
Attack Hobbies 1/144 Su-7UM
| KIT #: | 14411 |
| PRICE: | Approximately $6 from http://hobbyshop.cz |
| DECALS: | Five options |
| REVIEWER: | Scott Van Aken |
| NOTES: |
| HISTORY |
The Su-7, given the NATO reporting name 'Fitter-A,' was originally intended as a fighter to counter NATO's F-100 Super Sabre and F-101 Voodoo fighters, in service with the USAF. It was armed with two NR-30 30 mm cannon in the wing roots, with 70 rounds per gun. In keeping with the vogue for unguided rocket armament, early models had provision for an under-fuselage rocket pack, but this was quickly abandoned. The Su-7 entered service in 1958, but in 1959 it was decided, that a basic Soviet fighter would be MiG-21, and a production of Su-7 fighters was canceled after building less than 200 machines. As the Su-7B, the 'Fitter' soon found its metier as a ground-attack fighter-bomber, entering frontline service in 1961. In the Soviet service, its primary purpose became carrying of tactical nuclear weapons.
 The Su-7's combat capabilities were limited. With a tiny internal fuel volume of 2,940 l (647 imp gal), its operational radius, even with drop tanks, was poor - seldom more than about 300 km (200 miles), and it had almost no useful range at all with maximum ordnance. Take-off and landing speeds were also very high, requiring long runways. Su-7BKLs had provision for JATO, but this only made logistics even more complicated, so it was rarely used. An additional problem with early models was that the afterburner took six to seven seconds to light, a handicap in combat.
In its favor, the 'Fitter' was very easy to fly, with docile handling characteristics. Its controls were notoriously heavy, but it was forgiving and predictable. The thirsty engine provided exceptional rate of climb and low-level speed. Furthermore, the entire aircraft was extraordinarily tough and robust, easy to service and cheap to operate (except in fuel consumption). Despite its limitations, it was popular with pilots. The Su-7 saw combat service in the Six Day War in 1967, the War of Attrition, and conflicts between India and Pakistan. Although used mostly in the ground attack role, an Indian Air Force Su-7 did shoot down a Pakistani Shenyang F-6 (Chinese copy of the MiG-19) in 1971.
The limitations of the Su-7, particularly in take-off distance, led the Soviets to pursue the swing-wing Su-17, but the Su-7 remained in service through the 1980s. It was exported in the thousands to some Soviet Bloc and Warsaw Pact nations as well as many other air forces. In addition to the USSR, users were: Afghanistan (about 120), Algeria, Czechoslovakia (about 60), Egypt, India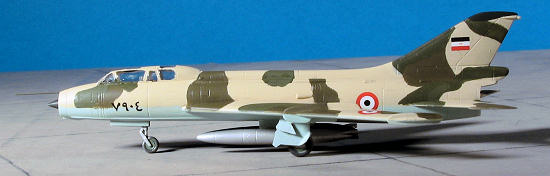 (about 160), Iraq, North Korea, Poland (46), South Yemen, and Syria, possibly Bangladesh.
A two-seat trainer was also built, the Su-7U (NATO 'Moujik'), and an export variant the Su-7UMK. The two-seater removes the leading fuselage tank, reducing fuel capacity by some 200 kg (440 lb), but is otherwise combat-capable. Visibility from the rear seat was poor so had to be augmented with a mirror system to allow the back seat instructor at least some modicum of forward visibility during landing.
| THE KIT |
Molded in a light grey plastic, the detailing is engraved and quite nicely done. Some might think it a bit overdone for this scale, but really, they couldn't do it much lighter and still have it present. Many parts that would normally be several pieces are one-piece in this scale, and that includes wings, tail planes and drop tanks among them. The nose wheel and gear leg are in one section and some of the gear doors are combined. There is detail in the wheel wells, which is nice. One could replace the gear doors with sheet brass for a more scale thickness. You could also build this gear up as most of the doors will need to be cut prior to use.
 I found some sink areas but all were on the back side of things so won't be seen. The kit includes side panels for the cockpits and instrument panels with some detail on them. No control sticks or rudder pedals so you'll have to make those. Frankly, you won't see much through the very thick but surprisingly clear transparency. Ordnance includes bombs and rocket pods as well as the aforementioned drop tanks. Really, the drop tanks are a given on the centerline of this fuel-sucking monster so you have a choice for the wing pylons. The instructions show you exactly where on the pylons to fit these, a nice touch.
Instructions are somewhat basic, but more than adequate. You have a parts guide, five construction steps and a painting/decal guide for five aircraft. Humbrol and generic color names are provided. Three options are unpainted metal for Poland, Czechoslovakia and India. Camouflage aircraft as are on the box art are for Russia and Egypt. The decals are very nicely done and I was quite pleased with how well they worked on the MiG-17 I built earlier. This sheet is superbly printed and I noticed no registration situations.
| CONSTRUCTION |
You'd think that with so few parts this would be a quick build. I've often found out that few parts does not always equate to a weekend project and frankly, a week is about as quick as I've ever built anything! This kit is an improvement over ear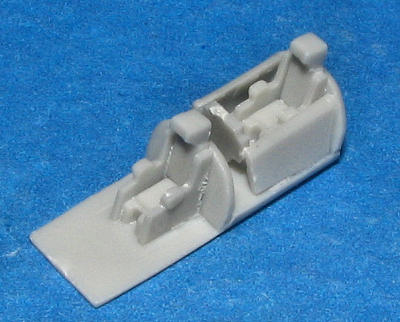 lier Attack Hobby kits I've seen/built. In this case, it is the inclusion of an interior. The way it is done is really quite well thought out. The rear bulkhead includes the seat center section and you just add the sides. A set of side walls is also part of the mix. I first painted the interior bits with that neat Russian interior blue that Testors offers as part of its enamel line. The seats were painted with a sort of nondescript green and the seat sides and top in a dark grey. I didn't try to match the Humbrol colors and just picked some from the mass of paint that festoons my work bench.
Generally, the fit of the interior is quite good. Fitting the side panels was not a problem and while there is some detail on them, you won't see it in the finished product thanks to the rather thick transparency. The instrument panels were not that great a fit and I had to do some trimming on them. The instructions intimate that these will fit on the forward sections of the side panels. They won't. I got mine to fit by installing them after the tub was fixed into one of the fuselage sides. They will fit under the small anti-glare shields.
 Speaking of fitting the tub, you need to be sure that it fits behind the lip that runs in the right fuselage half. Otherwise it will prevent the fuselage halves from closing. I recommend test fitting a LOT on this as I did. I cut little bits of weight and crammed as much as I could in the forward fuselage after I glued in the intake. Not doing so will result in a tail sitter. It doesn't take all that much, but it is needed.
With the interior in place and the intake glued in, I then glued in the exhaust compressor that was pre-painted with Burnt Metal from the Testors Metallizer line. This is actually too large and requires trimmed down to get the aft fuselage to fit. After doing that, I glued the fuselage halves together. Obviously I missed something as I couldn't get the sort of fit I'd have liked. I also had to fiddle with the intake to be sure it dried somewhat centered. No option but to apply the usual filler and the rescribe any missing panel lines.
While all that was drying, I masked the canopy. This wasn't as difficult as you'd think though the aft canopy frame lines are either missing or very faint and difficult to find.
 Then the wings were attached. The fit is about 50/50. The top line is perfect, but since the fuselage is curved and the wing attachment face is flat, you'll have a rather large seam to fill on the bottom. Be sure that the wing is straight as it has no anhedral. Gluing the wings on without care in getting it right will promote this droop so be very careful when attaching. Once the wings were on, I attached the inner wing pylons as I could find no photos with the outer pylons attached. There are faint marks on the wing to show where the edges of the pylons go. None of these were visible on the lower fuselage, probably because I sanded them off so I took a guess as to where they should fit.
The tail planes were an easy fit, though the attachment holes need to be enlarged. I then glued on the canopy using ordinary white glue and was ready for painting.
| COLORS & MARKINGS |
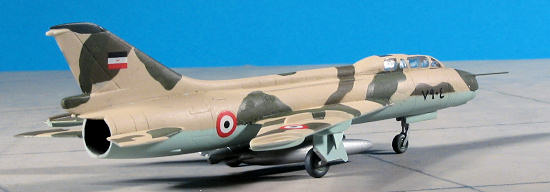
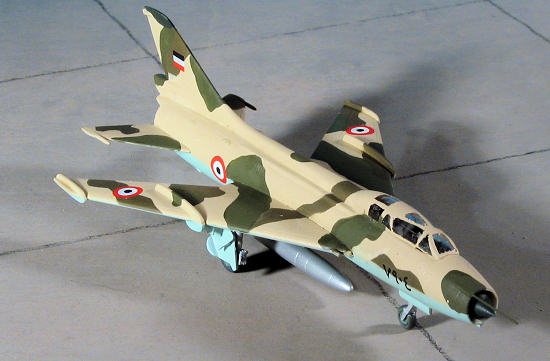
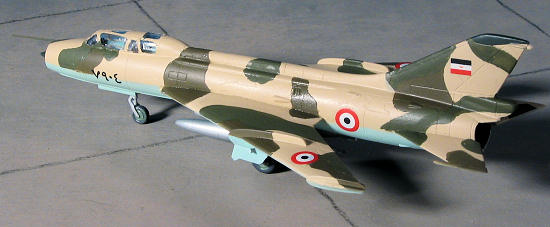
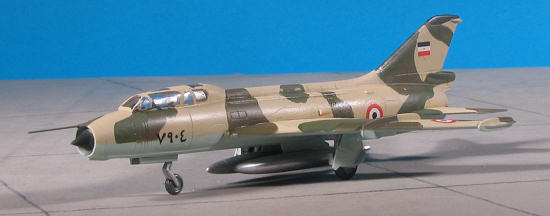
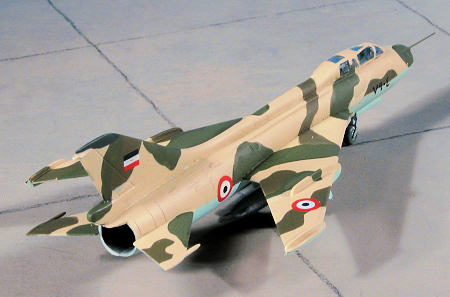
I decided to try a camouflage scheme on this one. It consists of a light blue underside with tan, green and brown upper colors. The lower light blue and upper tan were sprayed on. I then masked the upper surface for the brown. When I was done, I wasn't very happy with the outcome as it just didn't look that great. I then brush painted on the green and when it was dry, went back and brushed over the brown. I'm not sure I'd have been able to airbrush the upper colors and in this scale, I'm not sure it makes that much difference. I used a combination of Testors and Colourcoats and Humbrol ena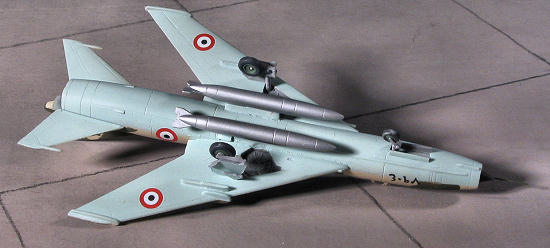 mels for all these shades. The drop tanks were painted using Floquil Old Silver enamel. The intake and fin tip were painted with a dark green.
It was then given a coat of clear acrylic gloss (Future in this case) and back to the bench I went.
While there, I painted the gear wells and inside of the gear doors in a dark grey, the gear struts in a medium grey and the wheels in a green. These were all Vallejo acrylics, which I like to use for brush painting details. I attached the landing gear struts and drilled out the hole for the pitot tube using a #80 (.0135") drill bit.
For decals, I chose the Egyptian one. The kit decals are really quite good, though they do need a setting solution to snuggle down all the way. I used Solvaset for this. I found that the whites were a bit transparent, allowing a slight differentiation in colors to show when applied over the camouflage.
| FINAL CONSTRUCTION |
 The next thing was to glue on the wheels. These needed to have the attachment holed drilled out to fit the gear stubs. The landing gear doors were then glued in place. The instructions are a touch vague on the main gear door attachment, but I think I got them about right. Most of the photos of Su-7UMs that I found show the drop tanks on the inner wing pylons. However, the gear doors are too thick and so I glued them to the centerline pylons. The wing pylons were left empty. I then cut a section of .0125 brass rod for the pitot and glued that in place. The model then got a coat of matte clear (Future with Gunze matte agent), and the masking taken off.
| CONCLUSIONS |
 I have to say that I like these kits. 1/144 scale has come a long way since the early days when shape accuracy was not considered to be paramount. You can see that in some kits like the Dragon 1/144 F-16 where the lower intake is a parody of the real plane. This and other Attack Hobby kits are well done and best of all, they are not that expensive. At under 4 inches in length, it won't take up much shelf space either. If 1/144 is your passion or you are just looking for something different, this is one that I can recommend to you.
| REFERENCES |
Fitter in Action
September 2006
#1433 in a series
My Thanks to http://hobbyshop.cz for the review samples. Get yours on-line at the link to the left.
If you would like your product reviewed fairly and fairly quickly, please contactthe editor or see other details in the