Eduard 1/72 MiG-21MF 'Interceptor'
| KIT #: | 70141 |
| PRICE: | $24.95 plus shipping |
| DECALS: | Five options |
| REVIEWER: | Scott Van Aken |
| NOTES: | Profipack |
| HISTORY |
The
Mikoyan-Gurevich MiG-21
(Russian:
Микоян и Гуревич МиГ-21;
NATO reporting name "Fishbed")
is a supersonic jet fighter aircraft, designed by the Mikoyan-Gurevich
Design Bureau in the Soviet Union. It was popularly nicknamed "balalaika",
from the aircraft's planform-view resemblance to the Russian stringed
musical instrument or ołówek
(English:
pencil) by Polish
pilots due to the shape of its fuselage. Early versions are considered
second-generation jet fighters, while later versions are considered to be
third-generation jet fighters. Some 50 countries over four continents have
flown the MiG-21, and it still serves many nations a half-century after its
maiden flight. The fighter made aviation records. At least by name, it is
the most-produced supersonic jet aircraft in aviation history (nearly 11,500
examples according to some sources) and the most-p roduced combat aircraft
since the Korean War. It also had the longest production run of a combat
aircraft (1959 to 1985 over all variants).
roduced combat aircraft
since the Korean War. It also had the longest production run of a combat
aircraft (1959 to 1985 over all variants).
Because of all the conflicts in which it has been involved, some wags say it is the most shot down supersonic aircraft in history. While your editor thinks that may be more true for the F-4 or F-105 due to the intense ground fire in Vietnam, it may be that the MiG-21 has been shot down in air to air combat more than any other supersonic jet.
The MiG-21MF is a third generation version of the aircraft. It is an export version of the MiG-21SM, with RP-22 radar and R13-300 turbojet. The choice of weapons loads was increased with the addition of the R-60 (NATO: AA-8 "Aphid") and later the R-60M IR-seeking AAM. These were also licence-built in India by HAL as the Type 88.
| THE KIT |
Having pretty well covered 1/48 with the MiG-21 family as well as a series in 1/144, Eduard finally decided to cover 1/72 scale. The wait has been worth it. Typical of Eduard, the molding is quite good with a number of parts not used in this boxing.
Having a separate upper spine with fin will allow pretty much all the sprues to be used with earlier and later versions, changing out very few other parts in the process. While this does make for more economical use of sprues, it adds to the 'fiddliness' of the kit, a trait rather common with Eduard releases. Note that this kit is identical to the previously previewed version save for the markings options. Though the kit's p.e. fret has a different number, the items on it are the same so I've used the previous illustration.
 Since this is a Profipack release, it comes
with a nice color photo etch set, much of what is used in the cockpit in terms
of instrument panels and you are provided a 'blank' when using the p.e.
Otherwise, you can use the raised detail plastic parts and put decals atop them. For those
who don't like p.e., this would be a good option as would waiting for the
weekend editions which won't have photo etch.
Since this is a Profipack release, it comes
with a nice color photo etch set, much of what is used in the cockpit in terms
of instrument panels and you are provided a 'blank' when using the p.e.
Otherwise, you can use the raised detail plastic parts and put decals atop them. For those
who don't like p.e., this would be a good option as would waiting for the
weekend editions which won't have photo etch.
There is no 'tub' for the cockpit with the side walls and bulkheads being added. The nose gear well is part of the cockpit assembly and needs the side walls attached. There is a diagram that shows all these bits in place so you can be sure you have it properly aligned. The main gear well is also four pieces and you build up that as well as the five piece exhaust before assembling the fuselage halves. When you do assemble the halves, you'll find that it comes with a separate ring inside the intake so you can paint and install the radome at the end of the construction process when the airframe is painted.
The lower wing is one piece and includes the lower fuselage. Before attaching the upper wing halves, you are to install the landing lights along with a number of other clear bits that are to be painted various colors. Masking these will not be all that easy and frankly, these are something I've not seen before. Then the wing and spine/fin are attached along with the windscreen and intake ring. The various small engine scoops and the tailplanes are then glued on.
Even though the flaps and ailerons are
separate, these were rarely deflected when the plane was on the ground so
positioning them up is the norm. You are provided with two flap options that are
the same save for one additional panel line on one set. Wheel
 hubs are separate
from the tire on both the nose and main tire. Gear is very nicely molded with
separate oleo scissors and brake lines.
hubs are separate
from the tire on both the nose and main tire. Gear is very nicely molded with
separate oleo scissors and brake lines.
The forward speed brakes are molded closed, but you can pose the aft one lowered. You are provided with a pair of rocket take off units if you wish to add them. It isn't until near the end of the build that Eduard has you assemble the seat and there are quite a few p.e. bits for the seat harness. The canopy can be posed open or closed and there are tabs for the open option that have to be cut off for the closed canopy. There are tiny little p.e. bits for the nose pitot probe.
Lots of things for under wings with two different styles of fuel tanks and a nice collection of missiles and rocket pods. I would have thought perhaps some iron bombs would have been nice for the fighter-bomber boxing, but that was not to be. All of the various pylons are butt joined.
Instructions are well done with Gunze and Mission Models paint references. Five options are provided including light grey versions from Poland, Czechoslovakia, and Romania. This grey needs to be mixed using the paints provided, but I'll bet there is a ready to go paint done by someone else. There is an East German aircraft in dark green and olive drab and a plane from Mali in tan, sand, dark green and bright green. The printing of the insignia is such that, unless you have a very strong light, you cannot tell that the center is green, so it is easy to mistake it for the Romanian insignia. Aside from that, the decals are well printed and provide a ton of stencils in both blue and black. The stencil sheet is huge and not shown, but also includes stencils for all the weapons. Those who include all of these will spend as much time on decals as building the kit. If you don't like any of the markings options, there are aftermarket sheets for this aircraft. Also in this boxing are masks for the canopy and various antennas.
| CONSTRUCTION |
Guess I shouldn't have been too surprised, but this kit seemed to build pretty much like the 1/48 Eduard MiG-21 I did a few years back. Biggest difference is that the parts are smaller. I decided to use the included colored p.e. but I still had to paint a lot of the interior. The recommended paint for this is the Mr. Color line and C391 is almost an exact match for pre-painted p.e. I did not use all of the teeny bits as I'm not that dedicated, but what is in there looks good. I used Cementine clear glue to attach these parts.
 I found the assembly of the fuselage to be typically
convoluted and it required quite a bit of fussing about and a little trimming to
get the cockpit to fit properly. No issues with the exhaust, but I did leave off
the outer part until after things had been painted. If you leave off the ventral
strake, you can still get this part to fit, but it is tight. In the front, there
is a ring that gets installed before the halves are closed that allows the
conical radome to be added after painting.
I found the assembly of the fuselage to be typically
convoluted and it required quite a bit of fussing about and a little trimming to
get the cockpit to fit properly. No issues with the exhaust, but I did leave off
the outer part until after things had been painted. If you leave off the ventral
strake, you can still get this part to fit, but it is tight. In the front, there
is a ring that gets installed before the halves are closed that allows the
conical radome to be added after painting.
The spine with the fin fit well and after opening holes in the lower wing for the pylons, I installed the main gear well assembly and attached the wing. Fit here was actually quite good. An oddity is that for the outer pylon, there is only a hole for the front pin so the aft one will need to be removed prior to attaching it. I also attached the tailplanes after dry fitting to be sure I could get the exhaust cone in place. There are a myriad of small intakes that need to be attached. These are in most cases, delineated by engraved marks on the fuselage. Not all are marked so a bit of guesswork will be needed. On the underside I installed the speedbrake housing and later attached the speedbrake. Like many parts, the actual attachment point of the actuating arm is vague at best. I ran into this issue with the main gear and inner doors.
The seat was assembled and then installed. After that the forward cockpit coaming was glued in place. Then the windscreen and the canopy were masked with the enclosed masks and attached. Fit is fair. Windscreen was fine, but the canopy just didn't fit as well as I would have liked. I filled the gear wells with Silly Putty, masked the landing lights, and set to do painting.
| COLORS & MARKINGS |
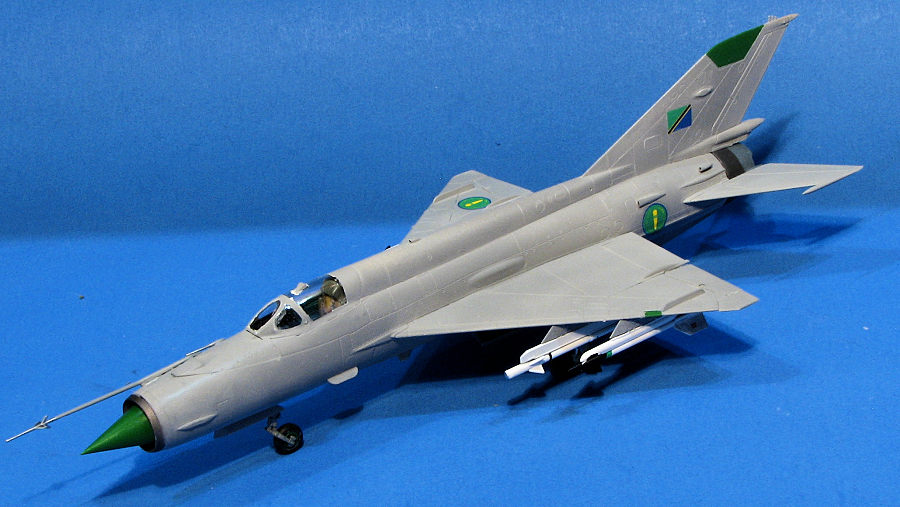
I first used some Replicolor primer to cover all the airframe and gear doors and other items as I was going to use acrylic paint and knew that without a good lacquer based primer, I'd have issues with any masking. I then painted the dielectric areas and wheel hubs with Mr.Color bright green. The dielectric areas were then masked and a bit more primer was applied. This one would be an overall grey and the shade recommended by several references was FS 36373. For this, I chose Mission Models as it was the only paint I could find in this shade without ordering it from overseas. This paint is a bit thick to spray directly from the bottle so it was thinned a little bit using 100 proof vodka, which is better than isopropyl as it doesn't cause the paint to dry too quickly.
Once most of the paint was on. The landing gear and main gear doors were attached. As mentioned earlier, the kit lacks solid, positive attachment points. This is puzzling as Eduard has been around long enough to where they should be able to provide those. Then the wheels were painted with the aforementioned bright green and assembled. They were then also attached. I'd forgotten to paint the inlet so before gluing on the nose gear doors, that area was masked off and painted.
 After all the
gear was attached along with the gear doors, the nose cone was pushed in place.
This was not easy as the fit is tight. Prior to that I put some weight in the
nose to prevent tail sitting. The last things were the missiles and rails. I had
glued the missiles to the rails first and found the attachment points were a lot
less than positive. In fact, even worse that just a flush butt join. Then these
were painted white and a few decals put on. Then I tried to fit these to the
pylons. What a PITA. The attachment points were dimples on the racks and pimples
on the rails. What was even worse is the rails were held slightly above the
pylons by little spacers on the rails. Why Eduard cannot seem to make parts easy
to attach is beyond me as it only adds to the frustration of building their
kits.
After all the
gear was attached along with the gear doors, the nose cone was pushed in place.
This was not easy as the fit is tight. Prior to that I put some weight in the
nose to prevent tail sitting. The last things were the missiles and rails. I had
glued the missiles to the rails first and found the attachment points were a lot
less than positive. In fact, even worse that just a flush butt join. Then these
were painted white and a few decals put on. Then I tried to fit these to the
pylons. What a PITA. The attachment points were dimples on the racks and pimples
on the rails. What was even worse is the rails were held slightly above the
pylons by little spacers on the rails. Why Eduard cannot seem to make parts easy
to attach is beyond me as it only adds to the frustration of building their
kits.
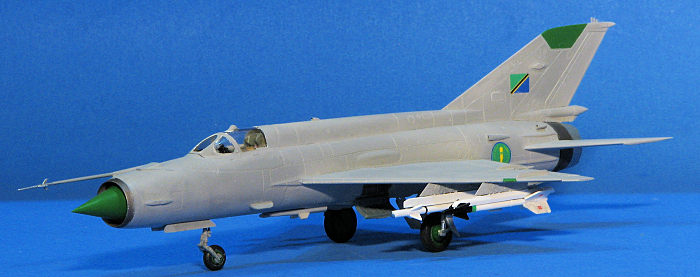
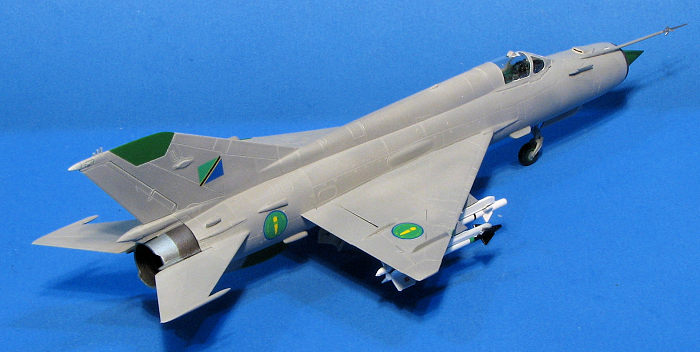
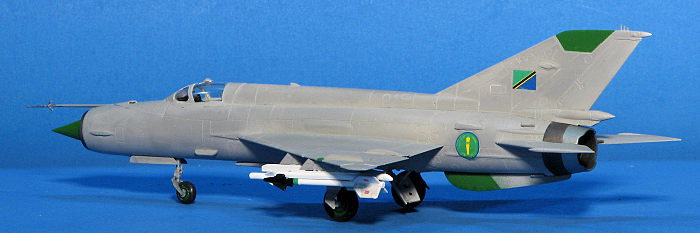
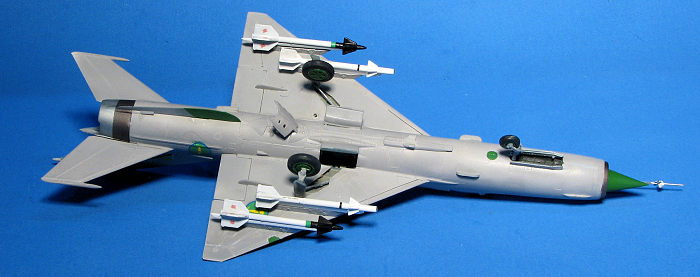
With those on, I clear coated the airframe and installed the few decals. I chose the Tanzanian option from a Berna decals sheet covering African MiGs. This was basically a tail flash and fuselage insignia. No aircraft number. The sheet provided two more insignia so I placed those on the wings. Could be right, could be wrong as I was unable to find any photos of these planes on the net to determine one way or another. I then put on a matte clear and removed the rest of the masking. One of the masks peeled off some of the grey when I removed it so had to touch that up with a brush. I'm not real jazzed on how well Mission Models paints holds up when masked, even with an undercoat so won't be using it for overall colors again. It brushes fine for things like tires and areas where it won't be stressed.
| CONCLUSIONS |
| REFERENCES |
http://en.wikipedia.org/wiki/MiG-21#Variants
19 June 2026
Copyright ModelingMadness.com. All rights reserved.
If you would like your product reviewed fairly and fairly quickly, please contact the editor or see other details in the Note to Contributors.