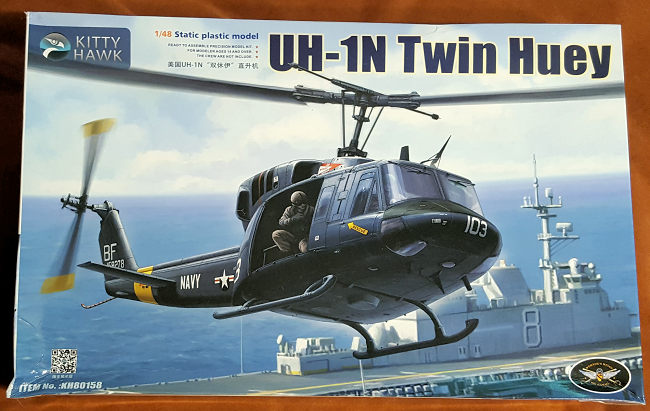
Kitty Hawk 1/48 UH-1N Twin Huey
| KIT #: | KH 80158 |
| PRICE: | $ |
| DECALS: | Six options |
| REVIEWER: | Scott Van Aken |
| NOTES: |
2019 Release |
| HISTORY |
Based on the stretched fuselage Bell 205, the Bell 212 was originally developed for the Canadian Forces (CF) under the designation CUH-1N Twin Huey. Later the CF adopted a new designation system and the aircraft was re-designated CH-135 Twin Huey. The CF approved the development of the aircraft on 1 May 1968 and purchased 50 aircraft, with deliveries commencing in May 1971.
The US military came very close to not procuring the Twin Huey. The purchase of the aircraft for US military use was opposed by the Chairman of the House Armed Services Committee at the time, L. Mendel Rivers. Rivers took this position because the aircraft powerplant, the Pratt & Whitney Canada PT6T was produced in Canada. The Liberal Canadian government of the time had not supported US involvement in Vietnam and had opposed US policies in southeast Asia, as well as accepting US draft dodgers. Rivers was also concerned that procurement of the engines would result in a trade deficit situation with Canada. Congress only approved the purchase when it was assured that a US source would be found for the PT6T/T400 engines. As a result, the United States military services ordered 294 Bell 212s under the designation UH-1N, with deliveries commencing in 1970.
Unlike in the Canadian Forces, in US service, the UH-1N retained the official name "Iroquois" from the single–engine UH-1 variants, although US service personnel refer to the aircraft as a "Huey" or "Twin Huey".
The Bell 412 is a further development of the Bell 212, the major difference being the composite four-blade main rotor. The UH-1N has also been developed into the upgraded, four-blade UH-1Y.
| THE KIT |
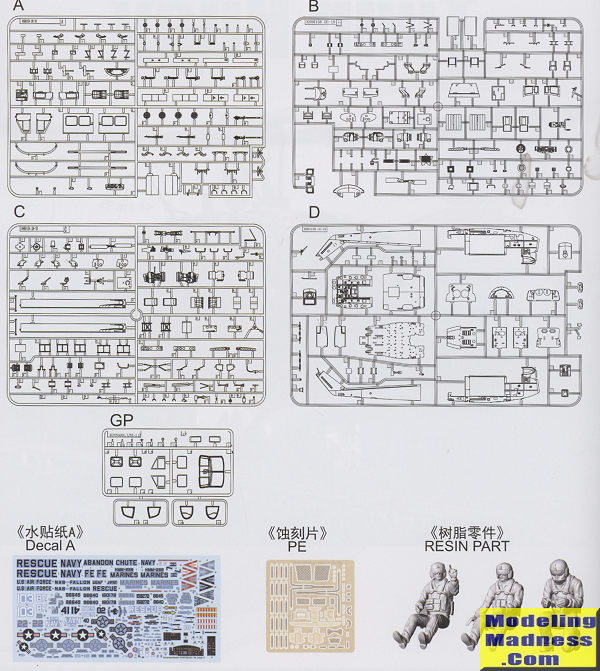 It
is nice that Kitty Hawk has produced a kit of this aircraft and I guess it was
to be expected thanks to their earlier UH-1Y. Kitty Hawk has also included all
the various bits required for a proper N model, and that includes all of the
latest (or in some cases last) upgrades provided for the aircraft. From what I
can tell, no sprues are interchangeable with the two kits, though obviously,
some of the parts are the same.
It
is nice that Kitty Hawk has produced a kit of this aircraft and I guess it was
to be expected thanks to their earlier UH-1Y. Kitty Hawk has also included all
the various bits required for a proper N model, and that includes all of the
latest (or in some cases last) upgrades provided for the aircraft. From what I
can tell, no sprues are interchangeable with the two kits, though obviously,
some of the parts are the same.
Instructions start you off
by building up the rotor head and blades. Like the Y model, these are well
detailed. The tail boom is next and include reinfor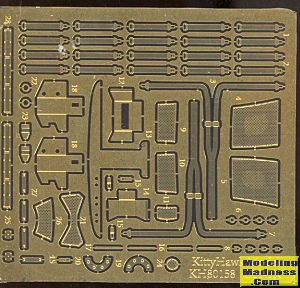 cements
and screens that are done in photo etch. In fact, the photo etch suite is well
thought out and appropriate. The cockpit is well appointed with all the controls
and the instrument panel/consoles have raised detail. Decals are also provided
for these. Photo etch is provided for the seat belt/harness and is shown draped
over the back of the seat. There are also p.e. belts for the jump seats. These
make up most of the space in the cabin. The instructions do not show any door
guns.
cements
and screens that are done in photo etch. In fact, the photo etch suite is well
thought out and appropriate. The cockpit is well appointed with all the controls
and the instrument panel/consoles have raised detail. Decals are also provided
for these. Photo etch is provided for the seat belt/harness and is shown draped
over the back of the seat. There are also p.e. belts for the jump seats. These
make up most of the space in the cabin. The instructions do not show any door
guns.
Though not shown open, there are separate engine panels so when you build up the engine assemblies, you can probably pose these to show engine detail, such as there is. You are provided a detailed hook well to install in the forward fuselage halves. Like the previous kit, the mostly complete cockpit/cabin assembly with engines is trapped between fuselage halves. Then the interior is completed and the roof sections are attached. For atop the rear of the engine housing, a disco lights IR jammer is provided.
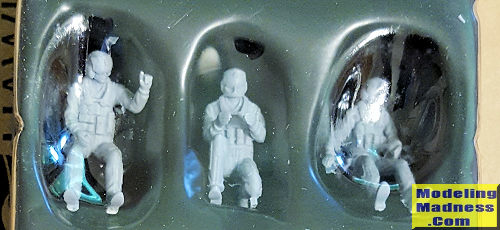 Before
attaching the doors, one installs the pilot and co-pilot if those are being
used. These and the third crew member (as shown in the cabin on the box art) are
superbly molded in resin. I'm not sure if you can pose the front doors open or
not as this is not shown. However, I don't see why not, though you'll have to
adjust the building sequence a bit to do that. Instructions also show the
installation of a FLIR pod in the nose and some sort of dispensers above the
door. In addition, you can attach rocket pods and machine guns on exterior
pylons.
Before
attaching the doors, one installs the pilot and co-pilot if those are being
used. These and the third crew member (as shown in the cabin on the box art) are
superbly molded in resin. I'm not sure if you can pose the front doors open or
not as this is not shown. However, I don't see why not, though you'll have to
adjust the building sequence a bit to do that. Instructions also show the
installation of a FLIR pod in the nose and some sort of dispensers above the
door. In addition, you can attach rocket pods and machine guns on exterior
pylons.
Kitty Hawk really needs to improve their instructions. The sequences are good and show where everything fits, however, in this case, it assumes you are going to be building the full-blown latest mod semi-attack ship. Yet several of the markings options are for a pretty standard UH-1N without all that offensive and defensive stuff tacked on. The parts to do these more bare aircraft are in the kit sprues, but not a peep on them in the build sequence. What this means is that the builder will need to be fairly knowledgeable on the type and pay attention to the painting and markings guide if doing, for instance, the SAR options.
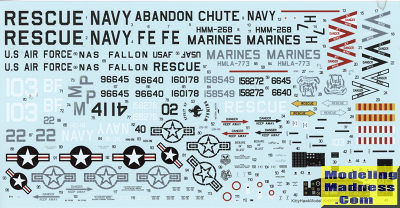 Markings
are for six aircraft and run a good range of camouflage options. One is a SAR
bird at NAS Fallon in the white and international orange scheme. Another is a
USAF plane with FE tail codes in the Euro I scheme. Another is a USMC
aircraft in the green, black, grey scheme with HMM-268. A standard white over
ADC grey USAF transport type is another option. A second Marine helo from near
the end of its use in two greys with HMLA-773 is option five. Finally, the box
art option in overall FS 16081 engine grey with BF tail codes from HC-16. As
usual, no unit or date information is directly supplied, the info provided here
was gleaned from what was printed on the aircraft in the camo scheme pages. The
decals are very nicely printed and as good as aftermarket. They super thin so
you need to take care when using them.
Markings
are for six aircraft and run a good range of camouflage options. One is a SAR
bird at NAS Fallon in the white and international orange scheme. Another is a
USAF plane with FE tail codes in the Euro I scheme. Another is a USMC
aircraft in the green, black, grey scheme with HMM-268. A standard white over
ADC grey USAF transport type is another option. A second Marine helo from near
the end of its use in two greys with HMLA-773 is option five. Finally, the box
art option in overall FS 16081 engine grey with BF tail codes from HC-16. As
usual, no unit or date information is directly supplied, the info provided here
was gleaned from what was printed on the aircraft in the camo scheme pages. The
decals are very nicely printed and as good as aftermarket. They super thin so
you need to take care when using them.
| CONCLUSIONS |
Based on my experience building their UH-Y, this one should be fairly trouble-free. It is a kit that takes patience and care when building, thanks to all the small bits, the p.e. and the need to research the subjects prior to starting. However, I can assure you that any modeler who considers themselves to be of at least an intermediate skill level will have no real issues. The end result will be a beauty and well worth the effort
| REFERENCES |
https://en.wikipedia.org/wiki/Bell_UH-1N_Twin_Huey
If you would like your product reviewed fairly and fairly quickly, please contact the editor or see other details in the Note to Contributors.
Back to the Main Page Back to the Review Index Page Back to the Previews Index Page