Hasegawa 1/72 F-4C/D Phantom II
| KIT #: | 04301 (Kx1) |
| PRICE: | 2200 yen in 1996 |
| DECALS: | Six options |
| REVIEWER: | Scott Van Aken |
| NOTES: | 1996 release |

| HISTORY |
The Navy's F-4 Phantom II was such a world beater when it was developed, that the USAF knew it had to have some of those as well. It was a perfect replacement for the F-105 and so they asked McDonnell to make Air Force versions. In the meantime, to get ready, they borrowed 36 F-4Bs so they could get crews up to speed on the plane.
The Air Force F-4C differed by having wider low pressure tires and some USAF avionics, but it was pretty much a B model in most respects. The later F-4D added improved engines and some more USAF mission systems that the Navy did not need, such as the ability to use Falcon missiles. It is with the F-4C and later F-4D that the Air Force took to Vietnam. It is with these planes that they and the Navy realized that an all missile armament wasn't exactly the best way to go and the AF learned that the Falcon sucked as a dog fight missile.
Even after being replaced by the gun-toting F-4E, the C and D models went on for years in the Reserves and ANG as it was still a quality interceptor that could also move mud if it had to. All C and D models were out of the USAF inventory by the early 1990s with the E/G following not that far behind.
| THE KIT |
 This may well be Hasegawa's
first 'special' boxing of their F-4 kits. The kit states C/D on the box and when
you open it, you get two sets of instructions and two sets of decals, one each
for the F-4C and F-4D. There is only one kit.
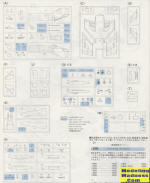
I am showing the C parts layout guide but, aside from what is indicated as 'not used', the sprues are identical. Typical of the time with Hasegawa, no weapons are included so you will have to get those either from a weapons set or your spares.
The cockpit is fairly well done for 1/72 of the time and uses decals for instrument panels and side consoles. The seats are the correct shape, but devoid of detail. Note that throughout the build you will need to either remove some bits and drill holes so it is a good idea to read through the variant you wish to do first.
In order to accommodate all the different variations, the nose/cockpit section is separate from the rest of the fuselage. The completed interior fits atop the roof of the nose gear well and then one closes up the nose halves. No weight is required for F-4 kits as the wheelbase is quite long. The rear fuselage halves are joined and one attaches the proper fit cap of those provided. Intakes are fairly shallow with no trunking. On most F-4 builds, this is the area that needs the most careful construction to avoid filler.
After opening lower wing holes, the upper wings and the outer wings are assembled. These are then glued in place. You can leave off the burner cans until after painting if you wish. You only get one canopy and that is the one that is in four sections. It is supposed to be built open, but if you are really careful you can do a closed version without it looking horrible.
 Landing gear is nicely done
for the sale. For things under wings you have a set of inner pylons that hold
Sidewinder rails. There are also three fuel tanks. You need to check photo
references in regards to the centerline tank as later planes will have the F-15
style. F-4s rarely carried all three tanks so again, check references before
opening those wing holes.
Instructions are standard
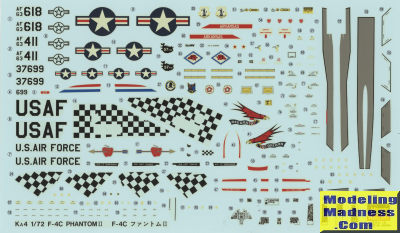
Hasegawa fare with Gunze paint references. For F-4C markings you have three nice
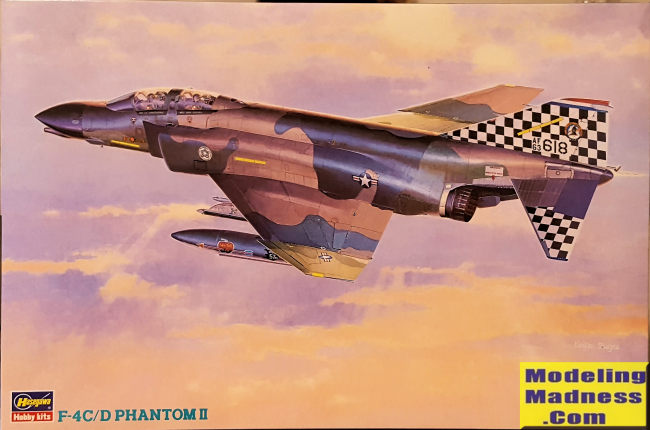
choices. One is the box art plane from the 57 FIS in its bicentennial scheme. It
 is in standard SEA camouflage. You also have a 123 FIS, Oregon ANG plane in
overall ADC Grey. Finally a 188 TFS, Arkansas ANG plane in the Euro I
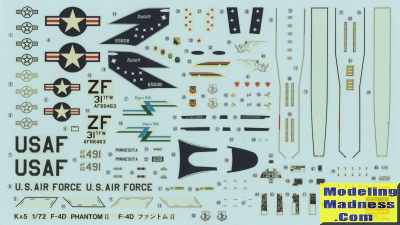
camouflage. For the F-4D a 307 TFS MiG killer with six kill markings. This is in
Euro I. then a 179 FIS, Minnesota ANG plane in overall ADC grey and finally, a
136 FIS, New York ANG plane in Hill Grey II. The decals have been around for
nearly 25 years as of this writing, and while probably still usable, have
started to yellow. They are old school so are a bit thick. It would be wise to
have a back-up set of markings for the scheme you choose 'just in case'.
| CONCLUSIONS |
So there you have it. 1/72 F-4C/D kits were developed by ESCI, Monogram, Fujimi as well as Hasegawa. The Italeri/ESCI kit isn't bad, but fairly basic as things go. The Monogram kit is quite nice even with raised panel lines. Fujimi's F-4 series is also very nice, but ensure you don't get the first dozen boxings as the cockpit is not well done. The later boxings fixed the issues it had. The Hasegawa kit is a bit fiddly to build, but will produce a very nice model when you are done and for these variants, is still the best in this scale.
March 2020
Copyright ModelingMadness.com. All rights reserved.
If you would like your product reviewed fairly and fairly quickly, please contact the editor or see other details in the Note to Contributors.
Back to the Main Page Back to the Review Index Page Back to the Previews Index Page