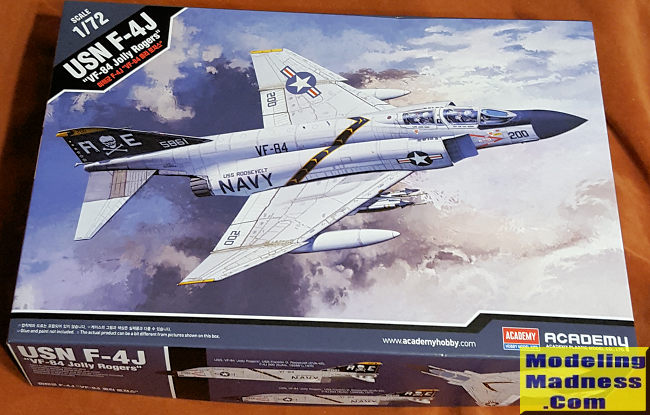
| KIT #: | 12529 |
| PRICE: | $25.99 after discounts and tax |
| DECALS: | Two options |
| REVIEWER: | Scott Van Aken |
| NOTES: | 2015 tooling. Jolly Rogers boxing |
| HISTORY |
The F-4 Phantom II is probably the most famous American fighter-bomber of the 1960s and 1970. First flown in 1958 with initial variants entering squadron service in the early 1960. The airframe proved to be so successful that it was also used by the USAF, who were the last to retire the type in the 1990s. Drone versions were modified and expended into the 2010s. Even today, the aircraft is flown by a dwindling number of military forces.
| THE KIT |
 It
is an interesting note that when a company is going to release an F-4 kit, they
start with the Navy version. I'm not sure why that is other than perhaps the
fact that Navy Phantoms of the 1960s and into the 1970s were quite colorful.
Academy followed suite by producing this kit in the markings of a unit that is
almost guaranteed to sell well, the Jolly Rogers. In this case, VF-84.
It
is an interesting note that when a company is going to release an F-4 kit, they
start with the Navy version. I'm not sure why that is other than perhaps the
fact that Navy Phantoms of the 1960s and into the 1970s were quite colorful.
Academy followed suite by producing this kit in the markings of a unit that is
almost guaranteed to sell well, the Jolly Rogers. In this case, VF-84.
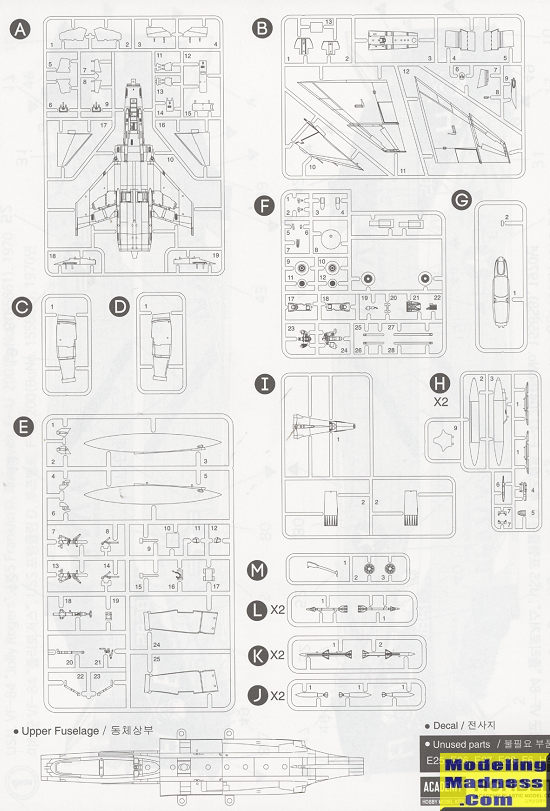
Rather oddly, the kit is molded in a variety of colors. Almost
as if Academy thinks this will be built without painting it. For instance, the
sprue with the lower rear fuselage, the exhaust parts, wheels, instrument pan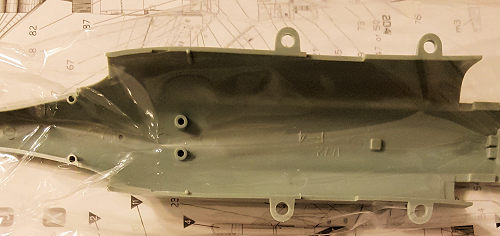 els,
and nose radome is in black. Upper wings and fuselage is in grey and lower
wings, gear parts, fuel tanks is in white. In this same vein, the attachment
points of the parts are quite large, leading a number of people to suggest that
these are snap kits. Well, that is probably not too far from the truth. I'm
currently building one of their F-18 kits and find that the joins of many of the
parts is quite positive and one could, in several cases, not bother with glue.
els,
and nose radome is in black. Upper wings and fuselage is in grey and lower
wings, gear parts, fuel tanks is in white. In this same vein, the attachment
points of the parts are quite large, leading a number of people to suggest that
these are snap kits. Well, that is probably not too far from the truth. I'm
currently building one of their F-18 kits and find that the joins of many of the
parts is quite positive and one could, in several cases, not bother with glue.
Academy does a commendable job of trying to duplicate a Navy rear seat but there is still a full length right side console, though at least there is no control stick. No decals are provided for the instrument panels. Once the various bits are installed into the upper fuselage piece (which isn't much) the cockpit and single piece exhaust are attached in the lower half then joined. Nose gear well is molded in the lower fuselage and one attaches the area behind the burner cans. Personally, I'd see if the exhaust pieces might be installed late in the build as painting the metal area behind them will be much easier without them in the way.
Both intakes have full trunking that ends in a compressor stage and you need to fill a hole or two when assembling these as this boxing is not for the later J. The instructions have you put the warning triangles on before attaching the intakes. OK, not something I'd do until after the kit is painted. Once the intakes are done they along with the upper wings, tailplanes and fin can be installed. There is room for weight prior to installing the nose cone, but you really don't need it and again, I'd wait to attach the nose until after painting the rest of the airframe.
Landing gear are nicely molded and the attachment points for the various doors is rather large. Speedbrakes are designed to be fully deployed so check your photos to see if this was the norm on the ground. Conversely, you can build this kit with gear and speedbrakes in the up position, though getting a stand will be your task. The kit comes with a one-piece canopy.
You get a full load of pylons and both wing and centerline
tanks. You also get TERs with bombs for the
 inner pylons
along with Sidewinders. Sort of like on the Monogram kit. Sparrows fit in the
fuselage troughs. Carrying all of this was not common and to model your plane
with a lighter load will require filling holes r cutting tabs as even the
missiles and bombs have large attachment points.
inner pylons
along with Sidewinders. Sort of like on the Monogram kit. Sparrows fit in the
fuselage troughs. Carrying all of this was not common and to model your plane
with a lighter load will require filling holes r cutting tabs as even the
missiles and bombs have large attachment points.
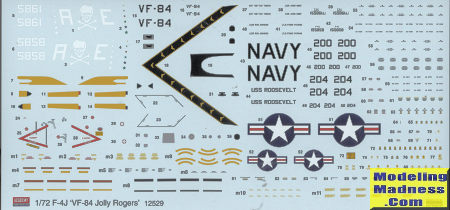
You are provided with two nearly identical markings options that differ only by serial number and nose number from the box art plane. A full batch of stencils is included and the instructions provide a placement guide for those. Decals are nicely done by Cartograf. The instructions themselves are well done and the painting guide provides multiple manufacturers for the various colors required.
| CONCLUSIONS |
I admit that when I first heard about this kit I was excited. That disappeared when I heard it referred to as a snap kit. But having experience with one of their other similar kits has made me change my mind about it. It is imperative that each of the parts be free from sprue attachment bits and have even the smallest flash removed in order to get a good fit. However, using glue as a lubricant will help with the fit and I can only see this as being a kit that will make a nice model. Note that this boxing is before the intake ESM antennas were attached, but the kit does include both the short ones for the later J and S along with the longer ones used on the F-4N, so if one wants to do a later J, just don't fill in the holes. Academy seems to have already released a number of other boxings, including a B/N so these may be worth checking out.
August 2018
Copyright ModelingMadness.com
Thanks to me for buying the preview kit.
If you would like your product reviewed fairly and fairly quickly, please contact the editor or see other details in the Note to Contributors.
Back to the Main Page Back to the Review Index Page Back to the Previews Index Page