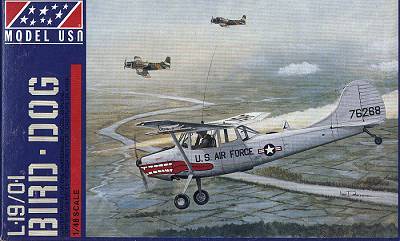
Model USA 1/48 O-1 Bird Dog
Kit Number: 0001
Price: $10.00 (retail)
Decals: Three Versions; O-1A for VNAF and JSDF, O-1E USAF 19 TASS
Date of Review: 31 July 1998
Review and Photo by: Scott Van Aken
Cessna's O-1 (formerly L-19) Bird Dog was the last fixed wing observation aircraft bought in quantity by the US Army. First used in combat during the Korean War with both the Army and Marines, the O-1 was finally retired from active service in the late 1960s when replaced by the O-2. A small, light aircraft in the same vein as the Piper L-4 Cub and Stinson L-5, it was easy to fly, easy to maintain, reliable and able to operate in almost any terrain. After being passed on to the National Guard and the Civil Air Patrol, many O-1s continue to fly on the civil register.
This is Model USA's one and only entry into the plastic kit market. When you open the box, you see a kit with good detail, a Scalemaster decal sheet (out of register, of course), and a lot of flash. Not a huge amount, but every piece has flash on it. This adds a considerable amount of time to the pre-build portion of this kit. What also adds to it is that there are a lot of very fine and thin parts, so a great deal of care needs to be taken during cleanup. As to the versions that can be kitted, this kit is a mixture of O-1A and O-1E. There are sufficient parts to do both versions, but to do an O-1A, you need to discount the interior, which is that of an O-1E; in fact it is a reworked TO-1D as there are blanks on the instrument panel where the instructor's extra instruments would have been installed! To do an in-country Vietnam-era O-1E, the pilot's seat needs to be armored, and this kit does not supply that armor. Not to say that all had armored seats, so check your references if doing one other than the 19 TASS version supplied.
On to construction. As I mentioned, there is a lot of flash on the kit parts. Nothing overwhelming, just a lot of work. Once most of the flash is removed, construction can begin. Every part must be dry fitted first as every part needed some sort of adjustment to fit. Since I like to build in subassemblies, I first glued the engine together. Then I went to work on the wings. The locating pins were useless and were all cut off. Also, one underwing section did not fit well and needed quite a bit of sanding to reduce its thickness. Almost all joins on this kit needed lots of putty so I'll just leave it at that.
Next was the interior. Once all the flash is removed from the seat parts, the seats were assembled and painted. The interior was painted darkish grey with olive padding and black electronics. Next the holes for the seats and foot pedals were drilled out and the foot pedals and seats installed. The engine was painted and attached to the firewall. On the other side was installed the instrument panel. After much carving, the door was attached to the fuselage and it was then time to install the transparencies; at least the side ones. Both transparencies and the fuselage needed trimming to get an acceptable fit. The transparencies are quite distorted so there is no need to go to any great detail on the interior :( Transparencies were also installed in the upper wing.
After the instrument panel is installed, the instructions would have you attach the floor to the firewall. Don't do it. It won't fit into the fuselage. At least mine wouldn't. Instead, I removed the tabs from the fuselage and first installed the firewall/engine combination. After it had thoroughly dried, the floor was fit (after some 'adjustment). Even then, the fit was poor. I cannot emphasize enough the need to dryfit all the parts on this kit. Then the fuselage halves were glued together in stages. When done, although the front and rear parts matched well, the cutouts for the exhaust were off by about 1/8". The nose cap was then added and the entire fuselage heavily puttied and sanded. After a second application, everything was relatively well smoothed out and the exhaust opening was carved out more to get rid of the mismatch in fuselage halves.
Next was attachment of the wing. I was not surprised to find that the fuselage was about 1/4" too narrow for the space provided in the wing. This was 'cured' by gluing one side and after a couple of days (to ensure a tight bond), the other side was glued, the section being held spread apart by various clamps and other bondage devices. While it worked, it is not as square as I would like, but squaring it would mean lowering one of the fuselage halves to where there would be no plastic above the side windows! Then the rear seat instrument panel was glued into place between the left side and the underside of the wing. If you have the kit, you'll know what I mean. Now that that was in place, it was time for the horizontal stabilizer as I at least wanted it and the wing level with each other. After more trimming and filler and sanding, it fit well. Same for the tail/rudder section.
While all that was drying, I cleaned up the front and rear canopies and braces and painted the braces black. They do fit, although not exactly with the same attachment points that the instructions would have you use. The aft canopy fits better than I expected and the front was a bit of a problem. It was just a bit too short, and the curvature where the leading edge of the wing fits is larger than the wing. This leaves a gap that cannot be easily filled (it's clear plastic) or adjusted out. You just will have to live with it or vacuform your own windscreen.
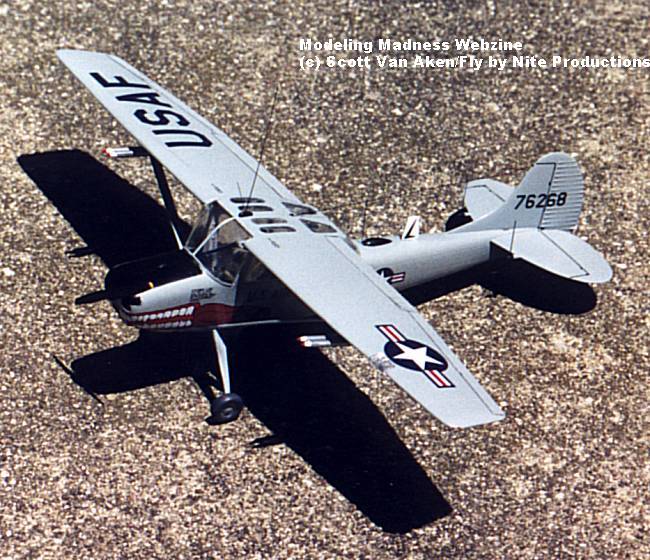
Next; installation of the landing gear. Normally an easy job except I lost one of mine and had to build another out of sheet plastic. The tail gear is quite fragile and rather than wait for it to break and then repair it, I took a piece of small, flat brass rod and reinforced the tail gear. It looks like a normal part of the leaf-spring type gear. The windows were masked, various antenna added, the underwing flap hinges and rocket racks added and the airframe painted an overall FS16473, ADC Grey. I used Testor's Model Master paint for this, but for some reason, the paint refused to dry as quickly as it usually does. In fact, it took over a week to dry enough to pick up!! While that was happening, I painted the rocket pods aluminum and the rockets white with red tips.
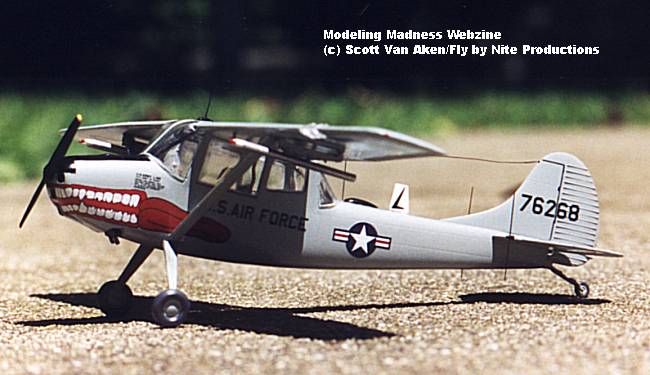
After painting, the kit was ready for decals. I really wanted to do the South Vietnamese O-1, but since the decals were off register, the insignia were unusable. It must have been the yellow mask as the US decals were good. They are typical Scalemaster and went on well. I was concerned about the large dog mouth decals, but Champ industrial strength setting solution made quick work of them. I did not use the zillion small stencils and I doubt anyone will miss them. After all had dried, I wiped off all the excess setting solution with a damp cloth and applied a coat of Future over the entire aircraft. I resprayed matte clear on the anti-glare panel and wheels. Final assembly consisted of the attaching the prop and underwing rockets, and press-fitting the oversize landing light in the wing leading edge. I then removed the masking from the windows and stretched some sprue for the radio antennas, these being painted black.
The end result is a passable O-1E that looks quite at home next to the Belgian Super Cub. After having built it, I can see why I took so long to start it. The lengthy cleanup and poor fitting parts; especially the transparencies, make this a kit for the more experienced builder.
Copyright ModelingMadness.com. All rights reserved. No reproduction in part or in whole without express permission from the editor.
Back to Reviews Page 2024