Matchbox 1/72 Do-28 Skyservant
| KIT #: | PK-107 |
| PRICE: | Currently around $15.00 SRP |
| DECALS: | Two options |
| REVIEWER: | Scott Van Aken |
| NOTES: | Ressurected from the 'dead kit' table |
| HISTORY |
The Dornier Do 28 Skyservant is a twin-engine STOL utility aircraft, manufactured by Dornier Flugzeugbau GmbH. It served with the Luftwaffe and Marineflieger and other air forces around the world in the communications and utility role.
A total of 121 Dornier
Do 28D-2s were built between 1971 and 1974 at
Oberpfaffenhofen for the
Bundeswehr
(German Federal Armed Forces) where they replaced ageing
Percival Pembrokes,
they s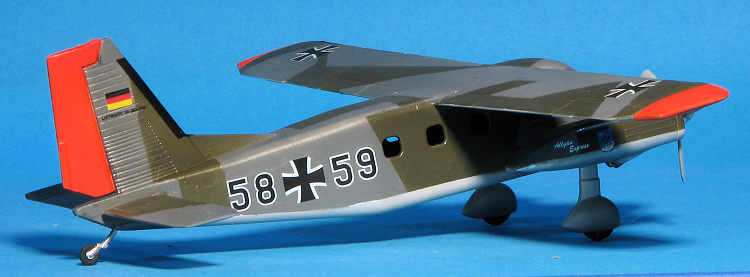 erved until the introduction of the
Dornier Do 228 in 1994, predominantly as a transportation and communications
aircraft. 20 aircraft were transferred to the
Marineflieger, 10 served from 1978 in the maritime
reconnaissance role, additional underwing fuel tanks
were fitted for extended endurance. The high noise levels and vibration in the
cabin led to the type's replacement by the significantly quieter
turboprop-powered
Do 228. During the 20 years in German military service,
only three aircraft were lost to accidents.
erved until the introduction of the
Dornier Do 228 in 1994, predominantly as a transportation and communications
aircraft. 20 aircraft were transferred to the
Marineflieger, 10 served from 1978 in the maritime
reconnaissance role, additional underwing fuel tanks
were fitted for extended endurance. The high noise levels and vibration in the
cabin led to the type's replacement by the significantly quieter
turboprop-powered
Do 228. During the 20 years in German military service,
only three aircraft were lost to accidents.
The Do 28D was flown in 30 countries around the world and is still in service today. More than 150 aircraft were built. In the German Federal Armed Forces jargon, the Skyservant was called the "farmer's eagle" and was regarded as a reliable "workhorse". Turkey received two specially equipped SIGINT aircraft with the code name of 'Anadolou' as well as the normal transport version.
| THE KIT |
Molded in three colors; orange, brown and white, the kit is pretty much
typical of Matchbox kits. It offers a good external representation with raised
panel lines, while offering a minimalist interior. In this case the interior has
seats for the pilot an copilot as well as six cabin seats. There is an
instrument p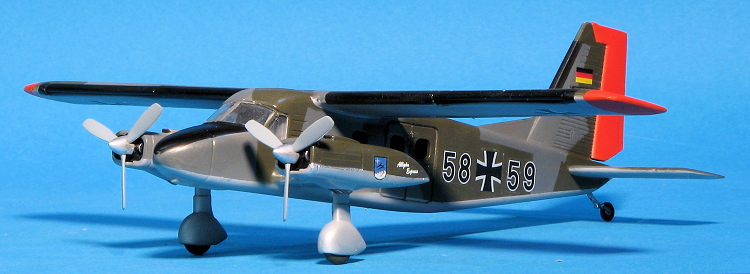 anel and two crew figures. Thankfully, the small cockpit windscreen
will prevent much from being seen on the inside. Same goes for the rather thick
cabin windows.
anel and two crew figures. Thankfully, the small cockpit windscreen
will prevent much from being seen on the inside. Same goes for the rather thick
cabin windows.
The rest of the kit is equally basic though it does seem the shape of the aircraft is pretty spot on.
Instructions are well done in Matchbox's booklet style. Colors are provided with old style Humbrol paints. Like all these older Matchbox kits, all the painting information is separate from the construction steps. Markings are for a Swedish Red Cross aircraft and a German aircraft with MFG 5. The decals are not in good shape, but are well printed. Unfortunately, since this was a bagged kit, there are no exterior painting drawings.
| CONSTRUCTION |
Despite being in a bag and being partially started, the construction of the kit was not as smooth as one would normally think. Sure, there were the usual fuselage seams and depressed areas around the alignment pins and sockets, but for this aircraft, the real work came when during the part where one attaches the engines.
Let me back up a bit. The previous owner had assembled the fuselage halves but did not install the windows. He had also glued the engine nacelles together. Here is where I took over.
I cemented on the engine fronts and blended them in as well as I could. I
also glued the wings, installing the slots during the process. Next, the pylons
for the engines we re cemented to the engines and smoothed out. Then, they were
glued to the fuselage and filler used there. This process was the most difficult
as there is not a lot of room. Since the engine side of the pylons includes part
of the lower engine nacelle, the gaps were a bit more than usual.
re cemented to the engines and smoothed out. Then, they were
glued to the fuselage and filler used there. This process was the most difficult
as there is not a lot of room. Since the engine side of the pylons includes part
of the lower engine nacelle, the gaps were a bit more than usual.
Once that was done, I test fit one of the cabin windows. It fit superbly and got me to thinking that perhaps I might want to wait until after the kit was painted to install these. Filling the interior with tissue would keep overspray from being an issue, and I could glue in the cockpit transparency prior to that. With my mind made up that this is how I would proceed, I assembled the spats, trapping the wheels in place. Then the wings were glue on, pretty well sealing my fate regarding the cabin windows. It was also a major mistake when it came to painting.
At the back, the rudder was glued on, followed by the tail planes. Why these folks decided on orange as one of the shades is beyond me, but since these kits were for kids, perhaps the bright colors were attractive. The tail wheel is particularly thin and I had serious doubts on how well it would hold up, but it was glued in place anyway. It was now time to think about some paint.
| COLORS & MARKINGS |
I wasn't ready to trust the kit decals on this one,
however, I did find some very nice ones by HaHen. These ended up being about 15
times more expensive that what I paid for the it. However, the sheet
has pretty much provides the option to do ANY Do-28 in German service. Now the
big choice was what
 scheme. In my mind, I had narrowed it down to those in the
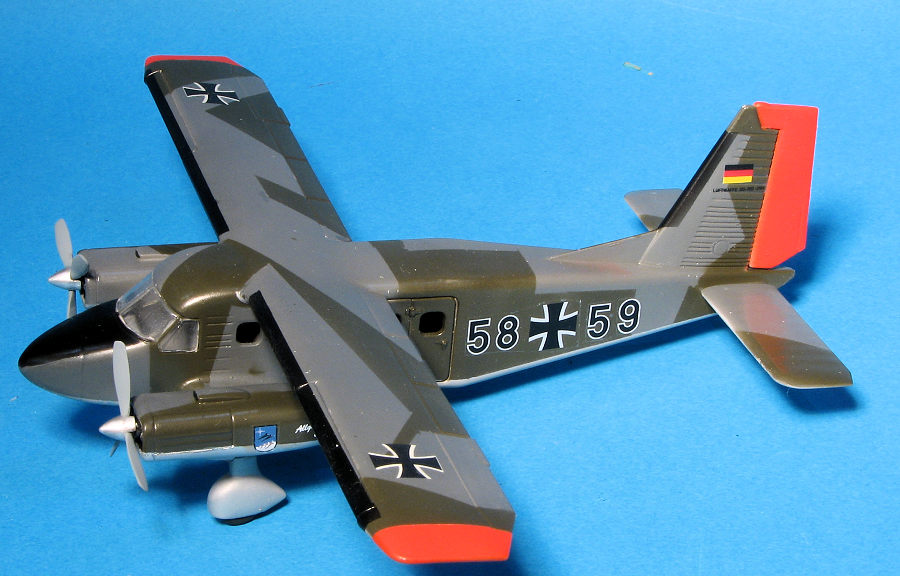
early splinter with the da-glo bits on the wing tips and rudder.
scheme. In my mind, I had narrowed it down to those in the
early splinter with the da-glo bits on the wing tips and rudder.
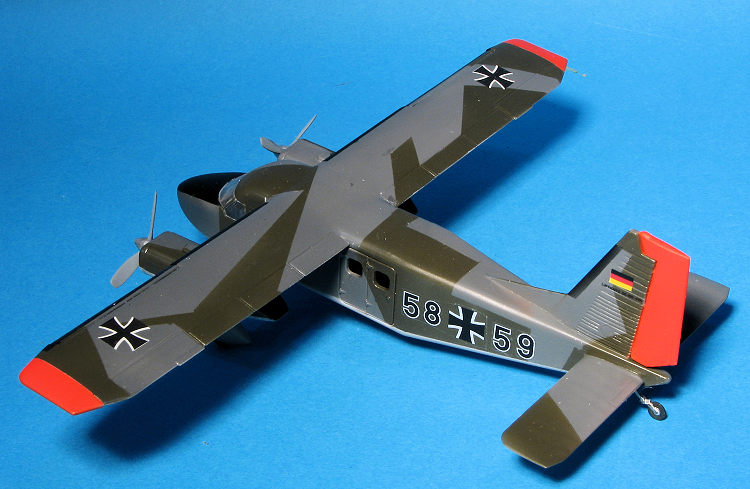
The underside was painted aluminum as I'd run out of RAL 7001. Upper sides were Basalt Grey and Olive Green from the Xtracolor enamel line. These dry glossy so one only has to wait for the paint to dry before applying markings.
Of course, this scheme requires a ton of masking, this job made even harder by the way the engines are attached. Next time I build this kit, I'll paint everything prior to attaching the wings. I had some issues with the paint pulling up with the tape. This may be due to the fact that I may have thinned the paint too much. Required quite a bit of back and forth to get things right. I also painted on the black de-icing boots on the fin and wing leading edges. The nose anti-glare panel was also painted even though a decal is provided in the HaHan sheet.
With everything done, I picked the JBG 34 hack. The HaHan
decals have a solid carrier so each marking has to be cut out separately. I
found that the white could stand to be a touch more opaque, but nothing major.
Interestingly, the name decals for the engine nacelles were on a separate sheet
and it looks like these were double printed as they are quite opaque. Aside from
the first two numbers of the code, the rest have to be cut separately. I used Microsol on them though I'm not sure that was really required. Regardless, it
worked just fine. For the wings, I used the ancient Matchbox insignia. I wasn't
sure they would work as HaHan only provides a limited number of free insignia.,
To my surprise, though they took a while to come free of the backing, they did
just fine and did not fall apart as I had originally feared.
looks like these were double printed as they are quite opaque. Aside from
the first two numbers of the code, the rest have to be cut separately. I used Microsol on them though I'm not sure that was really required. Regardless, it
worked just fine. For the wings, I used the ancient Matchbox insignia. I wasn't
sure they would work as HaHan only provides a limited number of free insignia.,
To my surprise, though they took a while to come free of the backing, they did
just fine and did not fall apart as I had originally feared.
With all the markings in place, I did a bit of touch-up painting and sprayed on a semi-matte clear coat. Then did some more painting on the wheels, glued in the tail wheel assembly (the wheel is impossibly skinny), drilled out the exhaust, installed the props and spinners, and finally removed the masking from the windscreen. I did not fill in the cabin windows as I was just about maxed out on my motivation regarding this one.
| CONCLUSIONS |
It really is not that bad a kit and had I not bought
one already started, I'm sure that things would have been a bit more smooth.
This is especially true of painting. This is one aircraft that simply must be
painted prior to attaching the wi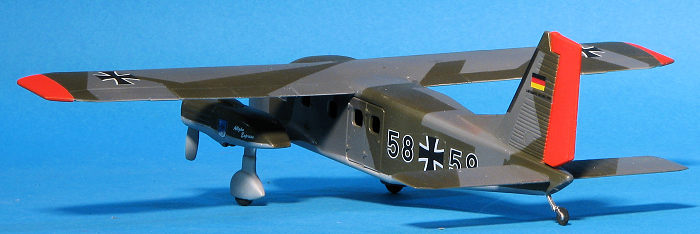 ngs,
particularly if you are using one of the camouflage schemes and have to do
masking (of which this kit requires a LOT). However, like pretty much everything
that one actually completes, the end result is pleasing enough and will look
quite nice on one's display shelves. You could even show it off to modeling
friends while regaling them with tales of mystery and adventure.
ngs,
particularly if you are using one of the camouflage schemes and have to do
masking (of which this kit requires a LOT). However, like pretty much everything
that one actually completes, the end result is pleasing enough and will look
quite nice on one's display shelves. You could even show it off to modeling
friends while regaling them with tales of mystery and adventure.
At one time, these were practically given away, but now are somewhat less available and really quite expensive considering what they are. I encourage those with interest to scour the vendors at your next show.
| REFERENCES |
http://en.wikipedia.org/wiki/Do-28
26 May 2017
Copyright ModelingMadness.com. All rights reserved.
If you would like your product reviewed fairly and fairly quickly, please contact the editor or see other details in the Note to Contributors.