| KIT #: | 01654 |
| PRICE: | $39.00 SRP |
| DECALS: | Two options |
| REVIEWER: | Scott Van Aken |
| NOTES: | New Mold kit |
| HISTORY |
The last supersonic single seat fighter developed by the British and put into unit service was the BAC/E.E. Lightning. Though not built in large numbers, the type has etched itself into the consciousness of aviation fans all throughout the UK. A maintenance nightmare according to those who worked on it, the aircraft was, nevertheless, quite capable and extremely fast. In fact, its speed was a major plus for an interceptor in the UK when the warning time was minimal. It was also quite fuel thirsty and was often seen with its somewhat unique ov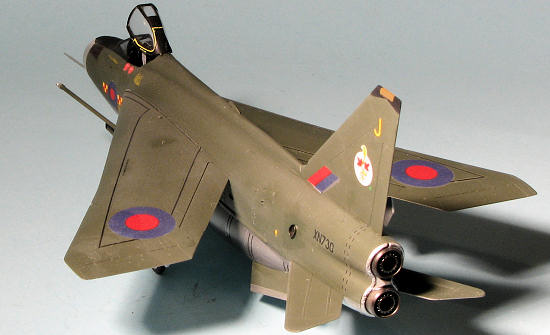 er-wing fuel tanks. This odd arrangement has been used on a few other aircraft for weapons, but to my knowledge, no other aircraft has routinely carried them in this fashion. Though the type was withdrawn from service in the late 1980s, several still operate in the UK doing fast taxy demonstrations and I believe at least one is airworthy in South Africa. The British aviation authorities will not allow private flying of the Lightning due to the ease at which the control surface hydraulic lines could easily be switched by accident and the lack of manual back-up. Then there is the problem with general maintenance, but the flight control deal that has kept them grounded.
The F.2A and F.6 are upgrades of the standard F.1A/F2 variant. The major differences are the enlarged belly tank that with the F.6 variant, includes the cannon armament, removing that from the nose where it was in earlier versions, and a larger, square-tipped fin. The F.2A still kept the upper nose guns and did not normally have them in the belly pack. Also added to this version were the ability to carry over-wing fuel tanks. These aircraft operated the Firestreak missiles, but could replace that option with additional guns in the forward tank section as was installed on the F.6, making it a four gun, no missile interceptor. The F.6 only had the guns in the forward tank and carried Red Top missiles. The F.2As basically served in RAF Germany with #19 and #92 squadrons.
| THE KIT |
To date, the Matchbox, and Hasegawa kits catered to the F.6 crowd in 1/72 scale along with the inevitable reboxing. Frog reboxed the Hasegawa kit for their line before going belly up in 1976. This is an all new tooling from Trumpeter I have to say that it looks like they did things right. Now Lightning advocates will undoubtedly be scrutinizing things for glitches (like perhaps the wrong external ducting length, but it looks fine to me.
 The kit has a convincing tub with a fair bang seat. I know that Pavla make replacements for these if you want greater detail. The intake assembly reminds me much of the Airfix 1/48 kit and that is good. It means that one can wait until the end of assembly to install the nose cone so that one is sure of the ability to install nose weight. None is indicated in the instructions, but I'd rather have the option to install it. Other similarities to the Airfix 1/48 kit are the inserts for the gun muzzles or blanking plates, separate flaps as well as separate speed brakes and canopy sections.
The kit offers both Firestreak and Redtop missiles (the Firestreaks being molded in clear).Trumpeter's instructions also show the correct optional bits for the F.2A and F.6 aside from the missiles. As on every small scale Lightning kit I've built, the nose wheel and leg are a single construct. The main gear appear good and sturdy, but the Lightning is a 'spindly geared' aircraft. I did find that most of the inside of the gear doors and the speed brakes had ejector pin marks that you'll have to remove if you want this to be a contest plane. There is one new sprue included with this kit and that is shown to the left. It replaces the small 'fin sprue' shown in the main parts layout, otherwise both kits are the same.
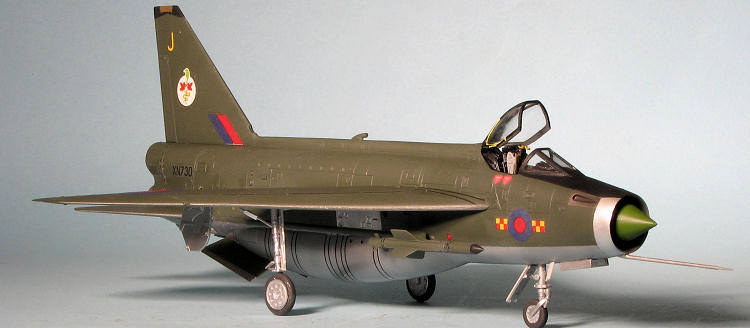
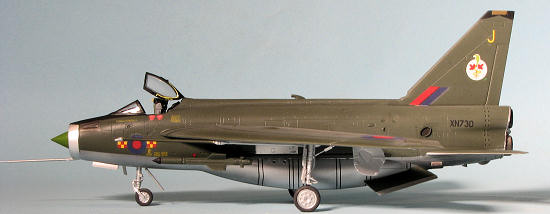
Instructions are quite well done, and the color guide provides a variety of paint references. There are markings for two aircraft supplied. The full color placement guide provides no unit or variant information at all. The box side does identify #19 Squadron for the Dark Green over aluminum F.2A and #23 Squadron for the unpainted F.6. There are tons of aftermarket decals for these aircraft, including some new ones from Model Alliance so you don't have to use the kit ones if you don't want to. Decals are well printed with complete data markings for one plane. The colors are actually more vibrant, but I didn't want to remove the protective covering from the front of them.
| CONSTRUCTION |
I have had this kit for a couple of years and was walking by the 'most likely' stash of kits awaiting to be built, locked my eyes on this one, pulled it out and started clipping parts from the sprues. There are times when rational has nothing to do with picking subjects to build and so it was with this kit. One thing for certain, I have built most Lightning kits around from 1/144 to 1/48, and did a slew of Airfix F.1s over 20 years ago. A version I have never built in any scale has been an F.2A and this kit does one so that is what will be done.
 In order to have this kit be useful for all the single seat versions, there are a lot of inserts. So that is where I started. The F.2A has guns on the upper nose and none in the lower position so I glued in those inserts. I also fitted the speed brakes closed as rarely are they open on the ground unless undergoing maintenance. However, the speed brakes are not designed to be modeled closed so I had to cut the panel arms down to fit. They also do not fit well into the openings, being a tad too small. Removing the sprue gates was also a bit time consuming. You see, Trumpeter molds these gates such that a large portion of them go into one side of the part. Usually the side less seen, but it is still not as builder friendly as those that are right on the edge. Well, not only do the speed brakes not fit particularly well, but neither do the nose inserts. They are not terrible, just a bit too small. For things like this I use superglue for filler and it usually requires several applications.
Meanwhile, I assembled the wings. I did not open the holes for the wing tanks as I think the Lightning looks silly carrying them. Once the wings were together and the seams filled. I did the first painting. In fact, I painted a lot of parts while still on the tree. For the first time, I tried Tru-Color's primer. It is a very dark grey and silky smooth, without the roughness we usually associate with primers.
Back at the cockpit, I painted it black, along with the instrument panel, control column and seat. I used the kit instrument panel decal and found it a bit oversized and with a silver background, which I found surprising. There are a couple of other bits to fit into the cockpit and those were added as well. The whole thing was drybrushed and the anti-glare panel glued on as indicated in the instructions.
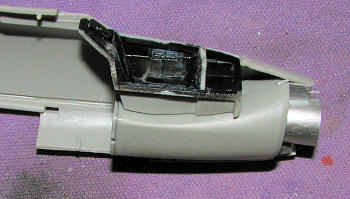 Returning to the fuselage, I assembled the intake/nose well halves after cutting some lead to put into the halves. There is scant room for weight in this kit and I felt I should fill as much as I could, just in case. I did not attach the nose radome as it needs to be painted something other than the silver indicated in the instructions. The intake center section is surrounded with a piece of trunking to which a compressor face is installed in the back. The intake was painted aluminum and the compressor with steel. You would have to shine a bright light down the intake to see the compressor face. This was then fit into the fuselage half and when dry, the cockpit section fit atop it. The cockpit pretty much snaps into place. A bit of space atop the intake had a section of weight attached.
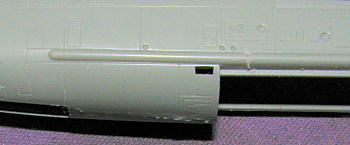 I then closed up the fuselage halves and glued the exhaust sections together. These latter bits were painted with Jet Exhaust from Alclad II. Checking my references, I found that the F.2A had short cable ducts. Trumpeter molds the longer ones used on the F.6, but makes no mention that these will ne
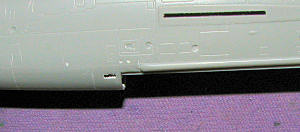 ed to be shortened. Using a few photos, I estimated where they should reach, marked them and then started sanding down the ducts. Took about ten minutes to do both sides.
With that done, the large fuel tank piece was glued in place. I had previously glued this piece together as I felt it would make for quicker work and it pretty well did so. Like most of the seams on this kit, I had to use filler to smooth things out. I also attached the fin and found that the fin is narrower than the spine on the upper fuselage. More filler. I taped on the wings and tail planes to see if I had enough weight, and it seems so, but I will still leave off the radome until the very end just in case I need a bit more weight.
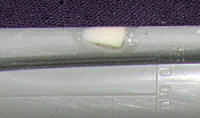 On the spine is an insert that contains a small pair of antennas. This is a small piece and having the sprue gate invade into the bottom of the piece meant carefully trying to sand that part down to get it to fit. Of course, during all this, it went flying off to who knows where and after the usual fruitless search, I decided to just fill the gap with super glue and a chunk of plastic. That was then sanded down and will be drilled out for wire antennas. Meanwhile, the upper scoop was attached and I glued the separate flaps into the wings. It is nice that the kit offers possible dropped flaps, but since one rarely, if ever, sees a Lightning parked with these dropped, they were glued in the neutral position.
Once this was done, the wings and the tailplanes were glued in place. This was followed by the ventral strakes. I found these fit better if attached to the opposite sides than shown in the instructions. I then glued on and masked the windscreen followed by the canopy. At this stage, painting seemed like a good idea so I headed for the paint shop.
| COLORS & MARKINGS |
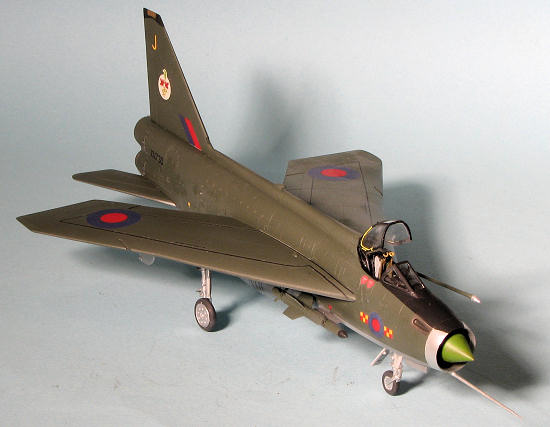
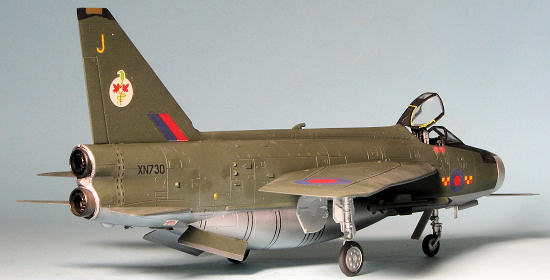 I began this evolution by spraying the airframe with Tru-color's dark grey primer. Then the upper surface was painted with Model Master RAF Dark Green. I also sprayed on the underside of the leading edges of the wings and tailplanes before realizing that the scheme I was doing did not have this feature. The decal sheet I want to use, Modeldecal # 23 from 1974, depicts the aircraft right after the upper dark green was first used. After a lot of masking, the main paint scheme was done. I did remember to paint a panel on the fuselage just under the wings metal as shown in the Modeldecal instructions, but missing from the Trumpeter painting guide. The last major painting job was to do the front intake ring in Alclad II Polished Aluminum, the nose gun panel with Alcald II Steel, and then to mask off and paint the nose anti-glare panel with black.
| FINAL CONSTRUCTION |
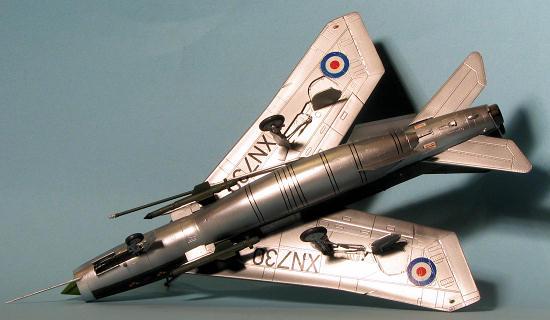 At this stage, I installed the landing gear and doors. The main gear legs have strut extensions that are flimsy to the max and are easily bent and if one does not take extreme care, they will break. Fit of all the gear is quite good. Once the doors were installed, I sprayed on some more aluminum to make sure that I covered all the areas where I sanded away the sprue attachment stubs.
It was after the gear and wheels were put on that I found out I put enough weight into the intake assembly to prevent tail sitting. The upper colors were then given a coat or two of Pledge (Future) in preparation for decals.
As mentioned, I wanted to use nearly 40 year old Modeldecals for this one. However, typical of these sheets, it expects you to get the common markings from the decal sheet. I used the Trumpeter wing walk and fuel tank markings. Most of these ended up being a bit too long and the forward wing walk strips did not curve enough to go where they should. They did, however, react quite well to Mr.Mark Softer. It was with some trepidation that I started using the old Modeldecal markings, but all went well.
With all the decals in place, I still had bits to add on. This included the exhaust assembly, a radio antenna, nose probe, missile rails and missiles as well as the small main gear doors. I should have attached these to the larger gear doors first as they were a pain to get in place. I found that the missile markings on the decal sheet were enough for one Firestreak and one Redtop. I guess i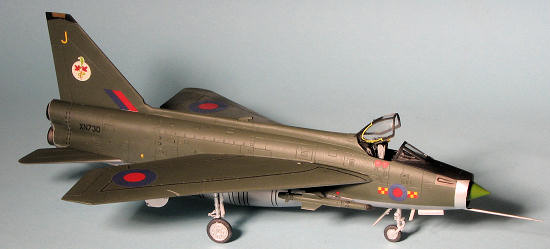 t never dawned on Trumpeter that the the plane might carry two of the same missiles. Anyway, the F.2A used the Firestreak. These could be painted either green or white and I picked green. The nose radome had a tiny amount of weight put inside as the plane would otherwise tail sit if leaned back fare enough. This radome could be a variety of shades from dirty tan to brownish to various shades of green. These were all shown in period photos from the Internet. I chose the green shade.
The aircraft was then given a matte coat over the green bits, the canopy unmasked and a seat installed. I decided to use a Pavla MB Mk.4B seat (#S72048) rather than the kit offering due to the greater detail of the Pavla seat. I did cut off the pull rings from the kit seat to install on the resin replacement.
| CONCLUSIONS |
Despite the couple of brain farts on the part of Trumpeter concerning the missile decals and the cable duct length, this is a very nice kit. General fit is good and the detail level is better than what has been available previously. It is not as cheap as some, but it does provide you an F.2A variant from the box, something that we have not had available to us before. I had not realized it, but I had already done its replacement, a 92 Squadron Fujimi Phantom several years ago, so this one will look fine sitting next to it on the shelf.

May 2012
Copyright ModelingMadness.com. All rights reserved. No reproduction in part or in whole without express permission from the editor.
If you would like your product reviewed fairly and fairly quickly, please contact the editor or see other details in the