| KIT #: | K48050 |
| PRICE: | 6560 yen at www.hlj.com (about $65.00 at today's exchange rate). 8200 yen SRP. |
| DECALS: | Five options |
| REVIEWER: | Scott Van Aken |
| NOTES: |
| HISTORY |
While the Mirage IIIC was being put into production, Dassault was also considering a multirole/strike variant of the aircraft, which eventually materialized as the Mirage IIIE. The first of three prototypes flew on 1 April 1961.
The Mirage IIIE differed from the IIIC interceptor most obviously in having a 30 cm (11.8 in) forward fuselage extension to increase the size of the avionics bay behind the cockpit. The stretch also helped increase fuel capacity, as the Mirage IIIC had marginal range and improvements were needed. The stretch was small and hard to notice, but the clue is that the bottom edge of the canopy on a Mirage IIIE ends directly above the top lip of the air intake, while on the IIIC it ends visibly back of the lip.
Many Mirage IIIE variants were also fitted with a Marconi
continuous-wave Doppler navigation radar radome on the bottom of the fuselage,
under the cockpit. However, while no IIICs had this feature, it was not
universal on all variants of the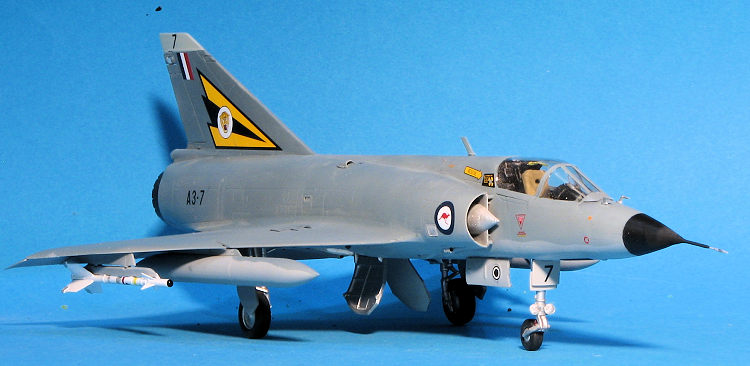 IIIE. A similar inconsistent variation in
Mirage fighter versions was the presence or absence of an HF antenna that was
fitted as a forward extension to the vertical tailplane. On some Mirages, the
leading edge of the tailplane was a straight line, while on those with the HF
antenna the leading edge had a sloping extension forward. The extension appears
to have been generally standard on production Mirage IIIAs and Mirage IIICs, but
only appeared in some of the export versions of the Mirage IIIE.
IIIE. A similar inconsistent variation in
Mirage fighter versions was the presence or absence of an HF antenna that was
fitted as a forward extension to the vertical tailplane. On some Mirages, the
leading edge of the tailplane was a straight line, while on those with the HF
antenna the leading edge had a sloping extension forward. The extension appears
to have been generally standard on production Mirage IIIAs and Mirage IIICs, but
only appeared in some of the export versions of the Mirage IIIE.
The IIIE featured Thomson-CSF Cyrano II dual mode air / ground radar; a radar warning receiver (RWR) system with the antennas mounted in the vertical tailplane; and an Atar 09C engine, with a petal-style variable exhaust.
The first production Mirage IIIE was delivered to the AdA in January 1964, and a total of 192 were eventually delivered to that service.
Total production of the Mirage IIIE, including exports, was substantially larger than that of the Mirage IIIC, including exports, totaling 523 aircraft. In the mid-1960s one Mirage IIIE was fitted with the improved SNECMA Atar 09K-6 turbojet for trials, and given the confusing designation of Mirage IIIC2.
| THE KIT |
Considering how popular the Mirage IIIE and all its subvariants are in the modeling world, it is quite surprising that we had yet to have a modern tool version of this in 1/48. Sure, the ESCI kit, which could also be found in Revell and Italeri boxes was a nice kit for its time, but it was quite lacking in the sort of detail modern modelers expect. Of course Kinetic has done the quite similar Kfir kit so I guess it was just a matter of time before they got around to the IIIE.
Now, we have a modern tool Mirage IIIE. This particular kit will make either the standard fighter-bomber or the reconnaissance version, specifically the Mirage IIIE/O/R/RD/EE/EA variations. I should mention that it does not include markings for the EA variant. All of these plane are without the extended fin that housed an HF radio antenna and is common with many other foreign buyers such as Brazil. One would think that this variant would be produced later on as the small extended fin section is included on the sprues as are a set of canards.
 If you have ever seen a Kinetic kit, then you are aware of how the molding is
done. It is nicely engraved with engraved rivet detail and is a bit 'soft' when
compared to companies like Hasegawa or Tamiya. None of that detracts from the
finished product. The kit does not offer any photo etch though it would be nice
to at least provide a seat harness.
If you have ever seen a Kinetic kit, then you are aware of how the molding is
done. It is nicely engraved with engraved rivet detail and is a bit 'soft' when
compared to companies like Hasegawa or Tamiya. None of that detracts from the
finished product. The kit does not offer any photo etch though it would be nice
to at least provide a seat harness.
So let us take a journey through the instruction sheet and see what is provided. First off is the cockpit. There are two seat types offered, Martin-Baker Mk.4 seats for most of the options and a Mk.10 for the Mirage IIIRD. On the Mk.4 you have two styles of face curtain handles so check your references. The seats are nicely done, but really would benefit from a resin replacement. There is a single tub with control stick, foot pedals and different instrument panels for the fighter and recce versions. There are also quite a few black boxes to put on the aft bulkhead. The detail on consoles and instrument panel are raised. There is no instrument decal.
 The wing has separate elevons and separate hinges. There are two sets of
hinges, one for the flaps down position. The lower fuselage incorporates the
lower wings and then attaches various plug-in bits along with the lower
fuel tank. The speed brakes are also separate, though these are almost
always closed. Speaking of closed, one can do the aircraft in flight with
all the gear doors shut.
The wing has separate elevons and separate hinges. There are two sets of
hinges, one for the flaps down position. The lower fuselage incorporates the
lower wings and then attaches various plug-in bits along with the lower
fuel tank. The speed brakes are also separate, though these are almost
always closed. Speaking of closed, one can do the aircraft in flight with
all the gear doors shut.| CONSTRUCTION |
 It took me a bit to get around to building this one, but I
finally did so. Decided to be totally conventional and follow the instructions
(at least for the most part) and as is often the case, this starts in the
cockpit. The first thing to decide is which seat to build as you are provided
with both a Mk.4 and Mk.10 seat. Apparently only the recce bird will be getting
the Mk. 10 so the other seat was built up. Aside from not having a harness, it
is pretty nice. I then began assembling the bits for the cockpit tub. The kit
offers a few optional black boxes, but does not tell you which option uses which
parts. Soap box time. This is one of the failings of Kinetic (and some others)
as I've run into a lot of this sort of thing with their kits and it is not at
all helpful.
It took me a bit to get around to building this one, but I
finally did so. Decided to be totally conventional and follow the instructions
(at least for the most part) and as is often the case, this starts in the
cockpit. The first thing to decide is which seat to build as you are provided
with both a Mk.4 and Mk.10 seat. Apparently only the recce bird will be getting
the Mk. 10 so the other seat was built up. Aside from not having a harness, it
is pretty nice. I then began assembling the bits for the cockpit tub. The kit
offers a few optional black boxes, but does not tell you which option uses which
parts. Soap box time. This is one of the failings of Kinetic (and some others)
as I've run into a lot of this sort of thing with their kits and it is not at
all helpful.
While building this up, I went ahead and painted a lot of the bits with aluminum that were going to be this shade such as the wheel well bits, intakes and wheel hubs, to name a few. I also assembled the intakes and installed them in their respective fuselage halves. Note that the instructions have the intake/fuselage pairs backward. You'll find out when you try to fit the intake as shown.
I then assembled the nose gear well, and when dry, it was attached to the cockpit section. I also attached the burner can to the exhaust. The inside of the burner can where it glues onto the exhaust had not only quite a bit of flash, but there was some plastic build up that had to be ground away before it would fit. I set it aside as that is something that can be glued in after all is painted.
Once the cockpit was done, except for the instrument panel, the seat was installed and the cockpit was glued into one fuselage half. Fit is quite good. There are channels in the fuselage sides and sockets for pins on the intake pieces to assure you have it in the right spot. It takes a bit of fiddling about. Once that was done, the instrument panel was installed. It would be a bit difficult to install it prior as the gun sight piece interferes. The other fuselage half was then installed. I glued it in stages to ensure the best fit. Once done, the first compressor stage piece was glued in place.
 Then the intakes. Fit here is good in some places and not
in others. I attached them to minimize any step on the fuselage sides. Then
the forward spine section. There are two and one is for the kit you are
building. The instructions neglect to tell you to open a hole for the
antenna that fits there. Again, a small amount of flash had to be removed on
all these parts. I do not understand why a new tool kit should have any at
all, actually. Flash generally means an incomplete mating of the mold halves
due to wear.
Then the intakes. Fit here is good in some places and not
in others. I attached them to minimize any step on the fuselage sides. Then
the forward spine section. There are two and one is for the kit you are
building. The instructions neglect to tell you to open a hole for the
antenna that fits there. Again, a small amount of flash had to be removed on
all these parts. I do not understand why a new tool kit should have any at
all, actually. Flash generally means an incomplete mating of the mold halves
due to wear.
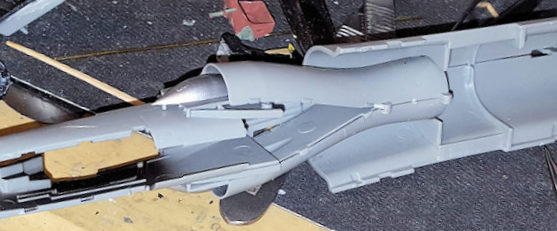
I then attached the wings. The fit is really atrocious. I would highly recommend gluing the upper wings to the fuselage and then attaching the lower. There is a considerable step at the wing root if you do not. Since I'd already followed the instructions and glued the upper and lower wing pieces, there was no choice other than multiple applications of filler and the eradication of any detail in that area. Note that the wings near the tip don't fit well either, the lower wing actually be a lot thicker near the tip than it needs to be. More filler. If I do another of these, I'll sand down the lower wing thickness near the tip to take care of that issue. The back part did not fit well either, but nothing an 80 grit sanding block cannot handle.
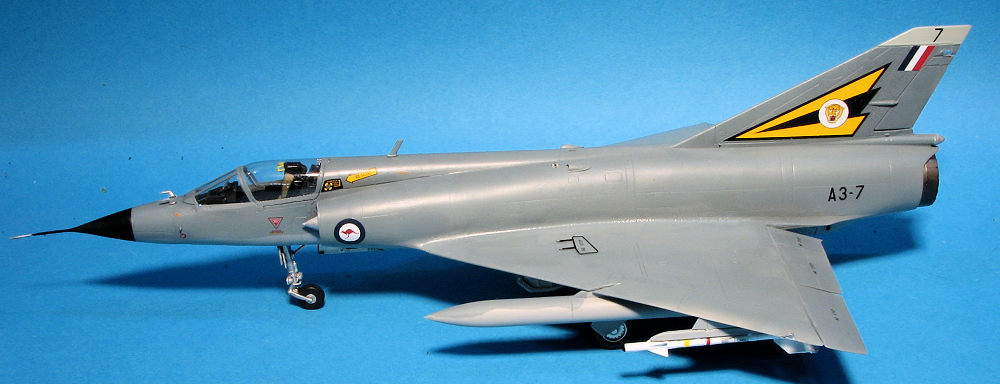
After getting thoroughly fed up with filler and poor fit, the kit languished on the shelf of doom for well over a year. Every once in a while I'd pull it down and do something small to it; install an insert or paint the tires, stuff like that, but it was getting pretty close to not being finished at all. Then I decided to simply get it done. It had been sitting so long that I forgot which version I was doing. It turns out I was building the RAAF version, which was a bit odd as that is how I did the ESCI kit a few years back.
 So I assembled the Sidewinders (note that the exhaust
piece is too big in diameter to properly fit), attached the flap actuator
fairings for a flaps lowered option, and glued on the flaps (which were a
very poor fit and have gaps I don't think were supposed to be there. I then
attached the Sidewinder rails and filled the centerline pylon holes. I then
glued the nose cone halves and put some weight inside. This was then
attached to the front and the fit is horrible. It actually touches the
forward fuselage in about half the places so required several fillings with
superglue. I also found other gaps in the forward fuselage that needed the
same treatment.
So I assembled the Sidewinders (note that the exhaust
piece is too big in diameter to properly fit), attached the flap actuator
fairings for a flaps lowered option, and glued on the flaps (which were a
very poor fit and have gaps I don't think were supposed to be there. I then
attached the Sidewinder rails and filled the centerline pylon holes. I then
glued the nose cone halves and put some weight inside. This was then
attached to the front and the fit is horrible. It actually touches the
forward fuselage in about half the places so required several fillings with
superglue. I also found other gaps in the forward fuselage that needed the
same treatment.
With that done, I attached the gun sight clear bits and then, after masking, attached the windscreen and canopy. The windscreen is, as expected a fairly poor fit and is actually a bit too wide besides not fitting flush with the fuselage other than in the very front. I had to use epoxy filler to take care of the gap. The canopy also does not fit well in the closed position, again, not fitting flush with the fuselage and leaving gaps. With that done, I filled the gear wells and headed to the paint shop.
| COLORS & MARKINGS |
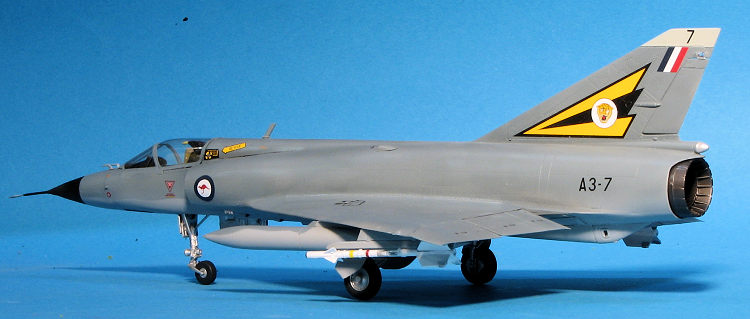
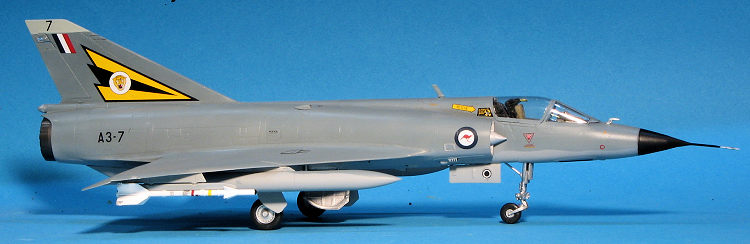
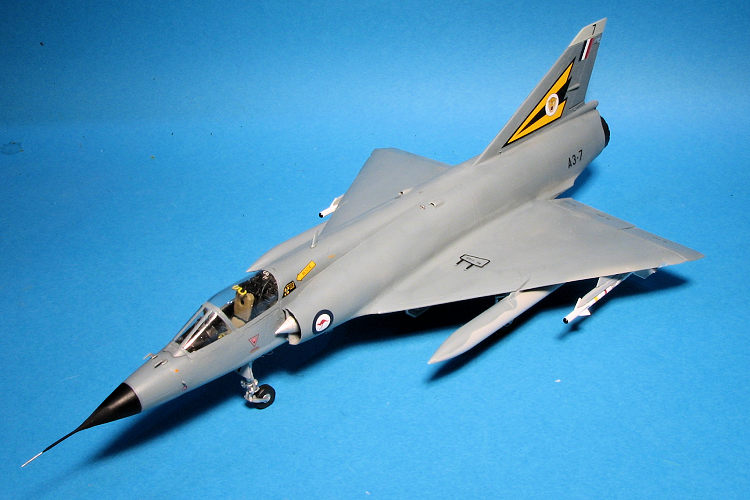
Since I decided on an Aussie plane, I decided to use the kit decals as they did a scheme not on the Caracal Models sheet I used for the previous Mirage IIIE. This plane is in the later greys scheme used during the end of their service life, but before they went to totally grey markings. The shades were FS 35237 uppers and FS 36475 undersides. Painting was fairly straight-forward and included painting the nose and lower nose antenna in matte black.
Once the main colors were on, I started building up the
landing gear. Fit of these is fairly loose so I ended up using a bit of
super glue around the attachment points to keep things stable. I found
fitting the main gear retraction struts to be particularly poor as the ends
that go to the main gear don't touch the mounting point and there is no
positive locator for the other end. The main gear axles were far smaller
than the holes in the main wheels so I needed super glue there as well to
keep them in place. The fit of the gear doors is not all that good. The
outer main gear door retraction struts have a pin on the end of them to
attach to the well, but no equivalent hole on the well. The location of the
other end on the door is not clearly shown in the instructions, but you can
sort of figure it out.
to
keep them in place. The fit of the gear doors is not all that good. The
outer main gear door retraction struts have a pin on the end of them to
attach to the well, but no equivalent hole on the well. The location of the
other end on the door is not clearly shown in the instructions, but you can
sort of figure it out.
With that done, the airframe was given a coat of clear acrylic gloss in preparation for decals. As mentioned, I chose the Australian option and that was a 2 OCU plane with the nice yellow and black tail marking. When the greys came into being the upper wing insignia went away so they are only on the fuselage and underside. For the most part, the kit decals worked well. They needed setting solution to reduce silvering and they don't like anything more than a really gentle curve. I could not get the missile band decals to work at all even after dunking them in Mr Mark Softer so had to Fantasy Printshop's stripes for those. I used most of the stencils as well; the grey plane does not have a ton of them compared to the bare metal planes.
That done, the final bits had to be attached. This included the gear doors I knocked off by handling, antenna on the spine, nose sensors and nose probe. The latter is VERY fragile and it was a miracle I didn't break it off though I bent it plenty. The wing tip lights were added as was the tail light. The tail item required the opening to be enlarged in order to fit. Landing lights were also glued on as were the wing fuel tanks and the burner can. The wing fuel tanks were glued in place followed by the Sidewinders. The holes in the rails did not match the pins on the missiles. I had to trim about half of the inner portions of each pin to get them to fit. The masking was removed, the small intakes on the underside had their 'entrance' painted with a sharpie and that was it.
| CONCLUSIONS |
My initial enthusiasm for this kit quickly evaporated as I got into the build. The general fit of the kit is not close to Tamiya quality and I found that the various inserts were generally a bit smaller than the place where they fit. Instructions are confusing in areas and some of the parts are mislabeled in the instruction sheets. All of this conspired to keep the kit on and off the shelf of doom for several years (the build was started in March of 2015). Eventually, I decided to just go ahead and finish it so I could move on to something else. It is nice that it is done and like many models we build, the end result belies the issues we had during the build process. It is really too bad it was such a chore as I really like the aircraft. I only wish it went together as well as the Hobby Boss Mirage IIIC.
| REFERENCES |
http://en.wikipedia.org/wiki/Mirage_III
17 May 2019
Copyright ModelingMadness.com. All rights reserved. Thanks to www.hlj.com
for the preview kit. Assuming they still have it, you can find this kit
at this link.
If you would like your product reviewed fairly and fairly quickly, please
contact
the editor or see other details in the
Note to
Contributors.