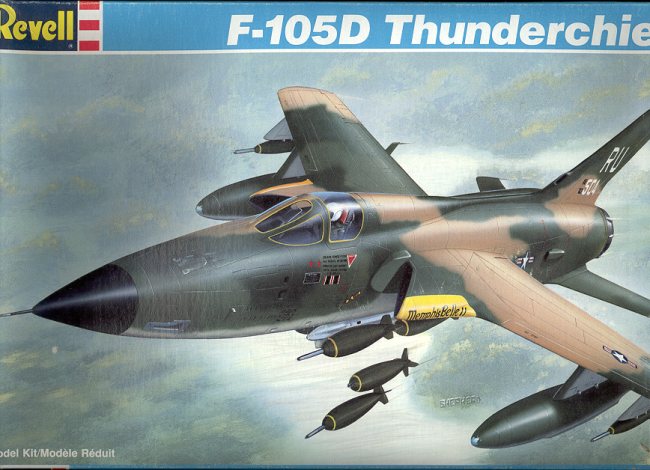
Revell 1/72 F-105D Thunderchief
|
KIT # |
4363 |
|
PRICE: |
$7.50 (back when it was issued in 1988) |
|
DECALS: |
One aircraft |
|
REVIEW : |
|
|
NOTES: |
Model backdated. |
|
HISTORY & KIT |
Please follow this link to read
about the kit and a short history of the type.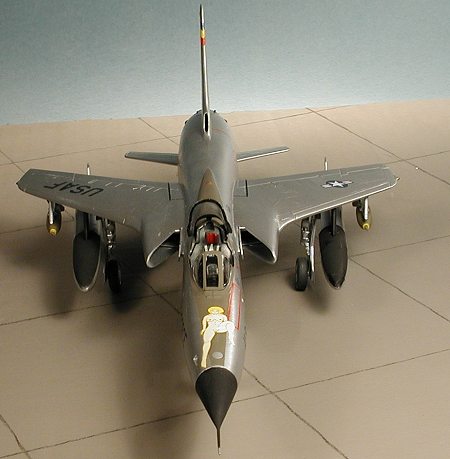
|
CONSTRUCTION |
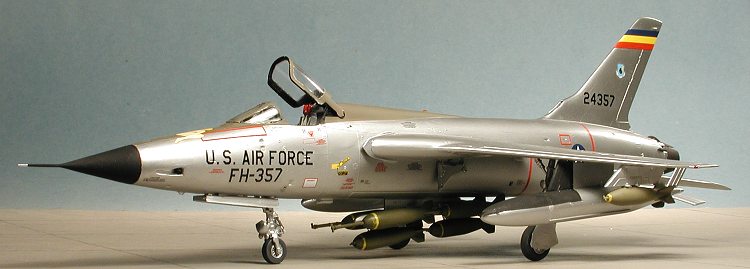
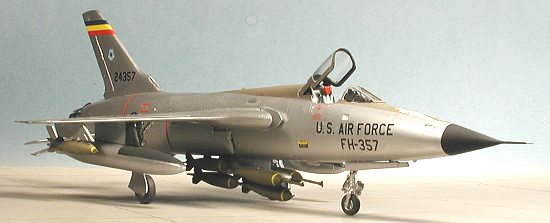
Believe it or not, I have never built this kit or the larger Monogram 1/48 Thud. Not sure why, as I have built several of the Hasegawa 1/72 versions, but there it is. The motivation for this kit was the Albatros decal sheet on the F-105. There was no way that I wasn't going to build one of the aircraft on that sheet. The big question was; which one?
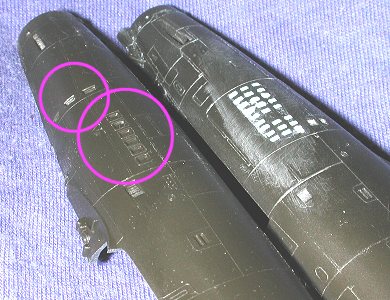
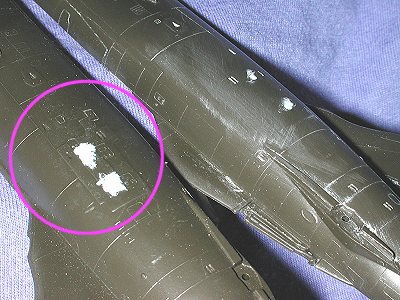
After much musing, I decided to go for the original nose art 'Pussy Galore'; one of the early Thuds in overall aluminum paint. This meant having to backdate the Revell kit as it portrays an aircraft after many modifications had been done to it in order to increase survivability in 'Nam. Fortunately, the Albatros sheet has a list of what needs to be done. The first thing is to remove some reinforcement plates from the airframe and to fill in some holes. Early thuds didn't have the rear engine cooling scoops nor the gun gas slots (which are grossly too large on this kit anyway). These were the first parts to be modified as you can see by the images below. The shot on the left shows the gun gas vents and the other the cooling scoops and reinforcement plates. One side has been started in these images.
 |
 |
While playing with the fuselage, the cockpit was painted dark gull grey with black instrument panel and side consoles. These were then dry brushed and a bit of color added to it so it wouldn't look so boring. I also built up the drop tanks. It was extremely rare to see the gas guzzling F-105 without them. Fit of these parts was not bad, but needed some filler and fussing, especially the tank fins.
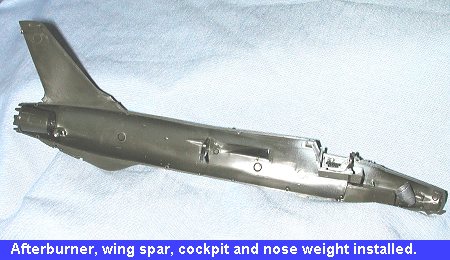 The next step was the installation
of the various bits in the fuselage prior to gluing the two halves together.
This meant the cockpit, gun, wing spar and afterburner can was glued in place. I
also added some nose weight as I wasn't sure if it would need it or not and
figured better safe than sorry. Once that was in and dry, the fuselage halves
were glued together and set aside.
The next step was the installation
of the various bits in the fuselage prior to gluing the two halves together.
This meant the cockpit, gun, wing spar and afterburner can was glued in place. I
also added some nose weight as I wasn't sure if it would need it or not and
figured better safe than sorry. Once that was in and dry, the fuselage halves
were glued together and set aside.
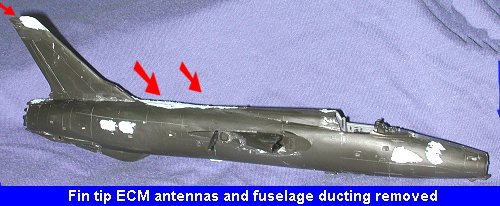
At this time the wings were also glued together and set aside until later. Back at the fuselage, there were a number of modifications still left to do. The biggie was to remove the upper spine ducting. This was accomplished by using a lot of sandpaper and final smoothing. The ECM antennas on the fin tip also need to be removed as these were later additions and not germane to the early Thud.
|
 |
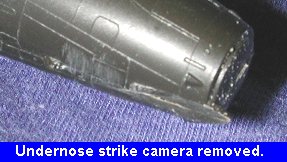 |
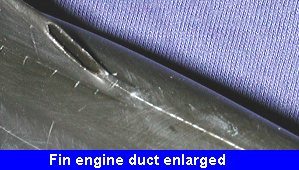
After those were done and smoothed out, the engine cooling intake at the base of the fin was enlarged (this area was partially blocked off when the two cooling scoops were added). Then the strike camera housing was cut off the nose section as it was a later modification. The nose cone was glued in place and this assembly set aside to dry. Later, some more filling and sanding was done to get things as smooth as possible.
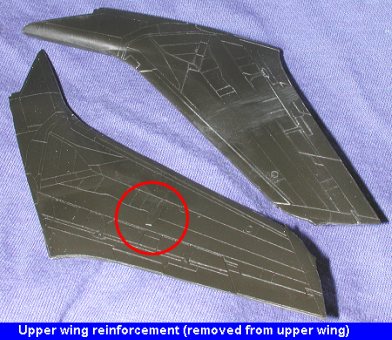
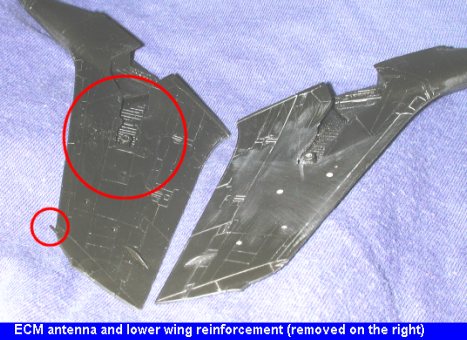
The wings also needed to have some work done on them. Combat stresses had causes some minor cracking, especially around the wheel wells so reinforcement plates were added on. These have to be sanded off for an early bird. You can see the rather large area for this reinforcement on the underside by what I had to remove. The kit also includes some ECM antennas that are not seen on the 105D. They are, however, used on the 105G Wild Weasel, and as you may know, Revell-Monogram do a 1/72 F-105G. Anyway, they need to be removed. In case you hadn't noticed, the OD plastic was a real pain to photograph!
 |
 |
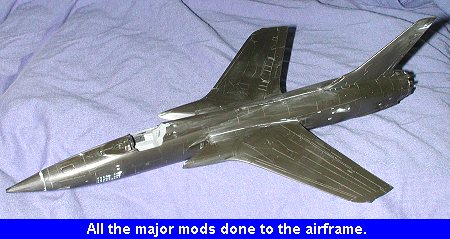 All of that should keep you quite busy for a while. I know that
it did me. Once pretty well along with rescribing and general cleanup, I started
to attach the wings. I put them on one at a time and found quite a gap at the
top. Once the glue had dried, this area had the usual filler applied to it. Then
it was time to go and make sure that all of the modifications were properly
filled and smoothed. I put the radome on at this time. Fit was fair but needed
filler. There are a number of intake/exhaust scoops on the nose of the kit. I
could not find any of these in any pictures of early 105s. If there, they were
not that prominent so they were sanded off. The usual back and forth to fill in
any of the smaller gaps resulted in a pretty clean airframe.
All of that should keep you quite busy for a while. I know that
it did me. Once pretty well along with rescribing and general cleanup, I started
to attach the wings. I put them on one at a time and found quite a gap at the
top. Once the glue had dried, this area had the usual filler applied to it. Then
it was time to go and make sure that all of the modifications were properly
filled and smoothed. I put the radome on at this time. Fit was fair but needed
filler. There are a number of intake/exhaust scoops on the nose of the kit. I
could not find any of these in any pictures of early 105s. If there, they were
not that prominent so they were sanded off. The usual back and forth to fill in
any of the smaller gaps resulted in a pretty clean airframe.
The next thing was to finish up the cockpit. This involved painting the seat and glare panel as well as gluing on the windscreen. The windscreen and canopy were then masked off. The windscreen was glued in place and then the canopy was then held down with white glue. The fit of the canopy section is terrible. It doesn't seem to want to fit in either the open or closed position. Not looking forward to the final construction steps am I. It was time to hit the paint shop for the first application of paint.
|
PAINTING |
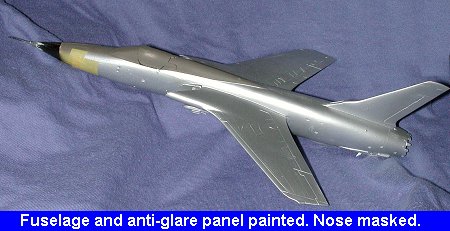 The best paint I
have found to look like painted aluminum is Testors Non-buffing Aluminum
Metallizer. In order to get it to stick well, the kit was first primered with
gloss white paint, after painting the canopy area interior green. Once
that was on, the Metallizer was applied. I had a bunch of trash in my Metallizer
that left spots all over the place. After a sanding down and reapplication of
gloss white in those places that needed it, the Metallizer was reshot. Not quite
so bad this time. It was obvious that this kit wouldn't be a contest jobber!
The best paint I
have found to look like painted aluminum is Testors Non-buffing Aluminum
Metallizer. In order to get it to stick well, the kit was first primered with
gloss white paint, after painting the canopy area interior green. Once
that was on, the Metallizer was applied. I had a bunch of trash in my Metallizer
that left spots all over the place. After a sanding down and reapplication of
gloss white in those places that needed it, the Metallizer was reshot. Not quite
so bad this time. It was obvious that this kit wouldn't be a contest jobber!
|
CONSTRUCTION CONTINUES |
 Now that I had a
painted aircraft, it was time to add on the landing gear. The main gear needed
quite a bit of mold line cleanup and once done was glued into the wheel wells.
Touchup painting of the gear wells was done at this time. There is a retraction
strut that is then glued in place. The fit of this strut is poor and the
attachment points are not well delineated at all. The nose gear is another deal
entirely. This needs the nose wheel trapped between the two forks. These forks
halves are separate and need glued in place. There is also a small radome for
the landing aids and a scissor for the nose wheel steering that need glued in at
this time. The radome had a LOT of flash and doesn't fit well. I also discovered
that the forks of the nose gear do not have long enough axles to properly hold
the nose wheel in place. Get out the glue! I also discovered that the fuel dump
tube had been glued on backwards so snapped it off and after cleanup, glued it
in properly.
Now that I had a
painted aircraft, it was time to add on the landing gear. The main gear needed
quite a bit of mold line cleanup and once done was glued into the wheel wells.
Touchup painting of the gear wells was done at this time. There is a retraction
strut that is then glued in place. The fit of this strut is poor and the
attachment points are not well delineated at all. The nose gear is another deal
entirely. This needs the nose wheel trapped between the two forks. These forks
halves are separate and need glued in place. There is also a small radome for
the landing aids and a scissor for the nose wheel steering that need glued in at
this time. The radome had a LOT of flash and doesn't fit well. I also discovered
that the forks of the nose gear do not have long enough axles to properly hold
the nose wheel in place. Get out the glue! I also discovered that the fuel dump
tube had been glued on backwards so snapped it off and after cleanup, glued it
in properly.
|
DECALS |
 With the kit on its
wheels, it was time for the decals. I found the decals themselves to be very
good indeed, however, I found the instruction sheet to be a bit lacking.
Specifically on placement of the data decals. These were shown on a drawing only
as a number and not as the decal themselves. I also found a number of decals on
the sheet that were not mentioned at all on the instructions. Specifically the
red warning rectangles. There is also no underwing decal placement so I'm not
sure if the USAF decal is in the right place or not. In addition, it seemed to
me that the national insignia and USAF decal might be a bit undersized compared
to the drawings.
With the kit on its
wheels, it was time for the decals. I found the decals themselves to be very
good indeed, however, I found the instruction sheet to be a bit lacking.
Specifically on placement of the data decals. These were shown on a drawing only
as a number and not as the decal themselves. I also found a number of decals on
the sheet that were not mentioned at all on the instructions. Specifically the
red warning rectangles. There is also no underwing decal placement so I'm not
sure if the USAF decal is in the right place or not. In addition, it seemed to
me that the national insignia and USAF decal might be a bit undersized compared
to the drawings.
Using the instructions from an old
Microscale 105 sheet, I got many of the data decals on, but I'm not sure if they
are really in the right place. There were also warning decals shown on the
Microscale sheet that Albatros didn't include. Albatros really needs to improve
that aspect of the instruction sheet. The decals worked very well with a bit of
Solvaset and I am quite pleased with the result.
|
EVEN MORE CONSTRUCTION |
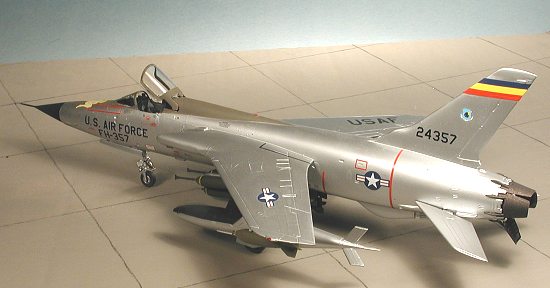
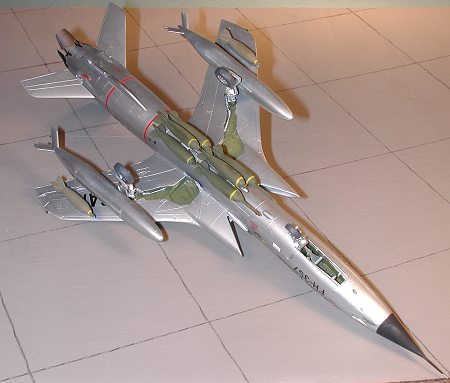
WIth the decals on and dry, it was time to finish up things. First the bombs, which had been painted OD, had the yellow nose rings shakily painted on. The two with fuse extenders were glued on the right and left side on the front of the MER. The others were glued on the other spots. For the wing racks (which were not glued on until AFTER the underwing decals were applied, I chose not to use the mk 82 slicks. I used two M117s from the Hasegawa weapons set. These are shaped a bit differently from the kit M117s. They were painted OD and had yellow nose rings painted on.
 Then the main wheels were glued in place. Gear
doors were next and fit quite well with no trauma. The doors were not painted
with primer on the inside and are silver or natural metal. If I screwed up,
someone will be sure to tell me! The drop tanks were then glued in place after
enlarging the wing holes to get them to fit (outer racks needed this too). You
need to pay attention that the racks hang vertically when the plane is on its
wheels. The wing has a slight anheadral that can throw you off.
Then the main wheels were glued in place. Gear
doors were next and fit quite well with no trauma. The doors were not painted
with primer on the inside and are silver or natural metal. If I screwed up,
someone will be sure to tell me! The drop tanks were then glued in place after
enlarging the wing holes to get them to fit (outer racks needed this too). You
need to pay attention that the racks hang vertically when the plane is on its
wheels. The wing has a slight anheadral that can throw you off.
The tail petals/speed brakes were then glued in place. I'm sure that they are a bit too dark for some people's tastes but they look fine to me. The tailplanes fit quite snugly so were not glued in place. With power off the plane, they tend to droop a bit at the back so you can position them as such. The outer wing bombs were glued in place after removing the pins from the outer racks and the nubbins from the bombs themselves. They are held on by superglue so are probably easily knocked off from rough handling. Be careful.
The final step was to remove the masking from the clear bits. The canopy itself had a lot of leakage due to the poor fit so I had to scrape a lot of Metallizer from the inside with a toothpick The inside of the canopy frame was painted flat black to help cover up some of the overspray and some touchup was needed on the interior too. After sanding down the little center piece on the back of the canopy, it was snapped into place in an open position and the kit was finished.
|
CONCLUSIONS |
What to say about it. For one thing, I am glad I'm finished with
it. This was one of those kits where nothing seemed to go as planned. This
happens every few kits to me and it probably isn't the fault of the kit but of
my bad planning or something. The areas rescribed are awful, the filler shrank
after the paint job leaving some depressions despite all efforts to prevent it,
the paint job itself isn't good and full of little lumps and bumps, and I wasn't
thrilled with the decal job I did. Because of all the glitches, it was hurried
to completion just to get it 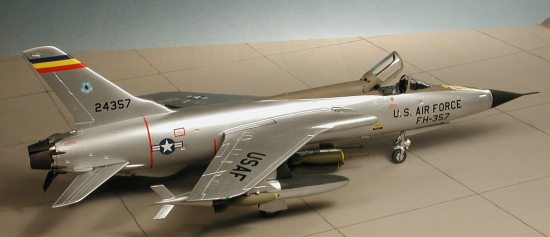 done.
done.
Sounds like a disaster, but these things do happen and while some blame can be put on the kit for iffy fit, I'll put most of the fault with the builder. What I ended up with was a 6 foot model. That is a model that looks good from 6 feet away! Will I build another? Well, not right away and not one that needs so many modifications. I still have a T-stick II conversion set that needs to be done.
I can recommend this kit to those with more skill and patience than I!
|
REFERENCES |
F-105 in Action, #17, Lou Drendel, Squadron/Signal Publications, 1973

Review kit courtesy of the fine editor at Modeling Madness!
May, 2001
Copyright ModelingMadness.com. All rights reserved. No reproduction in part or in whole without express permission.
If you would like your product reviewed fairly and fairly quickly, please contact the editor or see other details in the Note to Contributors.
Back to Reviews Page 2021