|
KIT: |
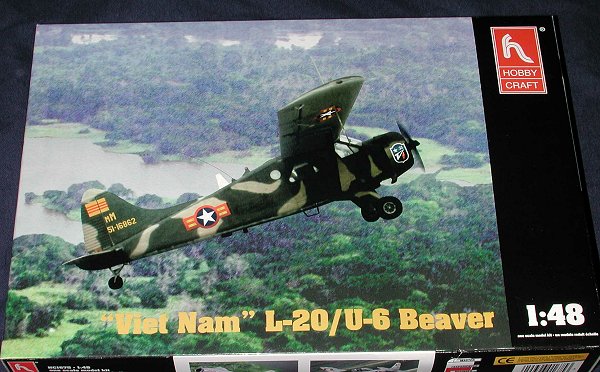
Hobbycraft 1/48 DHC-2 Beaver |
|
KIT # |
1675 |
|
PRICE: |
$19.98 MSRP |
|
DECALS: |
Four aircraft |
|
REVIEWER: |
|
|
NOTES: |
"Viet Nam" boxing |
|
BACKGROUND |
For a brief history and a look in the box, please see the preview.
|
CONSTRUCTION |
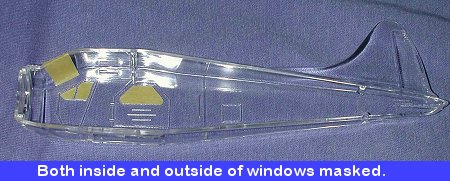 Have I mentioned that this has a clear fuselage? Well that means
that the very first step is to mask the windows. Now the easiest way to do this,
is to first mask the outside windows. They have clearly defined engravings
around them and it makes it very easy to cut the masking tape. Once this is
done, then do the inside parts, using the masked areas as a guide as the inside
of the fuselage is very smooth and does not have any guides.
Have I mentioned that this has a clear fuselage? Well that means
that the very first step is to mask the windows. Now the easiest way to do this,
is to first mask the outside windows. They have clearly defined engravings
around them and it makes it very easy to cut the masking tape. Once this is
done, then do the inside parts, using the masked areas as a guide as the inside
of the fuselage is very smooth and does not have any guides.
Once that is done, then all the interior parts were painted. The instructions are rather lacking in any kind of information on interior colors. The most used ones are black or a dark grey. I chose the dark grey route and used Dark Gull Grey from the Testors Model Master enamel line. The seats, bulkhead and floor were also painted during this time. The instrument panel and wheel/column were painted black and glued onto the floor. They were then drybrushed to bring out detail and the interior was glued into the fuselage and the halves glued together.
 For those who have not worked much with clear
fuselages, the downside is that the plastic is pretty hard and brittle. As a
result, it doesn't glue or sand as easily as regular plastic. Just about all of
the fuselage seam needed either filled or sanded or both. There are some
particularly large sink marks on the upper area near the wings. Unfortunately,
this is all a bit difficult to see due to the nature of the plastic. It took me
an application of primer to find all the glitches.
For those who have not worked much with clear
fuselages, the downside is that the plastic is pretty hard and brittle. As a
result, it doesn't glue or sand as easily as regular plastic. Just about all of
the fuselage seam needed either filled or sanded or both. There are some
particularly large sink marks on the upper area near the wings. Unfortunately,
this is all a bit difficult to see due to the nature of the plastic. It took me
an application of primer to find all the glitches.
While this was drying, the wings were glued together. The engine (which is just generic radial and should be replaced by an accurate engine) and cowling insides were painted flat black and the engine drybrushed with aluminum. Next step was to install the wings. Normally with aircraft that have struts to the fuselage like the beaver, I glue on the wings and then temporarily install the struts to allow the wing to dry at the right angle. Unfortunately, the struts are too long and to do so would give too great a dihedral to them. Wings of this length are a real pain to glue and so I had to rig all sorts of paraphernalia to get the wings to dry somewhat at the proper angle. I also noticed (after the glue had dried) that there is a bit of a sweepback to the wings. Not sure if the real DHC-2 is supposed to have that, but I venture it doesn't. A shim at the wing root should take care of that so beware that it is there.
 Next the wheel legs were
installed. It was at this time that I noticed that there were more holes
pre-drilled in the fuselage than what I'd be using. There is a float-plane
boxing of the kit so apparently Hobbycraft decided to just drill out every hole
needed. They neglected to mention that these extras would need to be filled.
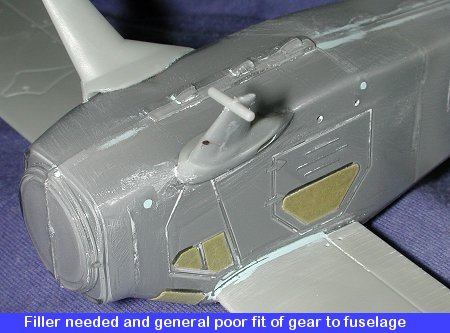
Make sure that when you glue the gear onto the fuselage that you allow room for
the wing strut to fit properly through the rectangular cut-away. I also was
distressed to notice that the upper section of the gear fairing covered the
lower part of the cockpit door. The fit of the gear is sloppy so you need to be
careful. In fact the fit isn't very good at all as there is a rather large
gap at the front of each one that will need filled. You can see from the
accompanying photo that this kit will need filler on nearly all the major joins.
At this time, I put on the first coat of primer so that I could find any
'invisible' glitches as mentioned earlier. Not too many showed up so I was
rather pleased at that. I used Floquil reefer white as a primer as I'd be
painting areas of this plane with red or yellow and the white makes for a good
undercoat. Before heading to the paint shop.
Next the wheel legs were
installed. It was at this time that I noticed that there were more holes
pre-drilled in the fuselage than what I'd be using. There is a float-plane
boxing of the kit so apparently Hobbycraft decided to just drill out every hole
needed. They neglected to mention that these extras would need to be filled.
Make sure that when you glue the gear onto the fuselage that you allow room for
the wing strut to fit properly through the rectangular cut-away. I also was
distressed to notice that the upper section of the gear fairing covered the
lower part of the cockpit door. The fit of the gear is sloppy so you need to be
careful. In fact the fit isn't very good at all as there is a rather large
gap at the front of each one that will need filled. You can see from the
accompanying photo that this kit will need filler on nearly all the major joins.
At this time, I put on the first coat of primer so that I could find any
'invisible' glitches as mentioned earlier. Not too many showed up so I was
rather pleased at that. I used Floquil reefer white as a primer as I'd be
painting areas of this plane with red or yellow and the white makes for a good
undercoat. Before heading to the paint shop.
|
PAINT & DECALS |
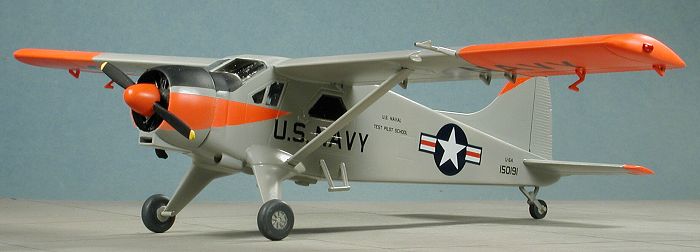
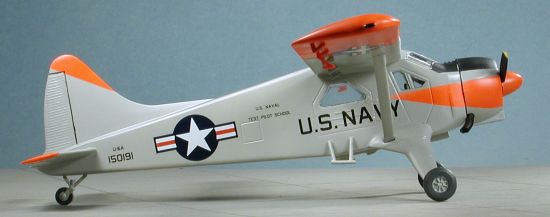 I chose to do the 1970s version of
the USNTPS aircraft from Max Decals 48-09, Beaver
part 2. This one had the light grey aircraft with Day-Glo red panels.
Step one was to first paint the Day-Glo portions
of the aircraft. This was the nose section, wing tips, fin tip and tail plane
tips. Then they were masked off with ye olde Tamiyae tapee. I used Badger
acrylic paint for this. The Badger paint really is quite good and is premixed so
no thinning is needed. I used several thin coats to get good coverage. The more
coats you apply, the darker it gets. The rest of plane was then painted with
Testors Model Master FS 16440 Gloss Gull Grey enamel. The instructions just say
light grey, but I figured if the Navy was repainting the plane, they'd use what
was around and that means light gull grey.
When that had dried. I went back to the bench to put on some more stuff.
I chose to do the 1970s version of
the USNTPS aircraft from Max Decals 48-09, Beaver
part 2. This one had the light grey aircraft with Day-Glo red panels.
Step one was to first paint the Day-Glo portions
of the aircraft. This was the nose section, wing tips, fin tip and tail plane
tips. Then they were masked off with ye olde Tamiyae tapee. I used Badger
acrylic paint for this. The Badger paint really is quite good and is premixed so
no thinning is needed. I used several thin coats to get good coverage. The more
coats you apply, the darker it gets. The rest of plane was then painted with
Testors Model Master FS 16440 Gloss Gull Grey enamel. The instructions just say
light grey, but I figured if the Navy was repainting the plane, they'd use what
was around and that means light gull grey.
When that had dried. I went back to the bench to put on some more stuff.
|
A FEW BITS HERE, |
At this stage, I still had a box full of small bits that had not yet been glued in. This consisted of things like the flap attachment brackets, the wheels, the steps and pitot tube. I also had not yet painted the cowling. Organized while doing this kit I was not. What I then did was glue in all the inner flap brackets and the pitot tube. Frankly, all of these parts are way oversized but to use smaller ones would mean not only making them, but filling in more holes so I let it go. I left off the outer ones until later as that part of the wing was covered with tape. The boarding steps on either side were glued in at this time and the whole thing set aside to dry.
 While the rest of the airframe was
drying, I installed the engine in the cowling and filled the front with tissue.
The prop and hub were cleaned up and gotten ready to paint. The prop is too
thick and needs replaced if you are building a serious model. Fortunately, I'm
not usually serious about any model so left it alone. The wheels were then
painted. These are not well done as there is no indication of where the rim
stops and the tire begins. One will have to put up with it as figure the odds of
an aftermarket set of anything coming out for this kit. I was juiced to have Max
Decals do some decent sheets for this kit!
While the rest of the airframe was
drying, I installed the engine in the cowling and filled the front with tissue.
The prop and hub were cleaned up and gotten ready to paint. The prop is too
thick and needs replaced if you are building a serious model. Fortunately, I'm
not usually serious about any model so left it alone. The wheels were then
painted. These are not well done as there is no indication of where the rim
stops and the tire begins. One will have to put up with it as figure the odds of
an aftermarket set of anything coming out for this kit. I was juiced to have Max
Decals do some decent sheets for this kit!
|
MORE PAINT & DECALS |
Back to the painting facility where the cowl was painted first white, then Day-glo. It was then glued onto the front of the kit where the nose flash was matched to the cowl and then masked. The fit of the nose is fair but it isn't even. Light gull grey was painted on the nose section, flap brackets and pitot tube. I also painted the wing struts at this time. With all that dry, the masking was taken off the outer wing areas and the remaining flap brackets glued in. The area was then repainted white and Day-glo (I had masked off the inner wing to prevent overspray problems). All this work is a good reason to wait until the end to install the wing braces as masking around them would be a major chore. Final bit was to paint the prop and anti-glare panel flat black.
 After all of that was dry, it
was back to the workbench for the decals. The Max Decals are nice and thin and
fit very well onto the gloss paint surface. I didn't use the kit insignia as I
wanted to save those for another Beaver (masochist, aren't I?). Instead, I got
an older Superscale insignia sheet and used those. Really there was an ulterior
motive to using the Superscale decals. Day-glo is a very intense color and will
bleed thorough white in a heart beat. No way was a single decal to be enough to
stop this. With several of the same size on the Superscale sheet, I knew I could
double up on the wing ones to try to block most of the bleed-through, and it was
relatively successful in doing so. Only one decal would not have been enough.
After all of that was dry, it
was back to the workbench for the decals. The Max Decals are nice and thin and
fit very well onto the gloss paint surface. I didn't use the kit insignia as I
wanted to save those for another Beaver (masochist, aren't I?). Instead, I got
an older Superscale insignia sheet and used those. Really there was an ulterior
motive to using the Superscale decals. Day-glo is a very intense color and will
bleed thorough white in a heart beat. No way was a single decal to be enough to
stop this. With several of the same size on the Superscale sheet, I knew I could
double up on the wing ones to try to block most of the bleed-through, and it was
relatively successful in doing so. Only one decal would not have been enough.
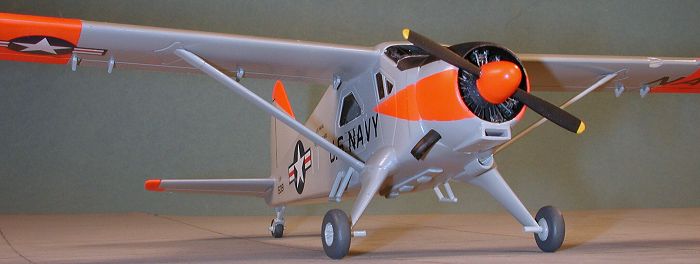
 Only a few more bits to do.
First the prop blade tips were painted yellow. Now they may have been
white/red/white or red/white/red as is often seen on Navy prop planes, but I
went with yellow. Heck it could be polished metal, but with no handy reference,
black with yellow tips seemed appropriate. The spinner (which had been painted
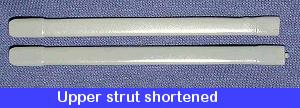
white then Day-glo) was then glued on. Then the exhaust pipe was shortened (it
is a very weird shape), drilled out and painted burnt iron. It was glued in. The
wing struts are too long as I mentioned so I had to shorten them. Fortunately,
the lower strut housing will hide any slightly overeager trimming. These were
then glued in along with the prop and the masking taken off the clear bits. To
my disgust, there were little plastic shavings sticking to the inside of the
clear parts. The last bits to be glued on were the wheels (which fit very
snugly) and the landing light cover. This part is about half the thickness it
needs to be and should be replaced if the opportunity arises. I didn't mess with
any antennas or any other stuff as I just don't have the references for it. This
is a case where ignorance is bliss.
Only a few more bits to do.
First the prop blade tips were painted yellow. Now they may have been
white/red/white or red/white/red as is often seen on Navy prop planes, but I
went with yellow. Heck it could be polished metal, but with no handy reference,
black with yellow tips seemed appropriate. The spinner (which had been painted
white then Day-glo) was then glued on. Then the exhaust pipe was shortened (it
is a very weird shape), drilled out and painted burnt iron. It was glued in. The
wing struts are too long as I mentioned so I had to shorten them. Fortunately,
the lower strut housing will hide any slightly overeager trimming. These were
then glued in along with the prop and the masking taken off the clear bits. To
my disgust, there were little plastic shavings sticking to the inside of the
clear parts. The last bits to be glued on were the wheels (which fit very
snugly) and the landing light cover. This part is about half the thickness it
needs to be and should be replaced if the opportunity arises. I didn't mess with
any antennas or any other stuff as I just don't have the references for it. This
is a case where ignorance is bliss.
|
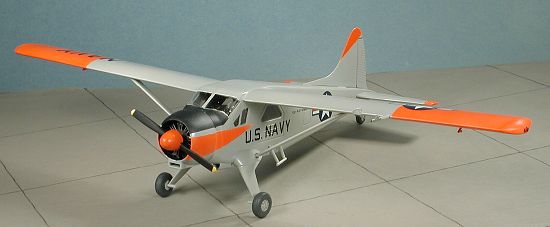
CONCLUSIONS |
Really, the end result is quite cool. The bright markings and the nice selection of decals is what is needed for this kit. The kit decals are OK as they are the later Hobbycraft ones, but I wanted something not available in the kit box. The Hobbycraft kit itself is a good start for those who want to put some work into it. As it is kitted it isn't bad, but there are problems that need to be overcome as you have read. Probably the biggest glitch with the kit is that the wings need to be shimmed to keep them from being slightly swept back when glued to the fuselage. Nothing that can't be fixed, but you do need to be aware of it. As with most Hobbycraft kits, it isn't a toss together model, but it does fill a need and isn't beyond the abilities of most modelers.
May 2002
Review kit courtesy of my kit collection.
If you would like your product reviewed fairly and fairly quickly by a site that has well over 100,000 visitors a month, please contact me or see other details in the Note to Contributors.