Miniwing 1/144 Canadair CT-114 Tutor
| KIT #: | Mini048 |
| PRICE: | $25.00 |
| DECALS: | One option |
| REVIEWER: | Scott Van Aken |
| NOTES: | Resin kit with vacuformed canopies |
| HISTORY |
In September 1961 the Canadian government ordered 190 examples of the production variant, CL-41A for the RCAF as the CT-114Tutor. For over 30 years, the Tutor, known affectionately as "Toot" in RCAF and CF use, served as a primary trainer. In 1976, the Canadian Forces modified 113 survivors with provision for two external fuel tanks (drop tanks) and upgraded avionics.
Canadair also developed an armament training and light attack variant, the CL-41G, with an uprated engine and underwing hard points to allow the carriage of external stores (up to 4,000 lb (1814 kg) of weapons) and drop tanks. In March 1966, the Royal Malaysian Air Force ordered 20 (serials M-22-01 to M22-21) examples of the CL-41G-5 Tebuan (which means "Wasp" in the Malay 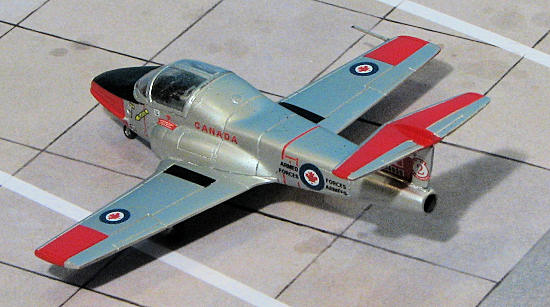 language) aircraft as "Counterinsurgency" (COIN) aircraft . The Tebuan entered service in Malaysia in 1967, serving for over 20 years, before being phased out in June 1986 and replaced by the Aermacchi MB-339A.
One other variant was developed, the CL-41R which was fitted with an F-104 Starfighter nose as a proposed electronic systems trainer for future RCAF CF-104 pilots. The R model never went into production.
In 1967, 10 Tutors were modified for use as a formation aerobatic aircraft by the RCAF (and later the unified Canadian Forces) display team, the Golden Centennaires to celebrate Canada's Centennial year. The display team was later disbanded but, a few years later, 431 Air Demonstration Squadron was reactivated as the nine-aircraft team, the "Snowbirds," who continue to perform at air shows and special events including the annual flypast on Canada Day over the capital city, Ottawa.
Modifications for the Snowbirds include: a smoke generating system, a unique paint scheme for added crowd appeal, and a highly tuned engine to enhance engine response in low level flying.
Although the CL-41 Tutor has been retired from active training, 22 Tutors continue to fly with the Canadian Forces with the Snowbirds and the Aerospace Engineering Test Establishment at CFB Cold Lake. A number of airframes are held in reserve for future deployment as replacement Snowbird mounts.
| THE KIT |
Typical of Miniwing's resin kits, this one is superbly molded with nicely engraved panel lines. There is a full cockpit piece that fits into the opened up cockpit area in the front of the plane. The fuselage is a single piece so unless one drills out the nose from the inside for weight, tail sitting will probably be an issue.
 The kit offers a single piece wing which fits very nicely in the recess in the lower fuselage. A single piece horizontal stab is also included. Small bits include the exhaust, two intakes, two main gear and wheels, two main gear doors, a single nose wheel/strut with a nose gear door that must be cut. A section of small plastic rod is included for the pitot tube. To top all this off, two vacuformed canopies are given, which is nice as I generally tend to mess one up during the build.
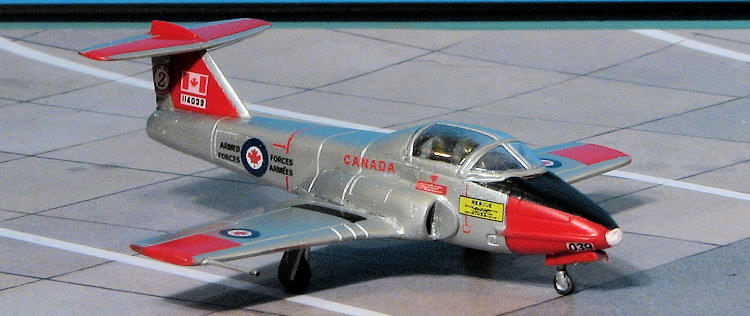
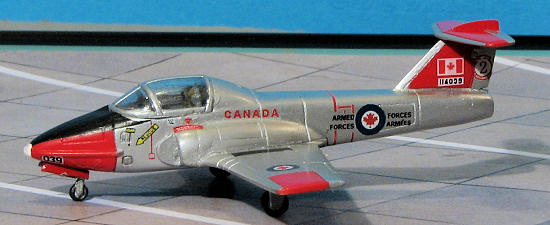
Instructions are pretty basic and consist of a small, folded sheet of paper. One side has an exploded view of all the parts while the other has a short history and color painting and decal placement guide. Markings are for one aircraft (114039) from the 2nd Flight Training Squadron. The plane is overall aluminum lacquer with red sections on the wings, nose, fin, and horizontal stab. I should mention that it would be OK to paint this as bare metal for most of these planes were so done prior to being painted in aluminum. The decal sheet includes all the markings and the nose anti-glare panel. These are done on an ALPS printer from the look of things. The roundels are somewhat pixilated, but as there are no viable aftermarket replacements, you'll have to use what is given.
| CONSTRUCTION |
This is a pretty simple kit to build. The folks at Miniwing have done a fine job engineering this one. Of course, there is some preparation required and that starts with filling in the air pocket on the upper fin with superglue. When dry, it was sanded smooth. Then the resin pour stubs have to be cut away. I used a fine razor saw for this and had all the blocks removed within about fifteen minutes. I will caution you to be careful holding the intake pieces as I snapped off the splitter plate on one of them. I also left all the really fragile bits on the sprue until needed.
 First thing glued on was the exhaust. Naturally, I cut the darn thing at an angle, so needed filler (super glue) once I attached the piece to the rear. I then glued in the interior and glued on the wings, all with nary a fuss as the fit is excellent.
While the glue dried, I cut out one of the canopies. The clear vacuformed plastic is a bit on the brittle side so be careful when doing this. Many test fits and trimming sessions are needed as is a deft hand. I found that I spent about as much time getting the canopy properly trimmed as I did any other part of the build besides painting and decaling.
Next, the intakes were glued in place. Like the exhaust, there were gaps and I used super glue to fill them, sanding it down once it had cured. With those bits done, I brush painted the interior with FS 36231 (dark gull grey) with a black anti-glare panel. Miniwings includes a decal for the instrument panel and for the seats, which is nice. These went on without any problems. I then attached the canopy with clear gloss paint and masked it off.
| COLORS & MARKINGS |
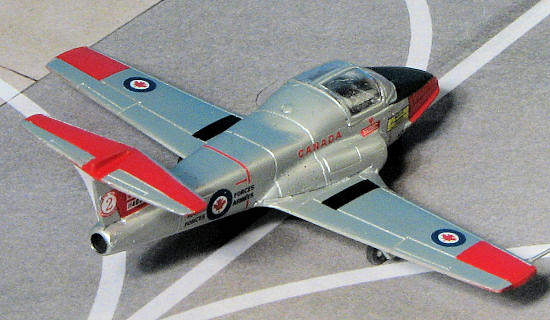
Silver and red bits is the color of this one. For the red bits, I used Testors Guards Red, after wiping down the model with lacquer thinner to remove any oils. Then the red areas were masked and the rest was painted with Floquil Old Silver. I decided to try out an old bottle I had to see if it would work as my previous attempts were not good. This time, it seems to have turned out better as 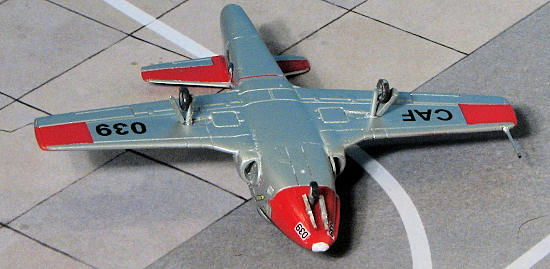 both colors were dry to the touch in a few minutes and I was able to handle things after letting them sit for a day.
I then attached the nose and main landing gear as well as the main wheels before applying decals. Though the plane will easily tail sit, I'm hoping that when I put on the horizontal stabilizer, it will still remain on its gear. I won't do that until after all the decals are applied.
The decals went on without any problems, though like the earlier Super Mystere I built, they are too large. Either that or the kit is too small. This isn't a real issue until you come to a place like the rudder where the unit badge is applied and it is obvious that the decals are too big. You see this as well in the wing walk decals, though those were trimmed to fit. The rest of the marking went on well with a bit of trimming needed here and there. I used Mr. Mark Softener to help them snuggle down, something that was really needed for the anti-glare decal.
| FINAL CONSTRUCTION |
 For this, it was simply attaching the gear doors and doing some touch up painting. Were I not lazy, I'd have cut off the nose landing light area and glued on a section of clear plastic, sanding it to shape. I simply painted that area white to represent that feature. The horizontal tail was attached as was the wing pitot tube. The entire airframe was given a coat of Testors Metallizer Sealer with the anti-glare panel and wing walk areas getting some matte clear. The masking was removed and the project was done.
| CONCLUSIONS |
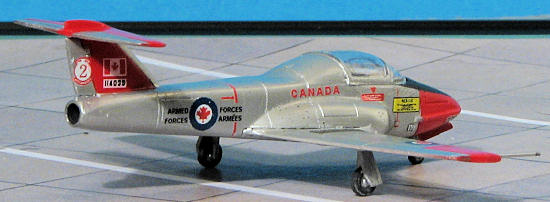 This was a neat build. I'm sure many would have finished it much faster than I, but I'm slow. There are a few issues with it including a few shape ones, but Miniwings got things fairly close and I'm sure most will be pleased. The plane is a borderline tail sitter as it really needs a bit of weight in the front to stay on all three gear. However, without any real place to put weight, one will have to deal with that aspect of things. When taking images, I had to angle the base I used by about three degrees. One could drill out the nose from the inside prior to attaching the interior section to provide more room for weight as it wouldn't take much. Overall, I can recommend this to 1/144 fans and those with some resin kit experience. Some with find the small parts a bit difficult to work with, but an Optivisor and good set of tweezers will take care of that.
| REFERENCES |
http://en.wikipedia.org/wiki/CT-114
November 2010
Copyright ModelingMadness.com. All rights reserved.
If you would like your product reviewed fairly and fairly quickly, please contact the editor or see other details in the