Revell 1/169 "IL-38" Bison
Kit Number: H-182
Price: 99 cents (when new)
Decals: Generic USSR, but who needs them as they are engraved on the kit for painting!
Reviewer: Scott Van Aken
Date of Review: 6 August 1997
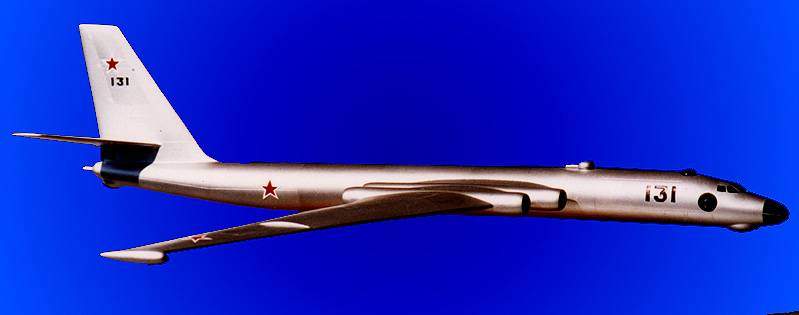
What Revell purports, in its naivet�, to be an IL-38 is in reality a Myasishchev M-4, albeit an early version. The Bison was just recently taken out of service thanks to nuclear and weapons drawdown treaties. These huge bombers were not the success that was hoped although they did sterling service as tankers and ESM platforms in later years. Looking very much like a cross between a swept wing comet and a B-52, the Bison and the Bear were ,in fact, both plying for the same job. The Bear won due to the poor range of the thirst Bison, but the Bison design was good enough to see a small production run and many variants.
The ancient Revell kit is a scale to fit the box and is molded in silver-grey plastic. Typical of the era, the decal placement was molded on the kit, so the deteriorated decals were not a problem! This was also an S kit which was supposed to have a stand, but since I got it at a swap meet for the box price of 99 cents, I couldn't complain. One reason it was 99 cents was because it was missing most of the undercarriage. This made it a perfect candidate for a stand model.
As you might imagine, there really were not that many parts to this kit. The fit was very good and little filler of any kind was needed. All the transparencies could be installed after the kit was completed, making a possibly difficult masking job unnecessary. Since it was a stand model, all the transparencies were painted black. The fuselage halves fit very well as did the horizontal stabilizer, which is one piece and inserted in the tail section. The wings are full span and two pieces which fit into a cutout on the top of the fuselage. The wings required the most work and putty. Mainly due to the engine intakes and exhausts which were larger than the mating surfaces. This required quite a bit of filing, sanding and smoothing to fit well.
Once completed, the wing was attached to the fuselage. There were some gaps at the forward and trailing edge that needed filled and smoothed. At this time the cockpit canopy was installed and needed filled for a good fit as did the nose transparency. The tail gunner's transparency was installed and smoothed over, being replaced with black decal. The turrets were installed, a hole drilled in the bottom for the stand, and the kit painted with various shades of Metallizer. The transparency areas were then brush painted with gloss black as were the astrodomes. The astrodomes were then installed.
Since the decals had become unusable, I found some stars in the spares bin to replace those on the sheet. The numbers were hand painted in the recessed areas provided on the kit. The base of the stand was made of redwood and clear coated. The rod into the aircraft is Lucite. I used a handy Letraset sheet to place an identification on the base.
Overall, it was a fun kit to build. It really doesn't fit any special place in my collection, but does add some interest to it along with the other stand kits I have made over the years.
Copyright ModelingMadness.com. All rights reserved.
Back to Reviews Page
2020