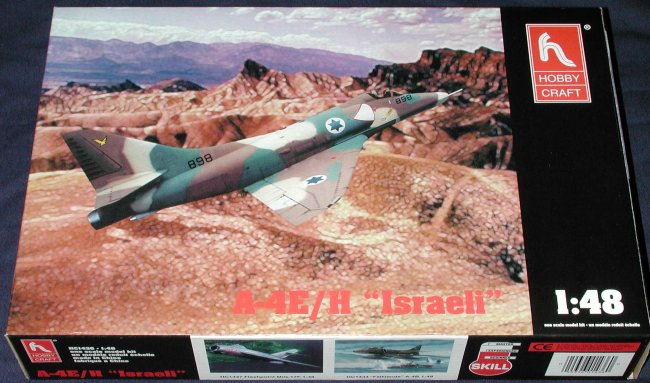
Hobbycraft 1/48 A-4E/H Israeli Skyhawk
| KIT # | 1436 |
| PRICE: | $17.98 |
| DECALS: | Three aircraft |
| REVIEW : | |
| NOTES: |
| HISTORY & THE KIT |
For information on the A-4 and the Hobbycraft kit,
| CONSTRUCTION |
The Hobbycraft kit is laid out like just about ever otherA-4 kit I have ever built and is quite similar to the Hasegawa kit. The firstthing that I did was to start construction of the wings, drop tanks, nose, and cockpit. Before gluing the wings together, I opened up any holes for pylons. Unless you are doing an aggressor bird, you need to have as much stuff hanging off the wings as possible!
 The nose and drop tanks are a simple glue job with no real problems. Unlike Hasegawa's kit, these drop tanks have no separate tail caps. It means you don't have a belly tank option, but it also means that you don't have the fit problem that the Hase tanks have, either. On both the nose and tanks I had to fill and sand seams. On the wings, you'll need to use filler on the wing slat area to smooth that join as it will be visible when the slats are glued on.
The cockpit is a rather simple construct consisting of a tub, aback wall and the small accessory panel behind it. Not sure if I liked having to glue all those little bits on the accessory panel, especially as the holes are much larger than the pegs on the parts. Fit of this panel to the back of the tub is OK, but the whole thing does not fit well into the fuselage. When I tried toline things up while the glue was still tacky, it just didn't fit into the guide tabs at all.
The cockpit has separate rudder pedals and control column. I'm not sure where the mold makers got the T handle control stick from, but I trashed mine and substituted the spare from my Hasegawa kit. Looks MUCH better. The seat in this kit is a bit tricky to build, being made up of two side panels, a rear panel and two seat inserts. Time for another gripe, and this is not just to Hobbycraft. The ejection seat in modern jets is not just a shape. Each aircraft has a specific design that is often unique to that plane. How about some research into this on upcoming kits? Monogram does a fairly good job of this so it isn't beyond the technology of Hobbycraft, Fujimi, Hasegawa orothers to provide us with an accurate seat.
 Now that the rant is over, the seat was painted flat black with green cushions. No harness is supplied; not even a decal. The fit of the seat is VERY tight. The instrument panel has raised detail on it, but that is about it. At least a decal to add some color to it would have been appreciated.
Now it was time to join the fuselage halves together. Test fitting the nose well showed that some trimming would be needed to get a decent fit. Once I was fairly satisfied, I glued it into one of the fuselage halves. Then the interior was installed. The fit of this is not good. The back of the cockpit is dropped down about a half inch or so from the underside of the fuselage. This kit will be built with the canopy closed so you can't see that gap. I fear that only an aftermarket interior set (or a lot of work) will correct this problem.
Once the fuselage was together, some weight was put in to the nose (just to be on the safe side), and the fin tip, nose and dorsal fairing were glued in place. The fit on all these is pretty good, though I did use a bit of filler on them to smooth things out (a normal occurrence for  me). The intakes were then painted white on the inside (the fuselage bit too), and when dry, the back of the fuselage intake was painted black. Then it was time to install the intakes. The kit directions seem to be reversed as far as which intake goes where. It seems to me that the intakes should either be straight or curve very slightly down when viewed from the side. Going according to the instructions, it would curve up and that just looks too weird. Fit of the intakes was quite good, again, a touch of filler used to take care of a gap or two.
While this was all drying, the wings had the wells, flap and slat areas painted white. This showed up a need to wash the parts in soapy water as I got fisheyes everywhere! Usually I don't wash kits, but this one apparently needed it. The area was then  repainted white and flap/slat areas painted red. The wing was then glued to the fuselage. Fit here is also pretty good, especially at the back and upper wing area. Some filler was needed in the forward wing/fuselage join. That was quickly sanded smooth and it was on to the next step.
So far, this kit is going together well. Next the kit had the intakes repainted white to take care of those areas sanded off. The cockpit was then touched up and ready for the seat. As I mentioned earlier, the kit seat is way too wide and just doesn't look the part. I purchased a twin pack of Escapac seats from True Details (48-406). At $2 a seat, it is a worthwhile investment as they look a LOT better than what comes with the kit. This was then glued into the cockpit and the canopy then glued in place and masked.
Next item were the little bits in the front of the wings for the gun barrels to attach to. These fit reasonably well, but needed filler to blend in well with the surrounding area. The tailplanes were then attached. Fit here was also pretty good, but again, some filler was needed as the curve of the inner part of the tailplanes was a bit greater than the mating surface. The fuel dump was glued to the underside of the wing. Then all the bits I didn't want repainted were masked. This included the intakes, wheel wells and the red area for the slats.
The kit was now ready to be taken to the paint shop for a bit of color.
| PAINTING |
 I used Gunze acrylic on the undersurface and Testors Modelmaster enamels on the upper surface. The color instructions recommend using a light grey, FS 36495 for the underside, though the box art shows a blue. Frankly, I think they are mistaken and that it should be a light blue FS 35526 instead. That is what I used and perhaps it should be even darker. Your choice. Anyway, the underside color was painted on first, as it my norm.
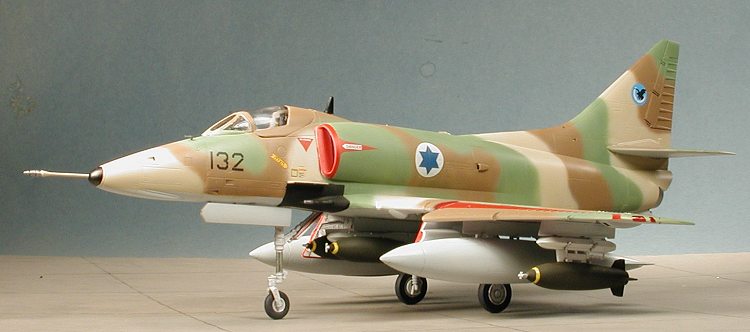
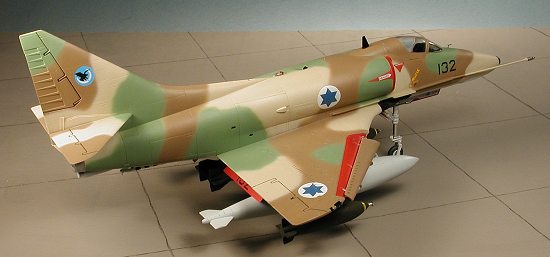
Once the acrylic had fully cured (a few days), it was masked off where needed and the upper colors painted on. I started with the light tanFS33531 and painted the entire aircraft. Then the brown, FS 30219 was painted on where it should go. Finally, the light green FS 34227 was painted. I generally followed the pattern on the box, but you can deviate pretty far from what is shown as no two planes were painted alike. I painted the slats separately and again, in a pattern similar to what was on the box. If they don't match, don't sweat it as these items were often taken from a 'hangar queen' if needed for an operational bird.
After all the painting had been done (and there was quite a bit of back and forth touching up done), it was taken back to the workshop to have the landing gear attached before more work was done.
| A BIT MORE CONSTRUCTION |
 Before putting on the gloss coat, I like to have the plane onits landing gear. These were painted white and then glued into the appropriate holes. The main gear had to be trimmed a bit on the piece that sticks out on the side to properly fit. The nose gear has a separate nose wheel, which is nice. Both the nose and main wheels have separate hubs. Nice touch for the main wheels, a pain in the butt for the nose wheel as there is no positive lock. I'd rather have had the nose wheel as one piece. The nose wheel also had a hole init that was too big for the attachment points on the nose strut. The main wheel inserts need a touch of sanding down to fit. The stubs on the main gear are too short to allow the main wheels to fit properly. The tires also look way too tall when compared to the Hasegawa kit, but don't look that bad when compared to photos. It seems as if Hasegawa's tires are a lower profile than on the real plane. The end result is that all the wheels need glued in place with superglue as they just don't properly fit.At this time, the attachment struts for the wing slats were glued in place and painted steel once done. It was then back to the paint shop to get the clear acrylic gloss coat in preparation for putting on the decals.
| DECALS |
After the clear had dried, I started applying decals. These are quite thin and go on well, however, I'd take the decal placement diagram with a major grain of salt. I have a couple of books on the Israeli AF and neither of them showed the roundel placement that was given in the diagram. This is a case of making sure that you have the proper references for the plane in question. Anyway, the decals are a real pleasure to use; a major difference from their earlier kits! I used the blue unit badges from the 'Valley' Squadron. I can only hope that this is a valid use as I have no uncensored photos to use as a reference for unit markings. Anyway, the decals are a real pleasure to use. Once all decals were on, I used a clear matte finish to seal things in place.
| CONSTRUCTION CONTINUES |
 Now that the decals were on, it was time to get to work on the rest of the model. The first thing I did was to laboriously paint the red on the gear door edges. Later, I was to discover that Israeli Skyhawks didn't all have this done to them so could have saved myself the time and trouble! Next was to work on the ejector racks. These had their little anti-sway thingies glued in place and then the whole thing was painted white. The anti-sway gizmos are not very convincing, but the illusion is sufficient. Next the bombs. The kit provides a slew of Mk80 series low drag bombs. When these aircraft were used in the 1973 war, they mostly carried M117 bombs. These older bombs were supplied from US stocks and were really Korean War vintage. The Hasegawa weapons set has six of them per set. I chose to put four of them on the centerline MER. For the outer racks I picked a pair of SUU-30 dispensers (also from the weapons set)that would be full of anti-personnel bomblets. These were duly painted olive drab and a shaky yellow band painted on the front. They were then glued onto the TER's as they would not fit directly onto the outer pylons. Both racks and bomb loads were set aside.
With the weapons out of the way, there were still a number of things to do to finish out the plane. First of all, the gear doors were painted and glued in place. Fit is very good and trouble free. Then the various pylons were glued on. Several need to have the holes enlarged to fit. There is no indication of what racks go where, but some deduction and the fact that only certain ones fit in certain places is a big help! With the pylons securely glued in, the flaps are glue in a slightly down position. Well, almost. You have to do some sanding on the aerodynamic fairing on the flap in order to get them to fit. Actually, you have to do quite a bit of sanding, but about 5minutes with a coarse sanding stick has everything ready to go. I put the second set of aircraft number decals on the inside of the lower flap like is done on USN aircraft. Not sure if that is correct or not, but it seemed logical.
| CONCLUSIONS |
It is a no-brainer to realize that this isn't a Hasegawa kit. It isn't as well detailed, is probably not quite as easy to build, (though certain areas are), comes with a full weapons load that the Hasegawa kit doesn't have and is a less expensive kit. You can also build a bunch of different versions that (at this writing) are not available from Hasegawa. As much as I'd like to give this kit a glowing recommendation, I'll have to temper it. The cockpit and canopy are the biggest problems. The poor fit of the nose wheel is another problem that should not be there and many will not like the overall lower level of detail. Bottom line, you want a highly detailed and more accurate kit, get the Hasegawa. If money is a concern or you want to build aversion that is not available from Hasegawa, then the Hobbycraft kit is what you want. In the end they will look like Skyhawks when sitting on your shelf at home.

May, 2001
Copyright ModelingMadness.com. All rights reserved.
If you would like your product reviewed fairly and fairly quickly, please contact the editor or see other details in the