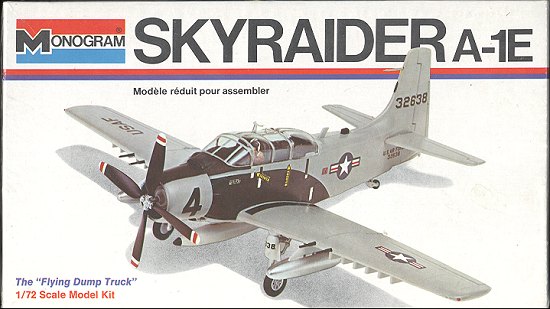
Monogram 1/72 A-1E Skyraider
| KIT # | 6807 |
| PRICE: | $2.80 (back in 1981) |
| DECALS: | One aircraft |
| REVIEW & | |
| NOTES: |
|
| HISTORY |
The spAD is one of those aircraft that seemed to last in serviceforever. Designed for WWII, fought in Korea and again 15 years later in Vietnam,it was finally pulled out of service due to a lack of spares more than anythingelse in the very late 1960s. Even today, it is not unusual to see the aircraftat airshows as these oil-leaking monsters are much beloved by their owners andfly quite frequently.
The A-1E was, like all Skyraiders, originally a Navy design usedas a trainer and as a COD (Carrier Onboard Delivery) aircraft. Unlike mosttrainers, this one was able to carry a full load, same as the regular ADs (laterA-1s). During the Vietnam war, the A-1 was looked upon as an angel of mercy bydowned aircrews. Their main task was to loiter above the crew on the ground andkeep the bad guys away from the rescue helo. The A-1s ability to stay on stationfor hours, relatively slow speed, and to carry a wide assortment of ordnancedesigned to deter the enemy helped ensure the survival of a number of aviators.It was replaced by the A-7D, an aircraft that just wasn't as well suited as theA-1.
| THE KIT |
Monogram's kit of the A-1E is one of the few 1/72 aircraftthat Monogram did back in the late 1960s/early 1970s. These kits were all easyto build, had minimal parts, and pretty good detail for the time. They also allcame with stands, something one just doesn't see in kits today. There is someordnance but not nearly enough. Basically you get three drop tanks and are onyour own to find other things to fill the built in bomb racks.
| CONSTRUCTION |
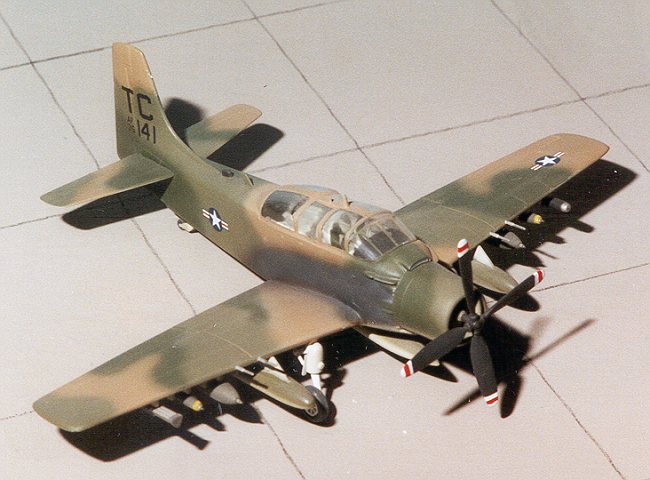
 Construction starts with the interior. Again, there is a prettygood one, but there isn't much detail in it. It is basically a one-piece affairwith consoles molded in. Just add the seats! There is a decal for the instrumentpanel. I painted this dark gull grey. The fuselage halves are next and theinterior is easily trapped in there. I then glued the wings together. There areno real wheel wells in the wings, just some pegs in which to insert the landinggear. The tail planes are a single piece and fit rather well.
Ithen glued the wing on to the fuselage. Fit was fairly good here as well thougha bit of filler was used on the underside. Next the canopy was glued on. Ishould have tinted the rear windows green or blue, but back when I built thiskit, that wasn't a skill I had! The next thing to be added was the enginecowling. There is no engine detail at all. Navy A-1s have a spring loaded coverthat fills the cowling opening when the engine isn't running. Fire up that bigold fan in the front, and the airflow pushed back this cover so the engine canget cooling air. It isn't unusual to be unable to see the engine on planes thatare parked on the ground. This cover is what is molded on the front. The exhauststubs are part of the cowling.
The landing gear and wheelwells were painted white as these were ex-navy planes and that was the way theywere painted.
| PAINT & DECALS |
 Withthe kit at this stage, it was time to paint it. It gets the normal SEA scheme oftwo greens and a tan upper and light grey lower. I used Gunze Sangyo acrylicsfor the paints and did the scheme freehand. Frankly, it isn't as tight as I'dreally like it, but the only other option was to mask off the colors. Now I knowthat some like this and some don't. I'm a bit ambivalent about it and do kitseither way depending on how I feel about it at the time.
Thekit decals, for one of the first Skyraiders sent into Vietnam in the early1960s, were not used. I have built this kit using the kit decals and they workjust fine when placed on a glossy surface. Anyway, I wanted something a bitdifferent. Back in 1984 when this kit was built, there were darn few aftermarketitems and most of those were decals. The 1/72 A-1E was not one of those subjectsblessed with an aftermarket sheet. So, I used decals from other sources,basically a Microscale insignia sheet for the insignia and a Scalemaster sheetfor the tail codes and serial numbers, cutting out each individual letter andputting it in place. I used the Microscale System to get the decals to snuggledown on Gunze's semi-gloss paint. Then it was sprayed with Pactra clearmatte.
Before unmasking the canopy, the engine exhauststain was sprayed on the side using flat black. I have never seen a clean A-1 asI think they are pre-grunged before leaving the paint shop!!
| CONSTRUCTION CONTINUES |
The masking is taken off the canopy and then the last bits areadded on. One thing that has been lost over the years is a horseshoe shapedantenna on a mast on the canopy. The prop was painted black and the red/whitestripes painted on the tips. Ordnance was a problem, but thanks to the Hasegawaweapons sets, I was able to find a couple of bombs and things to add to theunderside. A bit of touch-up painting and I was done.
| CONCLUSIONS |
This really is an easy kit to build, just like Monogram wantedwhen it designed it. There is enough room for the experts to detail the heck outof it and it still looks good right from the box, despite its raised panelheritage! It is odd that there have been a lot of 1/72 A-1 kits released in thelast 30 years, but this is still the only 1/72 A-1E. Recommended to all skilllevels.
July 2000
Review kit courtesy of me and my wallet!
If you would like your product reviewed fairly and fairly quickly, please contact the editor or see other details in the