Hobbycraft 1/48 P-26A
Kit Number: 1558
Price: $13.00
Decals : two versions, one with lots of scallops.
Comments: Hobbycraft came to the rescue again when it produced its superb P-26 kits. The only really good one available before was Hasegawa's 1/32 version. Revell has a 1/72 kit that is a good basic shape, but is also 30 years old.
What can I say. The kit has all you would need. A good interior, a superb little engine and it just looks cute. The interior detail is excellent only requiring (you guessed it) Reheat instrument decals to bring it to life. Since the left side entrance hatch is separate, putting it in the open position allows any detailing to be easily seen. Don't paint the interior green as on these aircraft they were left in aluminum to increase cockpit brightness. I can thank Squadron's mini In Action for that tidbit of information. I used True Detail's bulged tires on this one, installation being a snap once the proper sized hole is drilled. The biggest hassle in assembly is attaching the separate exhaust pipes. There are a bunch and they are all small. One must be careful attaching the oil cooler to assure no interference with the exhaust.
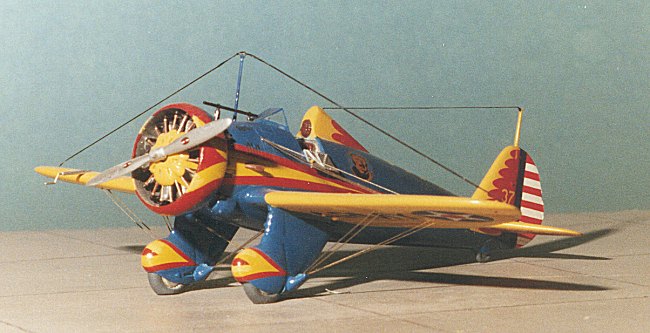
 The most challenging aspect of this kit is painting. Since the Hobbycraft decals are junk, I called on an Aeromaster sheet to rescue me. This sheet had six different schemes and I chose a March Field plane in red and yellow with the Grizzly insignia. This meant the plane had to be painted blue with yellow wings and tail. Masking the curves around the tailplanes and the areas next
to the spats is a challenge. The headrest must be painted yellow as well. All the red bits and the red/yellow scallops come on the decal sheet. The ample curves of the spats and
cowl ring require careful assembly of the decals and judicious use of setting solution. I probably spent as much time in painting, decaling and touch-up as anything. It is a shame that Aeromaster's yellow is not perfectly opaque. Another glitch with the decals is that this aircraft had its serial number on both the top and bottom of the fuselage. Only one set of numbers was provided in the kit and the number design is very non-standard.
The most challenging aspect of this kit is painting. Since the Hobbycraft decals are junk, I called on an Aeromaster sheet to rescue me. This sheet had six different schemes and I chose a March Field plane in red and yellow with the Grizzly insignia. This meant the plane had to be painted blue with yellow wings and tail. Masking the curves around the tailplanes and the areas next
to the spats is a challenge. The headrest must be painted yellow as well. All the red bits and the red/yellow scallops come on the decal sheet. The ample curves of the spats and
cowl ring require careful assembly of the decals and judicious use of setting solution. I probably spent as much time in painting, decaling and touch-up as anything. It is a shame that Aeromaster's yellow is not perfectly opaque. Another glitch with the decals is that this aircraft had its serial number on both the top and bottom of the fuselage. Only one set of numbers was provided in the kit and the number design is very non-standard.
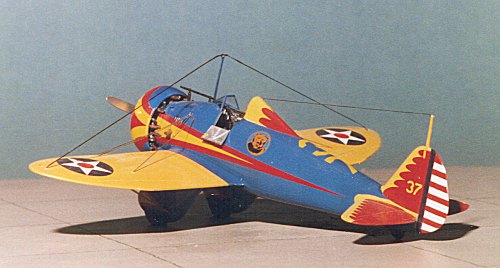 After the 2 week decaling session was over, it was time to rig. This plane cries for rigging, especially as the supports are molded onto the spats and (if memory serves; it has been a year) the holes in the wing are predrilled. Since I am sort of lazy, I went to my local model railroad establishment and got the thinnest brass rod I could find. This stuff is actually flat so more of an airfoil section as used on the real aircraft. I measured and cut each piece and in no time, the job was completed. The most challenging area was between the spats where there is little room. The brass was then brush painted silver.
The kit is a jewel and if you have the patience for the intricate decal schemes and the rigging, you'll have a great kit.
Copyright ModelingMadness.com. All rights reserved. No reproduction in part or in whole without express permission from the editor.
Back to Reviews Page 2016