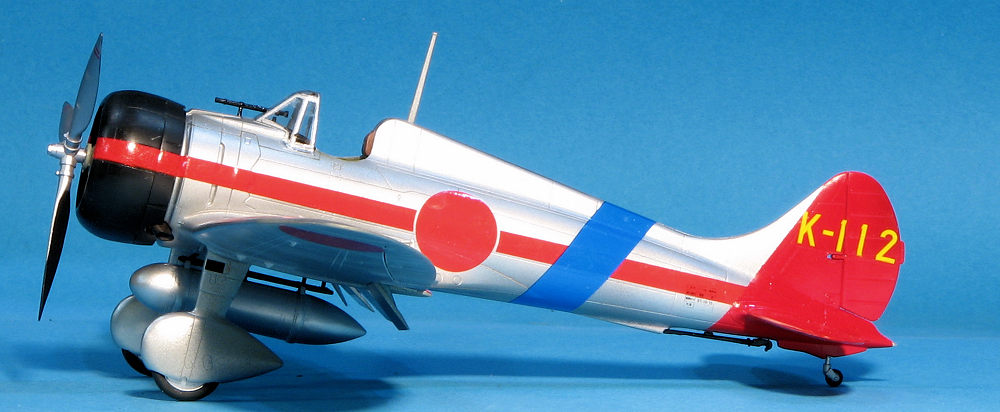
Fine Molds 1/48 A5M4 'Claude'
| KIT #: | FB 21 |
| PRICE: | 3060 yen |
| DECALS: | Three options |
| REVIEWER: | Scott Van Aken |
| NOTES: | 2016 tooling |

| HISTORY |
The aircraft entered service in early 1937, soon seeing action in pitched aerial battles at the start of the Second Sino-Japanese War, including air-to-air battles with the Republic of China Air Force's Boeing P-26C Model 281 "Peashooters" in what was the world's first-ever aerial dogfighting and kills between monoplane fighters built of mostly metal.
Chinese Nationalist pilots, primarily flying the Curtiss Hawk
III, put up a valiant fight against the Japanese, but the A5M was the better of
almost every fighter aircraft it encountered. Though armed with only a pair of
7.7 mm machine-guns, the new fighter proved effective and damage-tolerant, with
excellent maneuverability and robust construction. Later on A5M's also provided
much-needed escorts for the then-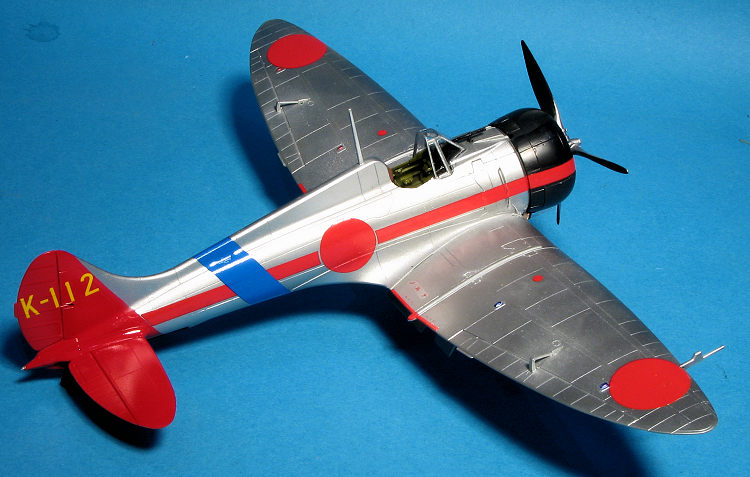 modern but vulnerable Mitsubishi G3M bombers.
The Mitsubishi team continued to improve the A5M, working through versions until the final A5M4, which carried an external underside drop tank to provide fuel for extended range.
The A5M's most competitive adversary in the air was the Polikarpov I-16, a fast and heavily armed fighter flown by both Chinese Air Force regulars and Soviet volunteers. Fierce air battles in 1938, especially on 18 February and 29 April, ranked among the largest air battles ever fought at the time. The battle of 29 April saw 67 Polikarpov fighters (31 I-16s and 36 I-15 bis) against 18 G3Ms escorted by 27 A5Ms. Each side claimed victory: the Chinese/Soviet side claimed 21 Japanese aircraft (11 fighters and 10 bombers) shot down with 50 Japanese airmen killed and two captured having bailed out while losing 12 aircraft and 5 pilots killed; the Japanese claimed they lost only two G3Ms and two A5Ms shot down with no less than 40 Chinese aircraft shot down.
104 A5M aircraft were modified to accommodate a two-seater cockpit. This version, used for pilot training, was dubbed the A5M4-K. K version aircraft continued to be used for pilot training long after standard A5Ms left front-line service.
Almost all A5Ms had open cockpits. A closed cockpit was tried but found little favor among Navy aviators. All had fixed, non-retractable undercarriage. Wheel spats were a feature of standard fighters but not training aircraft.
 The Flying Tigers encountered the Type 96, although not
officially, and one was shot down at Mingaladon airfield, Burma on 29 January
1942.
Some A5Ms remained in service at the end of 1941 when the United States entered World War II in the Pacific. US intelligence sources believed the A5M still served as Japan's primary Navy fighter, when in fact the A6M 'Zero' had replaced it on first-line aircraft carriers and with the Tainan Kōkūtai in Taiwan. Other Japanese carriers and Kōkūtai (air groups) continued to use the A5M until production of the Zero caught up with demand. The last combat actions with the A5M as a fighter took place at the Battle of the Coral Sea on 7 May 1942, when two A5Ms and four A6Ms of the Japanese carrier Shōhō fought against US aircraft that sank their carrier.
In the closing months of the war most remaining A5M airframes were used for kamikaze attacks.
| THE KIT |
About two years ago, I previewed the earlier A5M2. This is what you might consider the base kit for the later A5M4. The details on the kit are really superb. I especially like that Fine Molds has molded several of the panels slightly differently to provide a sense of 'grain' in the metal sheets. It will be interesting to see how this turns out in the final build.
 The cockpit is very nicely done and has proper sidewall frame
detail as well as what few boxes were attached to them. There are decals to fit
on the instruments and one is provided with quite a bit of detail. All of this
is painted in what is listed as Mitsubishi cockpit color, though some bits are
in the metallic blue-green color. This latter color is used on the inside of
flap wells and such.
Fine Molds has produced an excellent engine that is complete with pushrod assemblies, intake and exhaust piping as well as the electrical harness. It fits into a three piece cowling that is split into upper and lower sections with a separate cowl flap piece. Wing flaps can be display raised or lowered.
The wheel
pants are two part and the wheels have grooves in them that prevents them from
rolling. You may have to insert these prior to closing the halves of the landing
gear legs so test fitting would be a good idea if you plan on leaving them off
until after painting. You can open holes for a
fuel tank, and while there are holes for a bomb rack, though there is no bomb on
the sprues. A full pilot figure is provided to man the
 cockpit. No belts are
provided, but the aftermarket folks can take care of that for you.
Instructions are mostly in Japanese, but should be no issue for most of us. There are several paint references offered, one of which is Tamiya and one other is obviously Gunze. Three options are all unpainted metal with blac engine cowlings. Two have red tails. First is the box art plane from the 14th Naval Group in China during 1940. Second, also with a red tail is a plane aboard the Kaga in 1939. Finally, one with a red fuselage stripe and kanji in the insignia is from the Naval Third Carrier Division in 1942. No red tail on this option. Decals are nicely done and any of the three will make for a colorful aircraft.
| CONSTRUCTION |
I bought three different boxings of the Fine Molds A5Ms and figured I may as well build one. As I had a bunch of aftermarket decals for this, the A5M4 was chosen. First thing I did was to scope out the instructions to see what could be assembled prior to painting. Much easier to glue plastic to plastic than to scrape paint away first.
 Unlike most airplane kits, you actually build the wings
first. This is because the floor of the cockpit is molded into the upper wing. I
first opened up the holes for the drop tank and then cemented the wings. It was
here I realized I was in for a treat. The fit of the wing halves is nothing
short of superb. In fact, most of the rest of the fit was the same as I
continued with the build. Tamiya could not have done better.
With that done, I assembled the seat and frame bits to the rear bulkhead and glued the instrument panel to its backing. These and several other interior parts were then painted Mitsubishi interior green using AK Interactive acrylics. I also painted a number of other bits with Alclad II metallic colors such as the various engine parts and the wheel hubs. I also assembled the main gear halves (they are keyed) and the drop tank. The section that carries the guns just behind the instrument panel parts was then brush painted with White Ensign aotake.
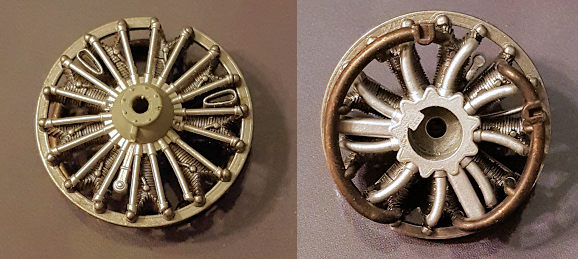 Meanwhile, I
assembled the engine. I had to repaint a few bits after cleaning up the sprue
stubs, but nothing major. Fit here is quite good. I noticed that the pushrod
tips are slightly cupped to fit onto the rocker arm caps. You can see one in the
photo of the engine that I didn't get into place. It was easily clicked into the
proper location.
I then applied the various instrument decals. Mr Mark Softer
was used to get them to snuggle down. Eventually all the bits were glued in
place, including the seat cushion, completing the coc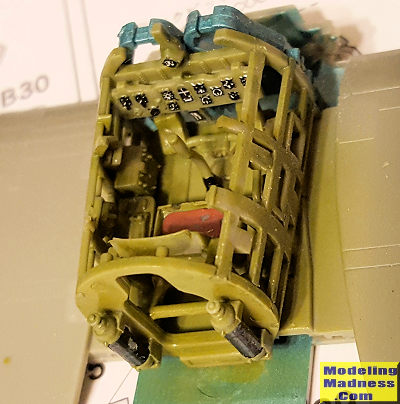 kpit assembly. I did not
use any aftermarket belts nor did I make any. During this time I assembled the
fuselage halves. The wings and cockpit assembly can be installed from below.
Before installing the wings, I dealt with some thin seams on the fuselage. The
wings are a superb fit and a pleasant change from some other builds I've done in
the past. Tailplanes took a bit of fussing to get them to properly interlock,
but once they did, it was easy to keep them aligned. At this time, I installed
the landing gear minus the wheels. These are keyed in such a way that if you get
the wrong one installed, it is quite obvious.
I then attached the guns to the cockpit opening. These are pretty much hidden so all you really have to paint is the part that sticks into the cockpit. The upper fuselage section was then attached. During this time, I completed the assembly of the engine. This consisted of trapping the engine in the upper and lower cowling halves. There is a circumferal groove inside the cowling where the engine fits. Then the rear cowl flap piece can be attached followed by the two exhaust stubs. This can be set aside until the end of the build but it is a good idea to test fit it to be sure the guns will stick through OK.
| COLORS & MARKINGS |
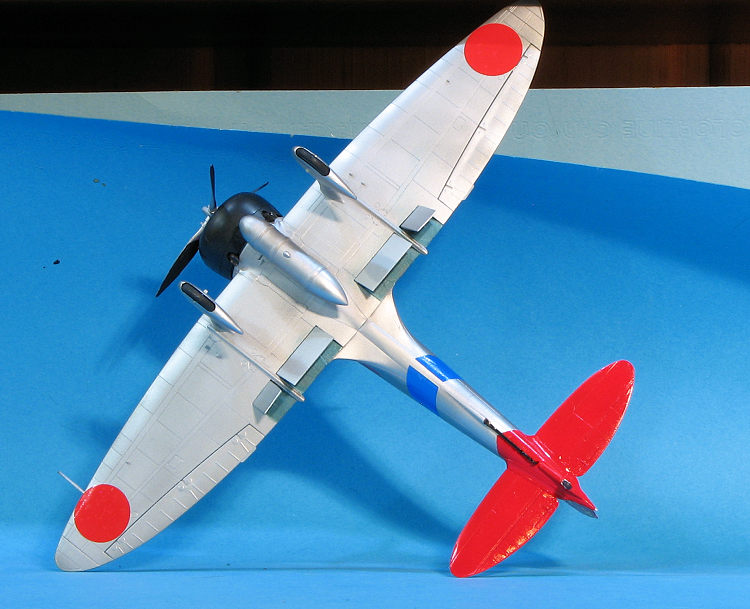 With the
airframe painted, I painted some of the smaller bits and installed them.
This included the wheels, the tail hook, the bomb rack, the radio mast and
the pitot tube. The black items were brush painted. The formation lights
were painted using a sharpie. Then the difficult part, picking a set of
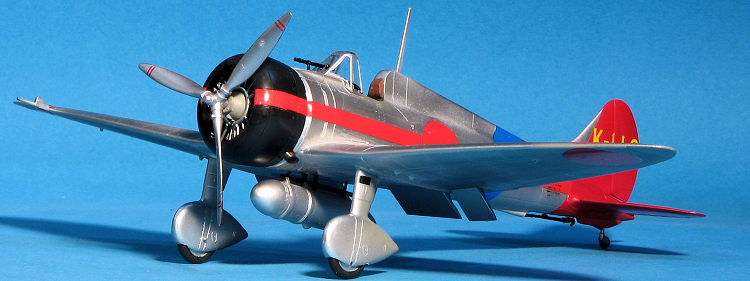
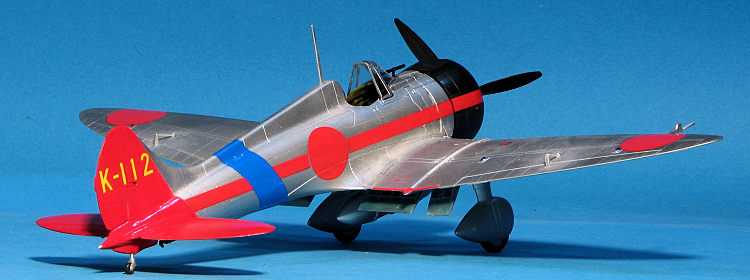
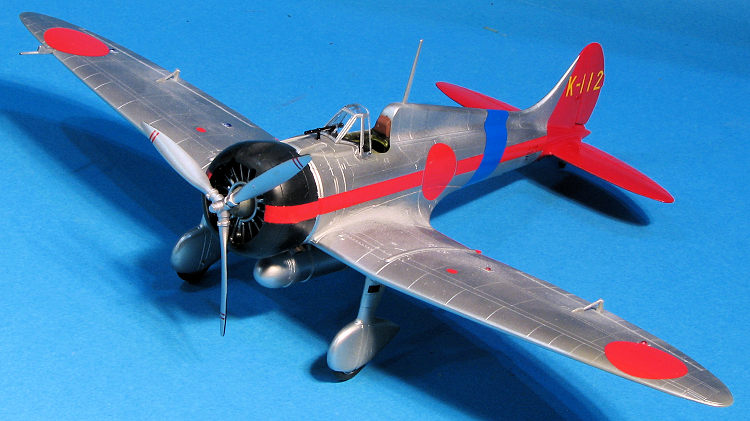
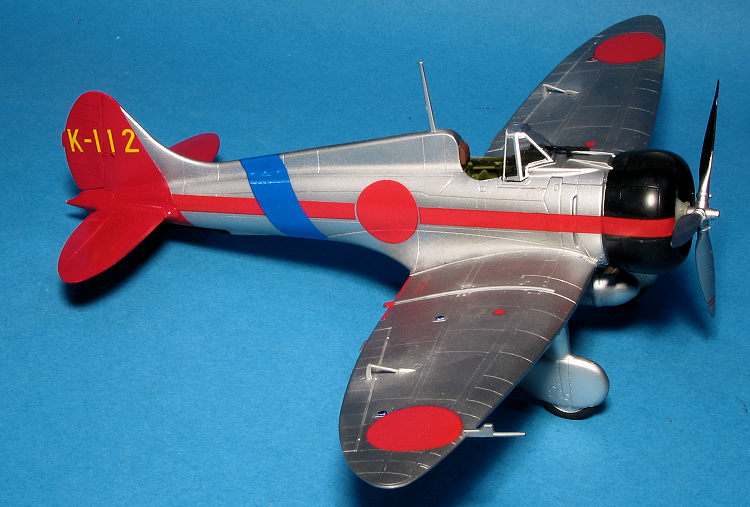
markings. I chose an aircraft from the Kaga with the red fuselage stripe and
the blue fuselage band from Lifelike sheet 48-053.
 | CONCLUSIONS |
I have not built or even held the Wingsy kit, but frankly, I have no idea what they could have that isn't available in this kit (perhaps a higher parts count). The kit fits superbly, the kit decals work well (I used the instrument ones), and the kit is not expensive by today's standards. I am completely sold on the newer releases from this company and I know that if you build one, you will agree.
| REFERENCES |
https://en.wikipedia.org/wiki/Mitsubishi_A5M
27 July 2018 Copyright ModelingMadness.com. All rights
reserved. If you would like your product reviewed fairly and
fairly quickly, please
contact
the editor or see other details in the
Note to
Contributors.