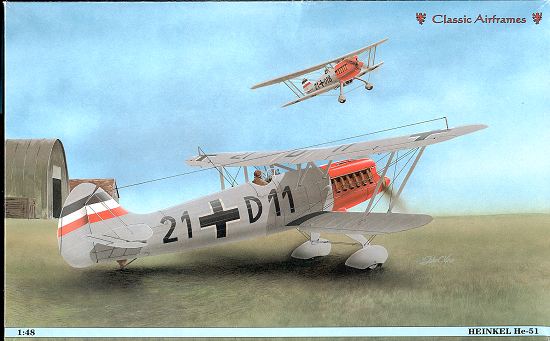
KIT: | Classic Airframes 1/48 He-51A |
KIT # | 407 |
PRICE: | $29.95 |
DECALS: | 1./JG 132 (1935) & 1./J 88 (1937) |
REVIEW BY: | |
NOTES: | Short Run |

HISTORY |
The Heinkel He-51 was one of the Luftwaffe's first really effective fighter aircraft. Though outclassed in almost all respects by the aircraft of other nations and by the Arado Ar-68, it was, nonetheless, a good aircraft and the basis for many of the fledgling air arm's first fighter squadrons. Rugged, somewhat forgiving and highly aerobatic, the He-51 was the first fighter aircraft that many of the later aces of the war were to fly.
The He-51 was sent to Spain in 1936 to bolster the Spanish Nationalists and to give German pilots and crews the opportunity to test their aircraft in combat situations. While doing fairly well, it was soon obvious that the Heinkel fighter was outclassed by the Republican and Russian pilots flying the I-15 and I-16 fighters. Even the Italian Fiat CR.32 was a superior aircraft to the Heinkel. Where the He-51 finally found it's place was as a ground attack aircraft. Led by Oblt. Adolph Galland, the tactics of cooperation with ground forces were developed that served the Germans so well in the lightning campaigns in Europe in 1939 and 1940.
THE KIT |
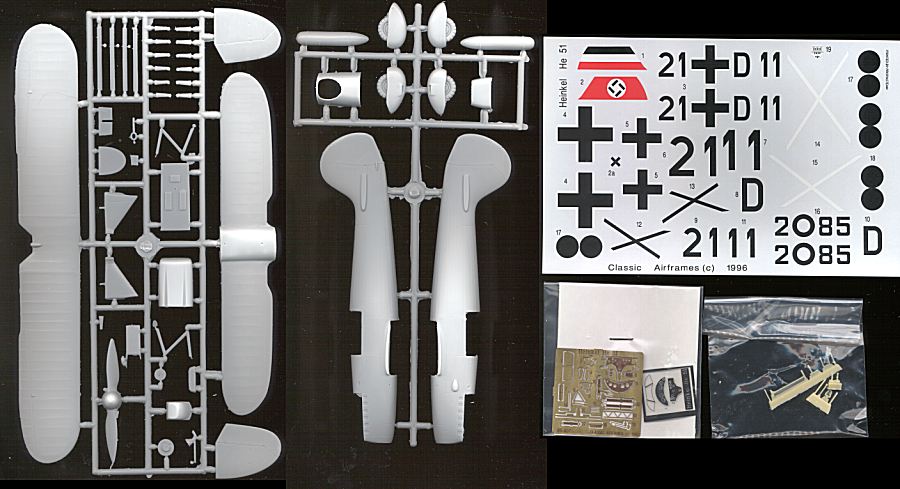
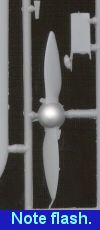
This is Classic Airframes' seventh kit and was released in 1996. What one gets with the kit are two sprues of somewhat flashy medium grey plastic with a fret of etched brass. In addition one gets some resin bits, a decal sheet for two examples by Propagteam, and a color sheet for the two paint schemes. The instruction sheet is a single sheet folded to give four pages. The first page is a parts diagram, the next two are construction blocks. They are not the most logical in sequence so you really need to pay attention to what you are doing. There is a painting guide with all the paint colors called out by letter. Interestingly, there is a paint letter called out in the instructions that has no guide. This is color 'E' and is for most of the interior as well as the seat harness. I can only assume that it is RLM 02 green-grey. The rigging diagram is especially helpful for, if you are like me, rigging isn't your most beloved talent!!
CONSTRUCTION |
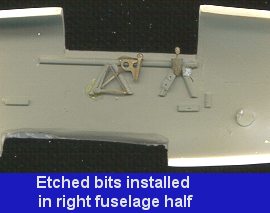
For a kit like this, the first place is the cockpit. This is where much of the etched brass will be place. First, I painted the cockpit plastic bits RLM 02 grey to get an idea of what it would look like. Next, seat and back wall were attached to the cockpit floor, followed by the two resin parts that make up the control column. This was followed by the etched rudder pedals and control cable. The seat had its etched belts attached, but not painted. The right cockpit sidewall gets four controls and indicators of etched brass installed at this time as well. Then the right fuselage half and the cockpit floor get another coat of RLM 02.
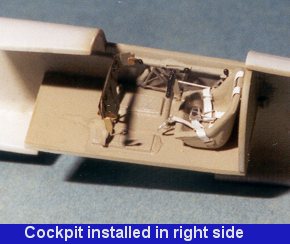
Upon completion of that, the various interior bits were painted then drybrushed before the cockpit floor was glued into the fuselage half. Then the fuselage halves were glued together and clamped (because the tail sections were a bit warped). Once that was dry, the cockpit covering (with the upper instrument panel already installed) was glued in place as was the engine cover. Before gluing on the engine cover, I opened up the propeller shaft hole and installed the prop backing plate.
Then the lower wing was installed. I had foreseen a poor fit for most of the parts and I was right. After those components had dried, the gross fit problems were hacked down with a 150 grit sanding stick and the lesser ones were slathered liberally with filler.
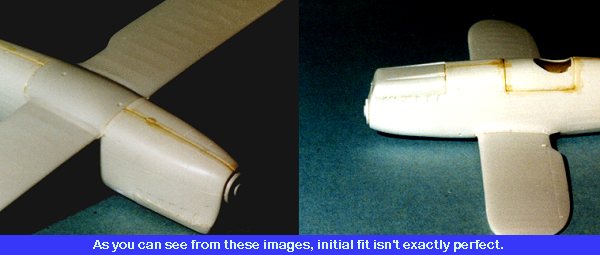
Aftera flurry of filler dust, the fuselage shape was pretty well clean. A bit ofrescribing of panel lines and opening of the two small intakes just above theprop was needed before continuing. The tailplanes were then installed and fitrather well. Next the landing legs were installed and any gaps in them and thetailplanes were filled and cleaned up. Then the wheels were installed on thegear legs and let to dry. Naturally, I got the legs a bit crooked so theaircraft doesn't sit perfectly level (rats!). Holes were drilled in the tailsections for the upcoming rigging and a few holes were also drilled in the lowerwings for that purpose. While this was going on, the tailskid was installed andany gaps filled and sanded smooth. Final item to add prior to painting is theradiator assembly between the legs. Now the fuselage is curved at this point andthe radiator is flat-bottomed. This meant quite a bit of sanding and cutting wasrequired before a reasonable fit was accomplished. It was then glued in place,and filler used to take care of the resulting gaps on the side. Now on topainting......
PAINT & DECALS |
I wasn't sure if I wanted to do a prewar Luftwaffe or SpanishCivil War version. The benefit of the prewar scheme was that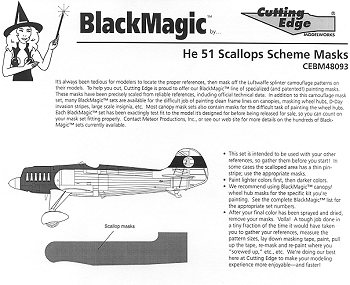 they are colorfuland the aircraft is basically overall RLM 63 light grey. The benefit of theSpanish Civil War version is a neat camouflage scheme and no real need to do anymajor masking for the fuselage colors as the other scheme requires. After muchthought, I chose the overall grey scheme. This was enhanced by the discovery offuselage masks by Black Magic especially for the colorful schemes. I decided touse Aeromastersheet 48-456, which includes two very colorful schemes. I chose theblue-trimmed aircraft from JG 135 as I didn't want to have to mask for the whitestripes on the green JG 137 scheme!
First of all, the airframe had to be painted overall RLM 63. Thecockpit was filled with tissue and then the airframe was painted using Xtracolorgloss paints. I really love this paint, even though it does have a fewdrawbacks. One is that any adhesive, be it regular glue or superglue causes thepaint to curl up like crazy. The other is that getting a proper mix isdifficult. One day you mix a batch and it dries in a few hours, The next day youmix it the same and it takes weeks to dry! Well this batch was dry to the touchin just a few hours.
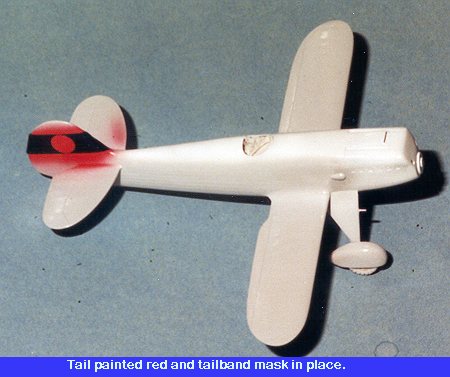 The next thing was to paint the tail red in preparation for thetail band mask. I used Tamiya Acrylic red for this purpose. Aeromaster does giveone the decals for this, but I figured I spent the money on the masks so shoulduse it. Once the paint was dry, the mask was applied. It sticks very well,though it wasn't a perfect fit. Fortunately, there is lots of extra maskingmaterial on the sheet. The instructions state that once the packet is opened,the stuff has a shelf life of about a year. Appears I'll be doing another He-51!
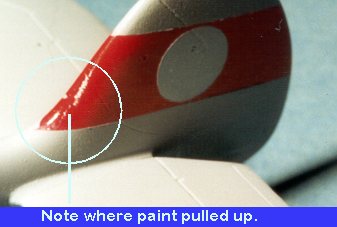
Once the mask was in place the tail was painted with RLM 63 greyand then the center was painted white. Asking Model Master white to cover glossred would be too much. Once that was dry the center was covered up and the tailsection resprayed with RLM 63. The next day the masking was taken off. Well,this stuff prevented any bleed through and also took up the red paint on thefront and rear of the tail section. That means a respray of that area in thenear future.
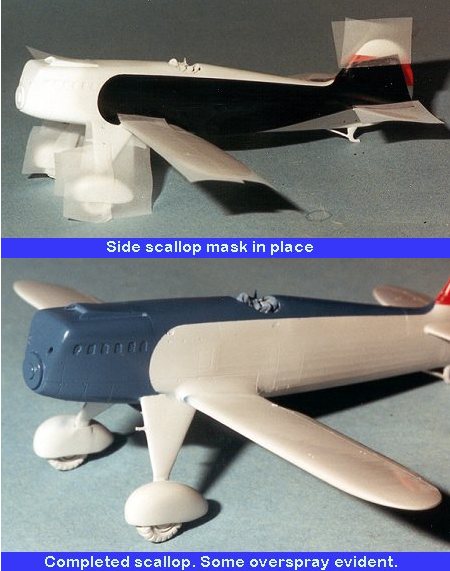 Now it was on to the big side pieces. Obviously these were notmeant for the Classic Airframes kit as they are too big to fit properly. Eachlarge side piece was juggled into position and then burnished down with afinger. The right side was particularly troublesome as there is a bulge right onunder where the leading edge of the mask goes. Anyway, the rest of the airframewas masked off with tape and then the nose section was sprayed with RLM 25 bluefrom Xtracolor. Once the paint was pretty dry the masking was removed. Overallit did a pretty good job, though there was some inevitable overspray and theright side scallop isn't very good, mostly due to the fuselage fairing that interferedwith it. A bit more masking and respraying was able to take care of the problems.Then removal of the masking tape also removed some of the blue on the spine andthat had to be redone. Once that was completed, it was on to the next step.
CONSTRUCTION,CONT'D |
CONCLUSIONS |
REFERENCES |
Review copy courtesy of me and my wallet!! If any of you manufacturers or shop owners want to send products for review and building, please
contact me.