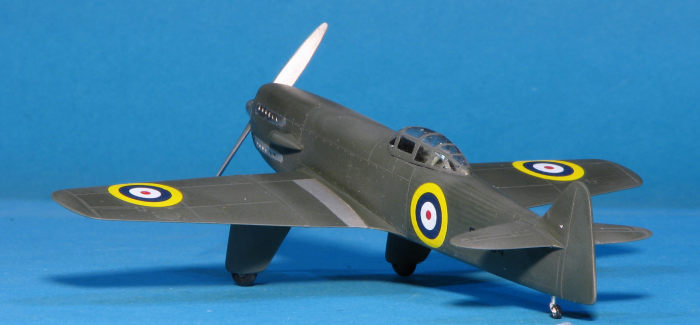
Planet Models 1/72 Martin-Baker MB.2
| KIT #: | 252 |
| PRICE: | $24.99 on sale ($61.95 SRP) |
| DECALS: | Two options |
| REVIEWER: | Scott Van Aken |
| NOTES: | Resin kit with vacuform canopy |
| HISTORY |
The Martin-Baker MB2 was a British private-venture fighter prototype based on a simple basic structure that had been developed in the earlier MB1 civil aircraft. Although briefly evaluated as a fighter by the Royal Air Force, the MB2 was limited in design potential and never entered series production.
James Martin, broadly responding to Specification F.5/34
for a fighter using an air-cooled engine for hot climates, designed a
fighter using the simple basic structure employed and developed in his
earlier MB1. Constructed of steel tubing, the MB2 incorporated many detailed
improvements which further simplified
 production as well as repair and
maintenance. Powered by a special Napier Dagger III HIM 24-cylinder H-type
engine of 805 nominal bhp, but capable of operation at 13 lb boost to give
over 1,000 hp for takeoff, driving a fixed-pitch, two-blade propeller, the
MB2 was capable of 300+ mph (480 km/h) speeds "on paper." The undercarriage
was fixed but cleanly faired in two trouser-type fairings, the port one
carrying the oil-cooler. A retractable undercarriage to improve performance
was "in the works" when the design was abandoned.
production as well as repair and
maintenance. Powered by a special Napier Dagger III HIM 24-cylinder H-type
engine of 805 nominal bhp, but capable of operation at 13 lb boost to give
over 1,000 hp for takeoff, driving a fixed-pitch, two-blade propeller, the
MB2 was capable of 300+ mph (480 km/h) speeds "on paper." The undercarriage
was fixed but cleanly faired in two trouser-type fairings, the port one
carrying the oil-cooler. A retractable undercarriage to improve performance
was "in the works" when the design was abandoned.
The fuselage lines were square cut and exceptionally clean, with almost constant depth from nose to tail. An unusual feature, at that time, was that the fuselage was slightly longer than the wingspan, a feature retained in later Martin-Baker designs, which contributed to good stability and control in yaw. The MB2 was the first British fighter to carry eight wing-mounted .303 Browning machine guns.
One of the hallmarks of Martin-Baker designs was the simple but efficient installation of main systems. The clean and orderly cockpit was set well back, allowing a good view downwards behind the wing. A crash post was fitted, which automatically extended to minimise structure damage and injury to the pilot in the event of a nose-over landing. A small, tapered tailplane was mounted on the top of the fuselage well forward of the stern post, while the fin and rudder combination was roughly triangular in side elevation. This arrangement placed most of the effective rudder area below the tailplane, thus providing an adequate balance to the keel surface and assuring good recovery from spins. In initial MB2 configurations, there was no fin and the rudder was mounted on the fuselage but lateral stability was unsatisfactory, with the fixed fin added later.
 The MB2 was first flown by Captain Valentine Baker at
Harwell on 3 August 1938 and initially tested with markings M-B-1 (G-AEZD
not carried). "The Aeroplane" stated, "in spite of its fixed undercarriage,
the MB2 had a performance as good as that of contemporary fighters and a
capacity for quick and cheap production by the simplicity of its structure
and easy assembly". Repair and maintenance were also simple, and these
factors might have influenced the authorities towards putting the MB2 into
production when the country's fighter strength was disproportionately low.
The MB2 was first flown by Captain Valentine Baker at
Harwell on 3 August 1938 and initially tested with markings M-B-1 (G-AEZD
not carried). "The Aeroplane" stated, "in spite of its fixed undercarriage,
the MB2 had a performance as good as that of contemporary fighters and a
capacity for quick and cheap production by the simplicity of its structure
and easy assembly". Repair and maintenance were also simple, and these
factors might have influenced the authorities towards putting the MB2 into
production when the country's fighter strength was disproportionately low.
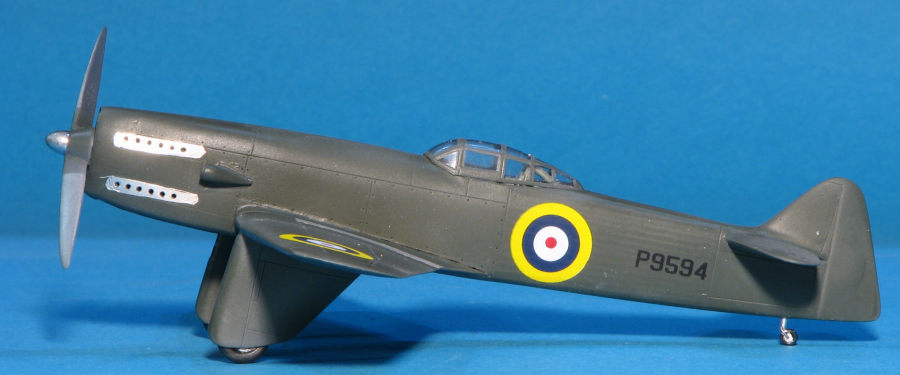
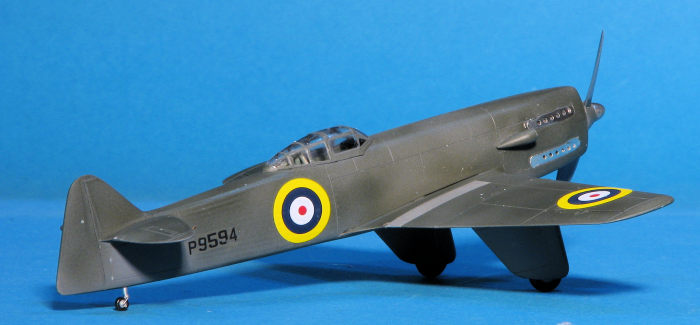
The MB.2 was subsequently acquired by the Air Ministry in June 1939 as P9594 and returned to A&AEE for a second assessment after modifications were made to tail control surfaces. The MB2 also spent some time at the AFDU, RAF Northolt, before returning to Martin-Baker late in 1939, where it still survived in December 1941, although probably flown little or not at all after the outbreak of war.
Around this time Martin was considering various other ideas, both for complete aircraft and for certain components. The aircraft designs included a twin-engined 12-gun fighter and a twin-engined multi-seat transport, both featuring the finless layout of the early MB2 airframe. In the fighter design, the trailing edge of the engine nacelles provided additional vertical control surfaces, and also incorporated the patented ducting system evolved by Martin to reduce drag caused by the engine exhaust. The most promising of the concepts became the MB 3 which would eventually spawn the superlative MB 5 prototype.
| THE KIT |
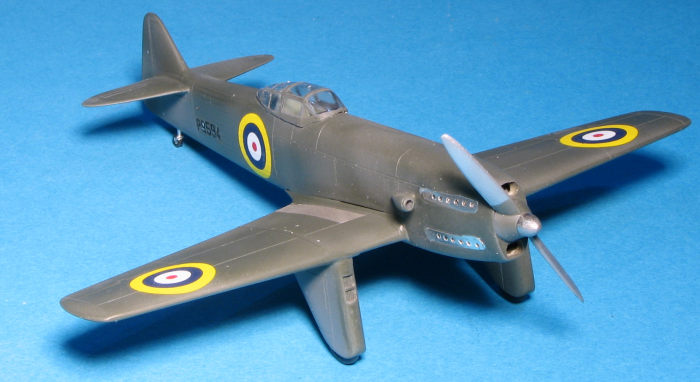
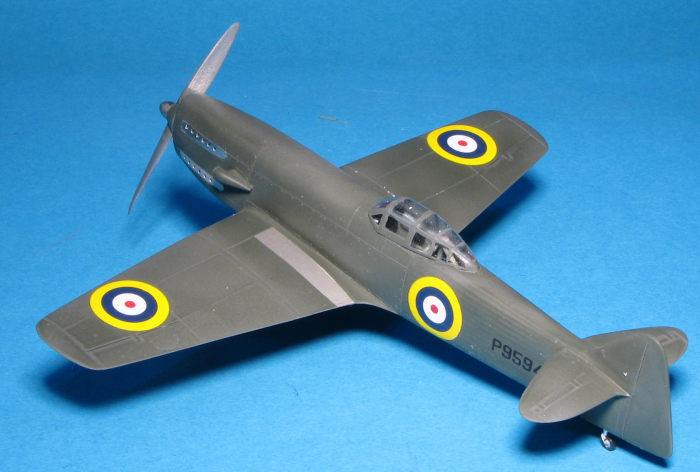
 This one comes with two fuselage halves complete with cockpit sidewall
detail. The wing is a single molding onto which the two wheel pants are
attached. Only enough wheel is provided that juts out of the gear pants. The
cockpit consists of a floor, seat, stick and rudder pedals. Belts would have
been nice, even as decals. There are separate tail planes and to do
the early and mid versions some saw work will be needed. For the fin-less
early version the fin/rudder will need to be cut away. For the mid section
with the smaller fin, the fusleage will need to be cut and the new
tail added on. The instructions would have you use the replacement tail to
do the fin-less version. Most of us will do the version that is easiest.
This one comes with two fuselage halves complete with cockpit sidewall
detail. The wing is a single molding onto which the two wheel pants are
attached. Only enough wheel is provided that juts out of the gear pants. The
cockpit consists of a floor, seat, stick and rudder pedals. Belts would have
been nice, even as decals. There are separate tail planes and to do
the early and mid versions some saw work will be needed. For the fin-less
early version the fin/rudder will need to be cut away. For the mid section
with the smaller fin, the fusleage will need to be cut and the new
tail added on. The instructions would have you use the replacement tail to
do the fin-less version. Most of us will do the version that is easiest.| CONSTRUCTION |
 With those in place, the roll bar was removed and glued in place. Then the
fuselage halves were cemented together. Note that with these sorts of kits,
a lot of test fitting needs to be done prior to applying cement. I then
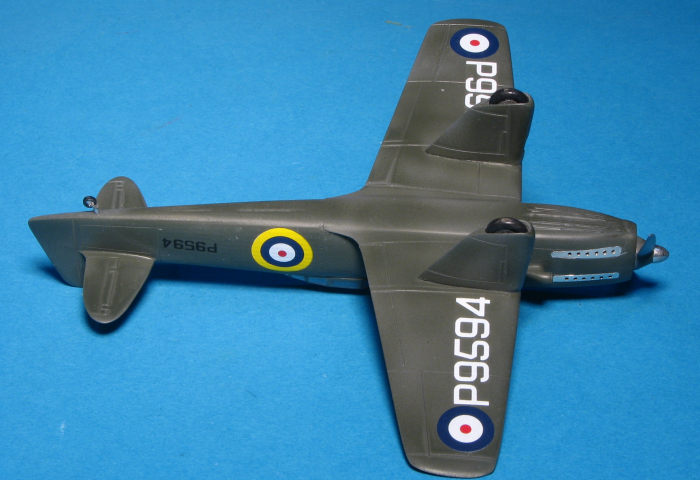
attached the wheel pants to the wing. It wasn't until after the glue had
firmly set that I realized I'd gotten them on the wrong side. One side has
what looks like a radiator on the leading edge. Oh well.
With those in place, the roll bar was removed and glued in place. Then the
fuselage halves were cemented together. Note that with these sorts of kits,
a lot of test fitting needs to be done prior to applying cement. I then
attached the wheel pants to the wing. It wasn't until after the glue had
firmly set that I realized I'd gotten them on the wrong side. One side has
what looks like a radiator on the leading edge. Oh well. | COLORS & MARKINGS |
 Anyway, once the aircraft was painted, I used Bare Metal Foil for the area
around the exhaust and the wing walk areas. The wheels were then painted and installed, though I
left off what looks to be a fairly fragile tail wheel until the very end.
The kit was then given a coat of clear gloss acrylic (Future) in preparation
for decals. I also took the time to paint the prop.
Anyway, once the aircraft was painted, I used Bare Metal Foil for the area
around the exhaust and the wing walk areas. The wheels were then painted and installed, though I
left off what looks to be a fairly fragile tail wheel until the very end.
The kit was then given a coat of clear gloss acrylic (Future) in preparation
for decals. I also took the time to paint the prop. | CONCLUSIONS |
Whether you are into prototypes or just like something a bit different from the norm, this is a kit you should consider. Due to the fairly simple construction, it is one that would be perfect for a first resin kit.
9 December 2021
Copyright ModelingMadness.com. All rights reserved. No reproduction in part or in whole without express permission.
If you would like your product reviewed fairly and fairly quickly, please contact the editor or see other details in the Note to Contributors.