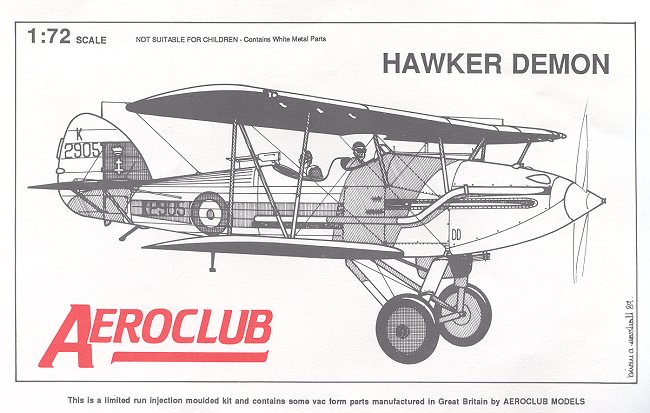
| KIT: | Aeroclub 1/72 Hawker Demon |
| KIT # | 6005 |
| PRICE: | $10.00 |
| DECALS: | See review |
| REVIEW & | |
| NOTES: | Multi-media short run kit |
| HISTORY |
The Hawker Demon was one of a long line of Hawker biplanes allbased on the Hart bomber of a few years before. This aircraft was areintroduction of the two-seat fighter to the RAF. The prototype was a convertedHart that had the supercharged Kestrel IIS engine installed as well as twoforward firing machine guns in place of the Hart's single Vickers.
The Demon and Hart looked very much the same as they werebasically the same airframe. There are a few distinguishing differences,however. The Demon has long exhaust pipes, a wider radiator, and the gunnersposition is different. In fact, some demons were fitted with a 'lobsterback'folding shield for the gunner to offer him some small amount of protection. TheDemon has a relatively long life for the period, serving from around 1934 until1939 when the last one had been pulled from service with the Auxiliary AirForce.
| THE KIT |
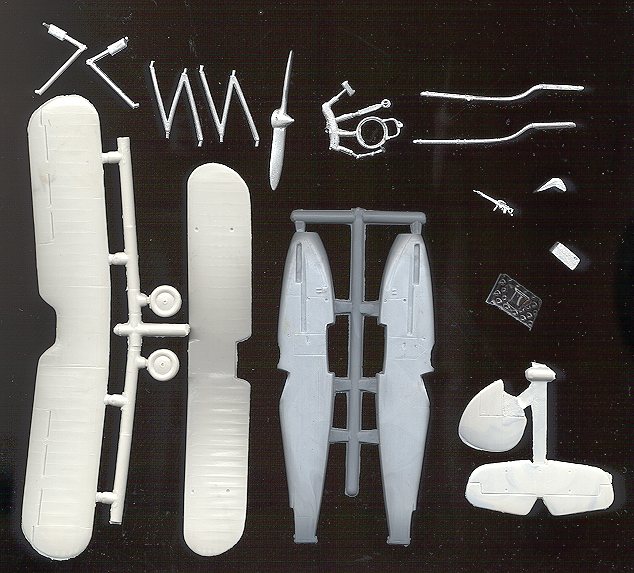
Aeroclub was probably one of the earliest producers of what wenow know as the multi-media kit. This kit has the basic airframe in low pressureinjected plastic, with most of the other bits in metal. You are given some strutmaterial to fill in the gaps of parts not otherwise provided. As you canimagine, the details are not bad for the medium and adequate for the job. Theplastic itself is a bit soft and very thick indeed; requiring the use of a razorsaw to remove the parts from the sprue.
There is some flash on all the plastic parts, but a quick swipewith some sandpaper should remove most of the offending material. The metalparts are well done and sufficiently detailed, though they also suffer from someflash and need the mold seams cleaned up. The metal part that is theunderfuselage radiator has no detail in it at all and just looks like a metalblock. The single vacuformed part is the small canopy. There is no spare. Youare required to make up much of the cockpit surroundings out of card, and allstruts but the 'N' and main landing gear struts will have to be formed from thelength of Contrail airfoil section that is given.
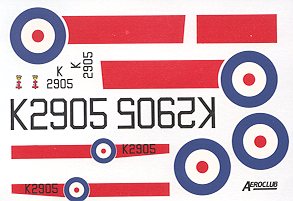 The instructionshave a nice three view drawing on one side, which also doubles as a decalplacement guide. The other is a rather generic sounding verbal constructionsequence. You know, the 'make the interior out of plastic card and install thevarious cockpit bits' sort of thing. Not too helpful for beginners, but not astumbling block for more experienced modelers. There are markings for oneaircraft, that of 41 Squadron and they are very good and up to the samestandards as Modeldecal sheets.
The kit isn't impossible to build as I built one many years ago.Here is a link to that review along with the rather poorpicture I took of the completed kit.
Definitely not a beginner's kit, but one that can be built byanyone with intermediate skills who has some short run kit experience.
Review copy courtesy of me and my wallet!
If you would like your product reviewed fairly and fairly quickly by asite that has over 1,300 visits a day, please contactme or see other details in the