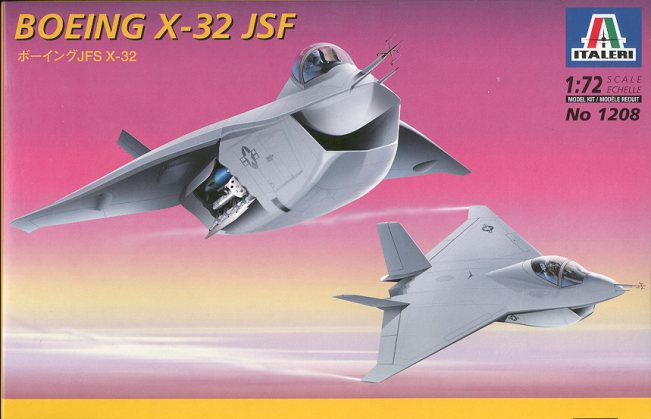
Italeri 1/72 X-32 JSF
| KIT # | 1208 |
| PRICE: | @$10.00 |
| DECALS: | One aircraft |
| REVIEW : | |
| NOTES: |
| HISTORY |

For an extremely well written preview of this kit as well as ashort history, I recommend following this link.Otherwise, it is on to the construction!
| CONSTRUCTION |
First thing I did was to take a look at the instructionsheet. Yes, I know real modelers don't use them, but I'm not real. Anyway, Inoted all the parts that had to be painted white or dark grey. This was mosteverything that would be part of the wheel wells or weapons bay and theinterior. The exhaustareas were glued into the upper and lower fuselages and then painted a burntiron. There are two small sawtooth pieces that fit in the fore and aft sectionof the weapons bay. Those were glued in place and then the weapons bay gluedover them. The instructions don't have you do the weapons bay until just beforegluing the fuselage halves together, but now seemed like a good time to do it. Duringthis time, the exhaust areas were glued into the fuselage halves and paintedburnt iron. The aft engine compressors were also painted this color with thefront compressor painted aluminum and washed with black. This was glued to theend of the intake and the exhaust areas was then glued to the back of thekit. Next, the interior was painted Dark Sea Grey with ablack instrument panel and side consoles. This was then drybrushed to bring outany details, and the cockpit was glued to the upper fuselage section. Thispretty well finished all the bits and pieces that needed to be installed in thefuselage. I wasn't sure if this beast was going to be tail heavy sosome weight was superglued around the intake trunking. Then the front compressorsection was glued to the back of the intake and in the rear, the exhaustsection, painted in burnt iron, was glued in place. Now the fuselage halves wereready to be glued together. This kit was moving along rather smartly. Duringsanding I noticed that neither one of the fuselage sides on the front sectionbelow the canopy seemed to have held and they gave way under sanding. Because ofthe design of the plane, one cannot use clamps to hold things down. There are noreally flat surfaces. These joins had to be hand clamped while they were reglued. Once the sanding was all done, the outside of the exhaust waspainted a dark metallic color. Then it was time to add some more bits. The firstthing I did was to add the cooling scoop on the left fuselage side. Flipping theplane over, the HUD was installed, then the canopy parts were masked and thewindscreen glued in place. Next the tails were added and the kit set aside todry. The seat was also painted at this time and when dry, was glued in thecockpit before the canopy was glued on. The seat in this kit is really verybasic and mine had a chunk taken out of the top of it by it breaking loose fromthe sprue during shipment. After all these bits had been glued inplace and dry, it was time to stuff the wells and intakes with tissue and headfor the paint shop. Once those bits were painted white, it was easierto see mold seams and ejector pin marks. Boy, are there a lot of the latter.Every gear and bay door had at least two and some of them four, all on theinside, thankfully, but there nonetheless. Those were either filed, filled orforgotten and the areas repainted as needed.

Upper fuselage 
Lower fuselage The upper and lowerfuselage section were then mated to each other. Fit here is not really that goodat all. I had some trouble getting the nose sections to align. It seems thelower section is a bit wider than the upper. Fortunately, things are flexibleenough to finally get them to mate, but there is quite a bit of overhang of theupper fuselage once the alignment pins are mated. There is also a rather largegap at the leading edge of the wings. The only cure for this is filler. As youcan see by the image, there was little that was not covered with putty.Fortunately, the detail, such that there is, can easily be rescribed and if thisis as bad as it gets, then things are looking up. From the looks of things, thisplane will be even uglier than is shown on the box art!


| PAINT & DECALS |
Though the instructions called for FS 36375, I found that amongst the hundredsof bottles and tinlets of paint that I had, this color was not to be found.Well, it is an X plane and I have yet to hear of an aircraft model not winning acontest because the grey was the wrong shade so I picked FS 36307, Medium SeaGrey, for the color. This has a slight Themodel was then sprayed with a gloss clear acrylic (Future) in preparation forthe decals. There really are not much to the kit decals and since this is aprototype, much is not expected. Aside from national insignia (which theinstructions would have you put on both upper wings----NOT), there are only afew manufacturers decals and no horde of stencils that are so common within-service jets today. The decals are very good and succumbed to Solvaset withno problems. Then it was back to the construction mode.  Before painting the kit, I had a real quandary. Should I do it as the real onewill be or should I get creative and do an 'in service' version. After muchthinking, I realized that this was only a test vehicle and that the finalproduct, if it won the competition, would probably be a different beast. Withthat knowledge, I proceeded to paint the kit with an overall grey scheme. Allthe spots I didn't want painted were masked off with tape or with damptissue.
  greenish tinge to it that will set themodel apart from all the bluish grey jet fighters around.
| CONSTRUCTION CONTINUES |
Early in the construction, I decided not tofit the weapons into the bay until this stage. Now I was thinking that perhapsthat wasn't such a good idea as the main gear is pretty close to the open bay.Regardless, I prepared the weapons, painting the JDAM a brown and the AAMRAAM awhite color. Both weapons are pretty poorly detailed and really just shapes.These were glued to their mounts prior to fitting them in the weapons bay. I hadthought about putting the AAMRAAM on the extended rail, but it was prettyobvious that there would not be room for it. The weapons with mounts were thenshoehorned into the bay. It wasn't the hassle I thought it would be, just neededto be done with tweezers. Finalbits were the nose probes. The attachment points for these were drilled out abit more and the probes glued in place. Once dry, the area was sanded a bit andthen repainted. Final step was to spray a matte clear on it and then remove thetape from the canopy. It was then that I noticed that I had forgotten the aftbulkhead to the canopy. Well, I'm not going to install it now, but will keep itin case the canopy ever pops off in the future.  With the decals firmly in place, I only had a few others bits to put on. Firstwas the landing gear. Really an easy installation, though I did have to open upthe placement holes a bit , something I had to do to all the holes in the kit.Once the gear was dry, the wheels were glued in place. So far so good. Then thenose gear doors. Super fit.

Looking from aft, note how
fuselage curves away from
straight door leaving a gap. 
Looking from aft, note how
the upper weapons bay door
hits inner gear door. 
Looking from forward, you can
see that the forward gear door
doesn't hang straight as it should. Now for the poorest fitting parts of the whole kit; the main gear doors andweapons bay door. Sorry folks, but these bits didn't fit as advertised exceptfor the small inner gear doors, which were no problem. The outer doors look asif they should interlock with each other so I installed the forward door first.The pegs just don't reach the slots they are designed for. However, it doesn'tmatter as they won't glue in at the angle desired. When the aft outer door isput into place, it totally disrupts the position of the forward door and doesnot overlap it as designed. This means that the forward door will need to beglued at a more acute angle to the wing than desired to get them to both inplace.
 Now that the gear doors are in place, it is time to hit on the weaponsbay doors. Thanks to the landing gear, there is no way that the upper door canbe open as much as one would desire. This is also why the extended rack won'tfit. It is glued in place as open as it will get. I'd hate to be a weaponsloader on this thing!! The lower door also won't fit well. The lower hingecurves and the door is straight. It will take two gluing sessions on the lowerdoor, the second with superglue to get a fit. I did not install the small windspoiler in the forward section of the bay. Were I to build this kit again, I'ddo it with the weapons doors closed. It will overcome all sorts of problems.
| CONCLUSIONS |
Despite the main gear doors, I am quite pleased with the kit.The fit is very good, the subject is unusual, and it does not have a plethora ofsmall bits that are endemic with current 'multi-version' kits. This is the kindof kit that even a beginner could build with no real problems. With the seemingslump in new goodies from most main stream injected kit makers, I am glad to seethat Italeri is busy cranking out new models with great regularity. If this kitis typical of what is new from them, I'll be buying more of them.
For those wanting more information on the Boeing JSF, here is avery helpful link: http://boeing.com/defense-space/military/jsf/jsfphotos.htm

Review kit courtesy of me and my wallet!
Copyright ModelingMadness.com. All rights reserved.
Thanks to Kurt and Burkhard for helping me get this kit. I appreciate it.
If you would like your product reviewed fairly and fairly quickly, please
contact the editor or see other details in the
Back to Reviews Page 2017