| KIT #: | 12547 |
| PRICE: | $24.00 shipped from Korea |
| DECALS: | Two options |
| REVIEWER: | Scott Van Aken |
| NOTES: | 2017 boxing |
| HISTORY |
The Boeing F/A-18E Super Hornet and related twin-seat F/A-18F are
twin-engine carrier-capable multirole fighter aircraft variants based on the
McDonnell Douglas F/A-18 Hornet. The F/A-18E single-seat and F/A-18F tandem-seat
variants are larger and more advanced derivatives of the F/A-18C and D Hornet.
The Super Hornet has an internal 20 mm M61 rotary cannon and can carry
air-to-air missiles and air-to-surface
 weapons. Additional fuel can be carried
in up to five external fuel tanks and the aircraft can be configured as an
airborne tanker by adding an external air refueling system.
weapons. Additional fuel can be carried
in up to five external fuel tanks and the aircraft can be configured as an
airborne tanker by adding an external air refueling system.
Designed and initially produced by McDonnell Douglas, the Super Hornet first flew in 1995. Full-rate production began in September 1997, after the merger of McDonnell Douglas and Boeing the previous month. The Super Hornet entered service with the United States Navy in 1999, replacing the Grumman F-14 Tomcat, which was retired in 2006; the Super Hornet serves alongside the original Hornet. The Royal Australian Air Force (RAAF), which has operated the F/A-18A as its main fighter since 1984, ordered the F/A-18F in 2007 to replace its aging F-111 fleet. RAAF Super Hornets entered service in December 2010.
In September 2014, Boeing readied plans to close its St. Louis production lines for the Super Hornet and F-15 in 2017. Not surprisingly, thanks to the constant delays with the F-35, the plant is still
| THE KIT |
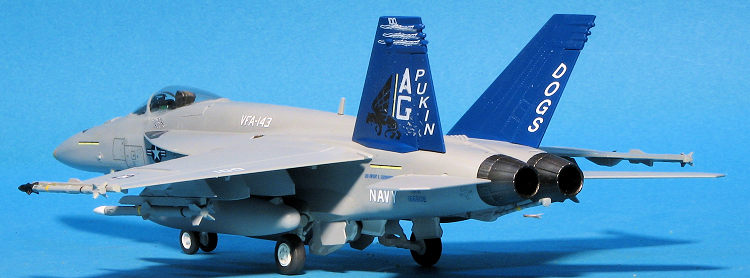
I bought this kit as I'd been told that this is more up to date than the Hasegawa super bug. Well, it does have the more recent protector grilles over the rear deck intakes that the Hasegawa kit does not, so perhaps that would be a good reason to choose this one.
 Interestingly, the kit starts you assembling the upper
fuselage. This contains the upper wings and part of the lower. There are two
lower wing/lerex pieces to put in place. There is a rear lower fuselage section
that includes the main gear and the gear wells are a separate piece. You are
also required to build up the engine intakes and install the landing gear legs
prior to trapping the horizontal stab when attaching the upper and lower
fuselage sections.
Interestingly, the kit starts you assembling the upper
fuselage. This contains the upper wings and part of the lower. There are two
lower wing/lerex pieces to put in place. There is a rear lower fuselage section
that includes the main gear and the gear wells are a separate piece. You are
also required to build up the engine intakes and install the landing gear legs
prior to trapping the horizontal stab when attaching the upper and lower
fuselage sections.
It is only then that you move on to the cockpit. This is the standard two seat tub with a two piece seat and control stick along with an instrument panel. There are five small decals to fit on the panel with one each for the side consoles. The lower forward fuselage also includes the nose gear well.
The nose is more than just the radome; basically everything forward of the lerex and a single piece. There is an insert for the upper fuselage behind the front seat that makes this an E model. There is a one-piece windscreen/canopy. To complete the airframe, you build up and install the nose gear, attach all the gear doors and the wheels.
 A supplemental instruction sheet covers the
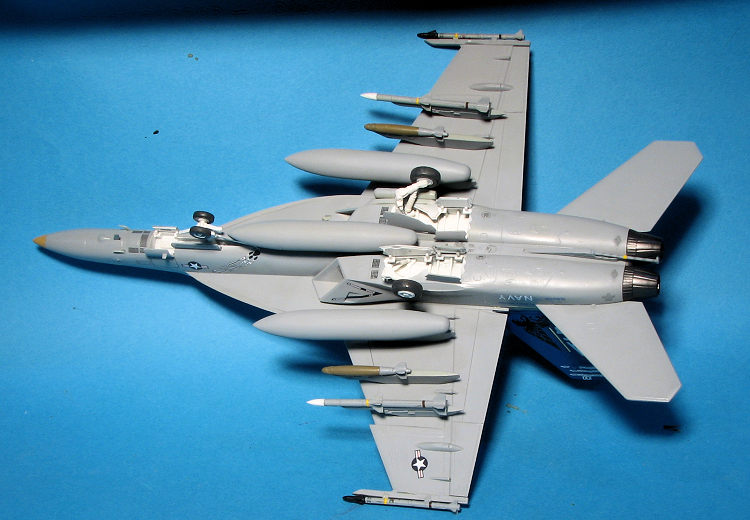
installation of the 'things under wings'. All the holes for attaching the pylons
are already open and quite large. This includes the fuselage centerline. If you
don't want a pylon, you'll need to fill holes. From the wing tip we have:
Sidewinder, AIM-120, Mk82 bombs, fuel tanks. A fuel tank is provided for the
centerline. The fuel tanks have the pylon molded to one tank half. I'm not jazzed
about the AIM-120s being in three pieces.
A supplemental instruction sheet covers the
installation of the 'things under wings'. All the holes for attaching the pylons
are already open and quite large. This includes the fuselage centerline. If you
don't want a pylon, you'll need to fill holes. From the wing tip we have:
Sidewinder, AIM-120, Mk82 bombs, fuel tanks. A fuel tank is provided for the
centerline. The fuel tanks have the pylon molded to one tank half. I'm not jazzed
about the AIM-120s being in three pieces.
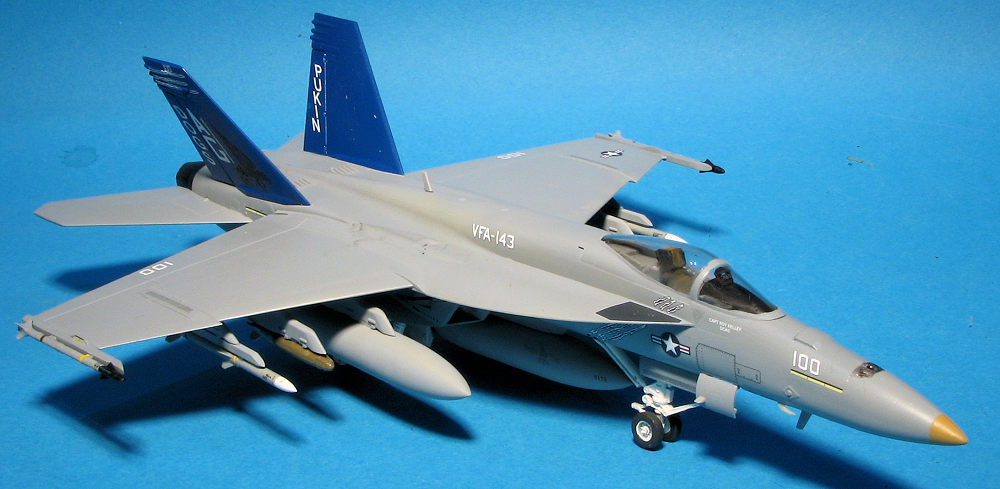
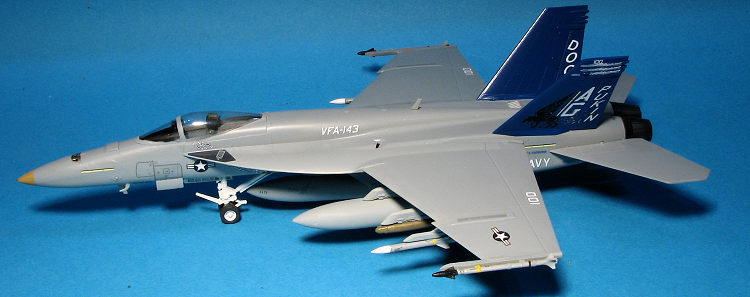
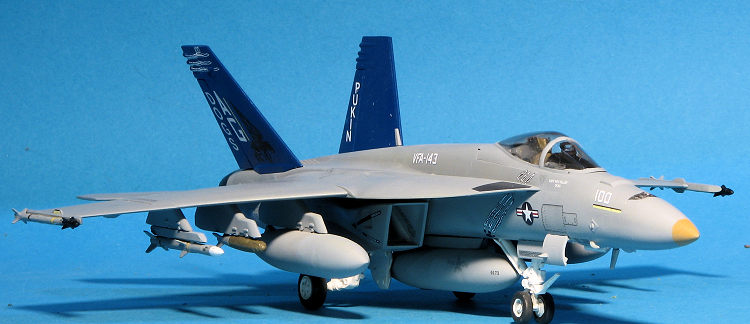
Instructions are very nicely drawn and you have options for two planes from VFA-143. Actually, they are both the same plane, which is the CAG bird. One from the 14th of September 2014 with the blue tail and the other from the 20th of September 2014 with a more conventional greys CAG scheme. The decals look to be very nicely done and if you don't like that scheme, there are a ton of aftermarket options.
| CONSTRUCTION |
I threw caution to the wind and actually decided to follow the instructions on this one. One does not start with the cockpit. Instead you add the aileron fairings to the underside of the outer wings, then attach the inner wings. But you knew that from reading the kit description. I can only say that the large pins and sockets do their job and the fit is actually very good. I also took this opportunity to paint all the gear well, door insides and intake trunking white while the cockpit area parts got a coat of dark gull grey.
The main gear well is a very positive and tight fit,
homing in with a 'click'. I found this to be a common thing when attaching other
parts so perhaps this could be considered a snap kit in that regard. The intake
trunking was glued in place and it was then that I started looking for photos as
the instructions are mum
 on the intake colors. I found some planes with all
white intakes and some with the forward part in the underside grey. I went with
the latter and that meant some masking.
on the intake colors. I found some planes with all
white intakes and some with the forward part in the underside grey. I went with
the latter and that meant some masking.
The intakes get some decals and here is where the instructions are vague. Firs of all, the numbers of the decals in the instructions don't match what is on the sheet. They are easy enough to figure out, but beware. Secondly, there are two drawings showing different decals going to the same place. I don't know if this is a 'use one or the other' situation so just used the first drawing decals. Then the upper and lower halves were glued together and clicked into place on the lower fuselage section. Next you are to install the landing gear. I decided not to as it makes masking so much more difficult.
At this point, the lower fuselage section is joined to the upper fuselage/wing piece, trapping the single piece horizontal stabs between them. Fit here is very good, though there is a seam that will be rather difficult to remove thanks to the stabs already being in place. On my next build of one of this series, I'll have to think about cutting the stabs so I can insert them later.
 Now it was time for the cockpit. The decals for the
instrument panels are simply black squares with white dots so those wanting
something a bit better looking will hand paint this area. Pretty much the same
for the instrument panel, though the screens are green. With that done, it and
the seat/control stick were glued in place and then put into the lower forward
fuselage piece. This was then glued to the rest of the airframe and the nose
piece attached. I found the nose to be a bit wider than the area on the fuselage
where it joined so some filler was needed. The upper forward fuselage decking
was added at this time as well. As I was planning on doing the blue tailed CAG
bird, I did not attach the fins as suggested. I did attach the wingtip missile
rails.
Now it was time for the cockpit. The decals for the
instrument panels are simply black squares with white dots so those wanting
something a bit better looking will hand paint this area. Pretty much the same
for the instrument panel, though the screens are green. With that done, it and
the seat/control stick were glued in place and then put into the lower forward
fuselage piece. This was then glued to the rest of the airframe and the nose
piece attached. I found the nose to be a bit wider than the area on the fuselage
where it joined so some filler was needed. The upper forward fuselage decking
was added at this time as well. As I was planning on doing the blue tailed CAG
bird, I did not attach the fins as suggested. I did attach the wingtip missile
rails.
At this time, I decided to skip ahead and not install the landing gear and doors and such. Instead, I glued together the drop tanks (which have the pylons attached). I also masked and attached the canopy after painting the anti-glare panel black and installing the gun sight. The gear wells were filled with tissue and it was off to paint.
| COLORS &MARKINGS |
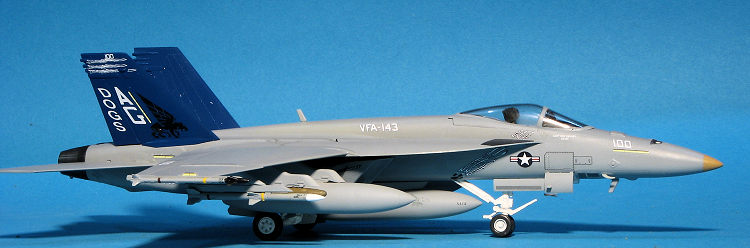
Modern Navy jets are two shades that are so close to each other with the paint I use (Model Master enamel) that they may as well be the same shade. One of these days I'll remember to darken the FS 36320 so that there is some contrast between the two. This time, there is darn little. So painting it was a breeze. Once dry, a clear coat was sprayed in preparation for the decals.
Meanwhile, I painted the fins using Tamiya Sky Blue. This sort
of matched one photo I found on the net of an earlier CAG bird, but the later
one was a darker shade so I added a bit of standard blue to it and reshot the
fins. Since these were gloss paints, I simply plugged in the fins to the rest of
the airframe. Landing gear were installed to keep the airframe off the ground.
All the attachment areas required some glue to help get the pins into the
sockets. Even then, a bit of additional grunt was needed. Same for the wheels. I
left the gear doors off until after the decaling was done as they would get in
the way of placement.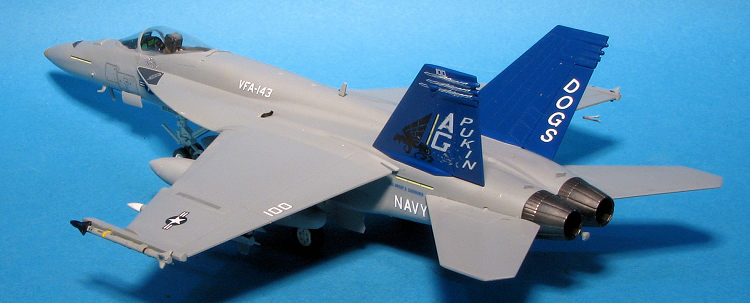 Same for all the pylons and missiles.
Speaking of, the missile have decals and these can be a bit of a chore to apply. Same for the tail hook stripes as the decal makers seem to have forgotten there is no way to wrap them around all of the shaft thanks to the way the assembly is designed. Keep your scalpel handy for cutting when applying this.
I slowly applied the rest of the markings. I left off a lot of the really small ones, especially as the upper surface grey markings practically disappeared when applied. Had I darkened the paint, they would have probably been more visible. The decals take a little while to come loose using cold water and one loose, have a rather short use time before the glue goes away. They are very thin and prone to folding over on themselves so be caution. I like that most of the various vents and such are as decals. I used Mr Mark Softer setting solution and that helped with the silvering.
With those in place, I added the gear doors followed by the pylons and ordnance. Again, all was a very tight fit. Antennas were last and I lost one of the pitot probes so had to make one out of stretched sprue. A coat of clear matte was Masking was removed from the canopy and I cursed at the leakage. That was cleaned up as best I could and that was it.
| CONCLUSIONS |
Now that I have actually built one of these, I have to
say that my overall impressions are generally positive. The way it is engineered
overcomes the horrible intake area fit of the Hasegawa kit, which I like. In
terms of 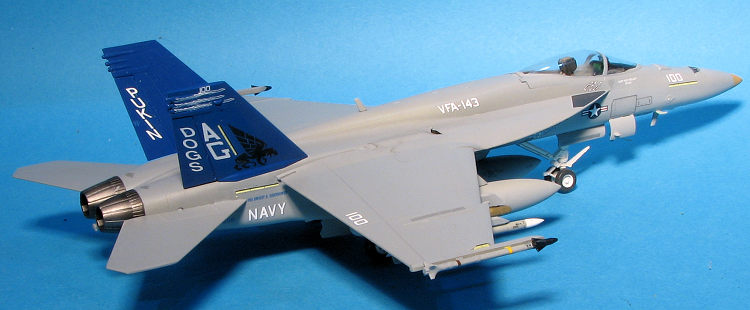 detail,
I'm a bit torn. Both look fine when done and really, this kit was less of an
actual construction hassle.
detail,
I'm a bit torn. Both look fine when done and really, this kit was less of an
actual construction hassle.
However, I'm not all that jazzed about not having the option to leave the pylons bare or empty. Most of the time these planes are devoid of ordnance and with this kit that option is not really available. It would have also been nice to have had the twin bomb rack for the middle pylon. The instructions worked well and the decals are quite good so there is that aspect of things.
Overall, I'll give it a positive rating. It certainly removes some of the frustrations of its competition, but at the cost of some rather hefty attachment points (particularly for the gear doors). I bought several of these newer tool kits over the last months and I'm sure another will be built.
| REFERENCES |
Copyright ModelingMadness.com. All rights reserved.
I bought this one to build for you so you could see what it is like.
If you would like your product reviewed fairly and fairly quickly, please contact the editor or see other details in the Note to Contributors.
Back to the Main Page Back to the Review Index Page Back to the Previews Index Page