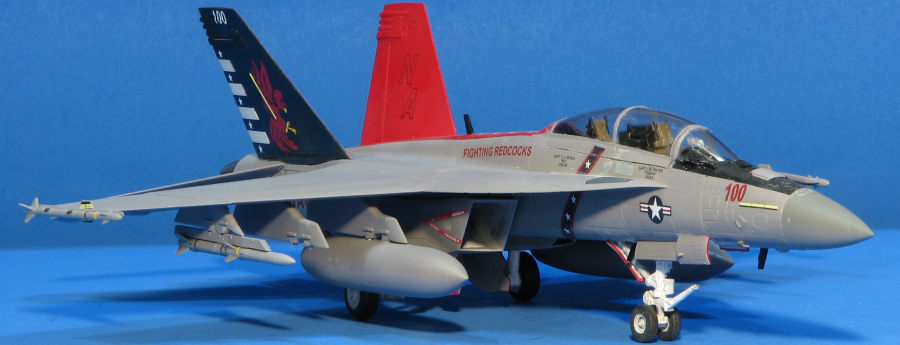
Revell 1/72 F-18F Super Hornet
| KIT #: | 03834 |
| PRICE: | $40.25 delivered |
| DECALS: | Two options |
| REVIEWER: | Scott Van Aken |
| NOTES: | 2022 release |
| HISTORY |
 With the need to develop a replacement for the F-18A/D
Hornet, McDonnell/Douglas (later Boeing) went to work. What they came up with
was basically a new aircraft that had a very strong resemblance to the earlier
aircraft. The single seat F-18E and two seat F-18F were larger and more capable
than the types they replaced.
With the need to develop a replacement for the F-18A/D
Hornet, McDonnell/Douglas (later Boeing) went to work. What they came up with
was basically a new aircraft that had a very strong resemblance to the earlier
aircraft. The single seat F-18E and two seat F-18F were larger and more capable
than the types they replaced.
The F-18F is, like the single seat F-18E, a multi-role aircraft and basically replaced the F-14 Tomcat. Gone was the long range Phoenix system, but it got excellent ground attack capabilities when those were needed. The F model also takes over the SAM suppression role and the airframe was developed into the EA-18G 'Growler' ECM platform. An advanced type has been developed, but there is no indication that the Navy will actually buy it. The Navy has made minimal purchases of the F-35C as the F-18E/F is longer ranged and has greater weapons carrying abilities, so there is always the possibility that more Super Bugs will be built.
| THE KIT |
The Super Hornet has been kitted in 1/72 by several companies over the years. For some time, the best one available was tooled by Hasegawa and that has been released in a number of boxings, each with different decals. While a nice kit, it does have some fit issues regarding the intakes that require some careful fitting. The Hasegawa kit also makes only an early version without the later fins on the aft upper fuselage exhaust vents. Later Academy produced a nice looking kit that does a later version and now we have this very nice kit from Revell, that also does a later variant.
The cockpit is standard stuff with a pair of cockpit tubs that use decals for the instrument and console panels. The seats include a molded on harness. The design of the intakes is quite similar to that of Hasegawa so we'll see how well this fits. Once the interiors and intakes are attached, the one piece horizontal stabs are put in place and the fuselage halves are glued together.
 Next the nose section is assembled and attached to the
fuselage. No nose weight is indicated. Fins simply slot into place along with
the exhaust (which are somewhat shallow). Landing gear are well done and can be
installed after painting. One thing I do not like is that all the gear doors are
molded as a single piece that need to be cut into the separate pieces.
Next the nose section is assembled and attached to the
fuselage. No nose weight is indicated. Fins simply slot into place along with
the exhaust (which are somewhat shallow). Landing gear are well done and can be
installed after painting. One thing I do not like is that all the gear doors are
molded as a single piece that need to be cut into the separate pieces.
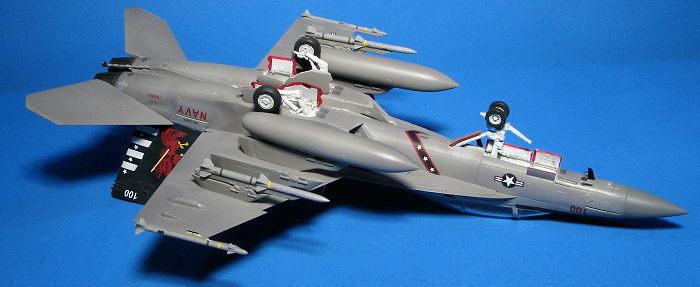
Wing tips are separate parts that cannot be posed folded. Holes are already opened for the various pylons. Things under wings are FLIR pod, fuel tanks, Mk 83 bombs, HARM missiles, Sidewinder missiles, and AMRAAM missiles. A boarding ladder can be built raised or extended. Canopy can be posed open or closed.
Instructions are very well done. All color references during the build are in Revell paint numbers with some needing to be mixed. Two markings options are provided. One is the box art plane from VFA-103, which has to be the most kitted set of markings ever done for the F model super bug. The black on the fins and fuel tanks will need to be painted. The second set is from VFA-11. The decals are very nicely done and include a full set of stencils. There are lots of aftermarket decals if you are so inclined.
| CONSTRUCTION |
 Since this is the newest tooling of a Super Hornet, I
was interested in seeing how Revell's kit would build. I did what most would do
with an unfamiliar kit. I followed the instructions. Buildin the cockpit was
quite easy. Fortunately I am familiar with the colors used in Navy cockpits so
did not have to decipher Revell's generic color information. In order to make
most of the tooling usable on both the E and F versions, the front and rear
cockpits are separate subassemblies. These fit into the lower fuselage. The
upper fuselage canopy insert is then installed.
Since this is the newest tooling of a Super Hornet, I
was interested in seeing how Revell's kit would build. I did what most would do
with an unfamiliar kit. I followed the instructions. Buildin the cockpit was
quite easy. Fortunately I am familiar with the colors used in Navy cockpits so
did not have to decipher Revell's generic color information. In order to make
most of the tooling usable on both the E and F versions, the front and rear
cockpits are separate subassemblies. These fit into the lower fuselage. The
upper fuselage canopy insert is then installed.
While all that is drying, the intakes are painted and assembled. Each intake has the first compressor stage installed and then this is attached to each outer intake section. These are then glued ontothe lower fuselage section. Then the upper and lower fuselage sections are glued together, trappin the horizontal stabilizers. Then the nose halves are assembled before gluing that to the rest of the fuselage. I have to say that so far, the fit has been quite good.
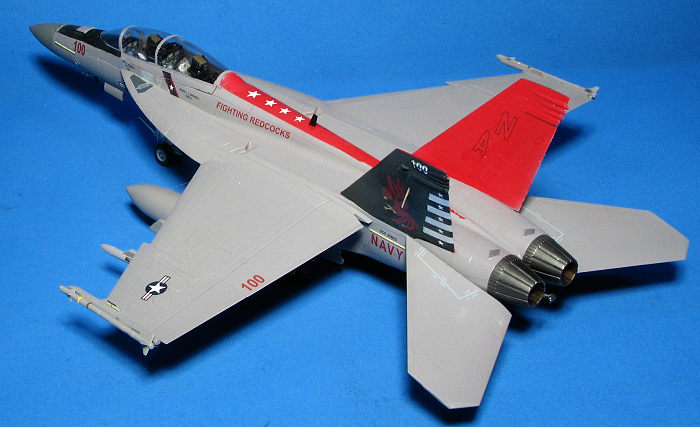
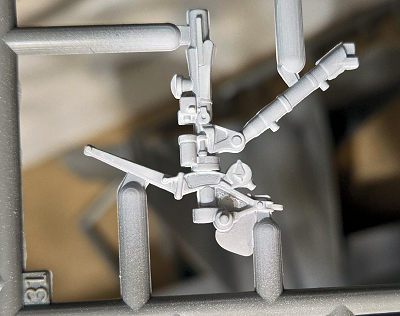 The next step is to attach the vertical stabilizers,
but I'd leave these off until after painting if one is doing a non-standard
scheme where they need to be painted a color other than the rest of the
airframe. I did not take this advice and wish I had. I would also leave off the
next step, which is the exhaust until near the end of the build.
The next step is to attach the vertical stabilizers,
but I'd leave these off until after painting if one is doing a non-standard
scheme where they need to be painted a color other than the rest of the
airframe. I did not take this advice and wish I had. I would also leave off the
next step, which is the exhaust until near the end of the build.
Next, one is to build up the landing gear. Here is one place where I had issues with flash with the nose gear particularly bad. I also had flash issues with the fins on some of the missiles and a few other parts. Not difficult to clean, but I shouldn't have to on a kit this new. Anyway, I got the gear built up minus the wheels and set them aside until after painting. Then jumped ahead to the end of the instructions and attached the windscreen and canopy in place. This was masked with strips of Tamiya tape.
| COLORS & MARKINGS |
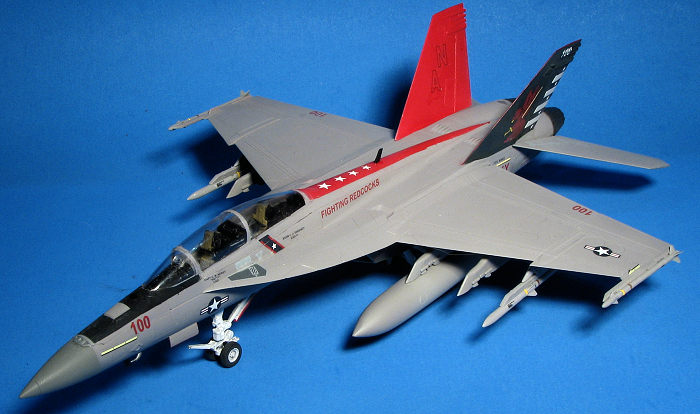
I first painted the gear wells with Tamiya matte white along with the inside of the gear doors. Then I masked the gear wells with Silly Putty. Then, using Hakata lacquer paints, the underside got a coat of light ghost grey (FS 36375). I also did the fuel tanks and outer gear doors at this time. Next the radome was painted dark gull grey (FS 36231) using Model Master enamels. Once that was good and dry, it was masked off. The inside of the fins and the outer rudders were then painted Tamiya matte white. It may have been wise to not attach the fins until after painting. Once the white was good and dry, the rudders were masked off. Then the inside of the fins and the spine were painted Tamiya red. Those areas were then masked when cured and the outside of the fins painted dark sea blue (FS 15044) using Testors Model Master enamels. Some masking was required on the fins and the red spine before applyin those shades. I then painted the underside FS 36320. As usual, the two shades are so close that they seem to be the same.
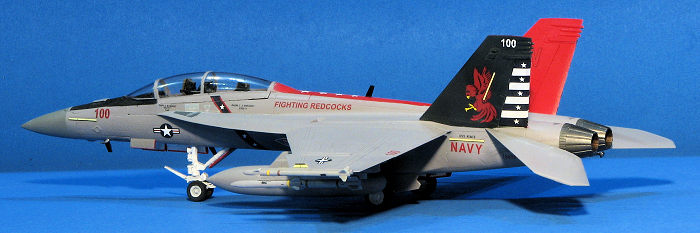 For this kit I used DXM Decals as they had a scheme
for VFA-22 which I liked. Not that the kit markings are bad, but every F-18F kit
has done them and I tend to shy away from done to death options. I chose one of
the CAG options and picked the one with the most color in it, hence the red and
blue fin shades. Personally, I wish the sheet included the spine red section as
that was a paint to do and I still got it crooked. I had assembled the fuel
tanks so those and the pylons got the underside shade.
For this kit I used DXM Decals as they had a scheme
for VFA-22 which I liked. Not that the kit markings are bad, but every F-18F kit
has done them and I tend to shy away from done to death options. I chose one of
the CAG options and picked the one with the most color in it, hence the red and
blue fin shades. Personally, I wish the sheet included the spine red section as
that was a paint to do and I still got it crooked. I had assembled the fuel
tanks so those and the pylons got the underside shade.
A clear gloss coat was applied and the airframe put on its landing gear. Decals went on without too much issue. They are quite thin and there are a LOT of small stencils. For the stencils, I basically used those on the kit decal sheet. Same goes for those that fit on the missiles. They are also quite good, but even thinner than the DXM decals.
The last steps were to cut open and install the gear doors. I used a Sharpie for the red warning markings. Missiles were cleaned up, painted, decaled and installed. I left one of the pylons empty as I didn't want to use the bombs. Then a coat of clear semi-matte was sprayed on and the masking removed. I wasn't happy with the fit of the canopy so I pried it off, cleaned up the join area of the old glue and then, using tiny dabs of super glue, reattached it. Looks a lot better than it was, but still isn't perfect.
| CONCLUSIONS |
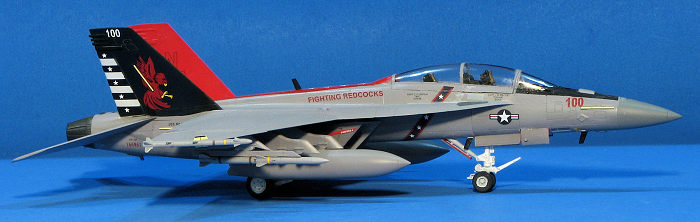 Overall, I'm happy with how things turned out. It took
me forever to actually build this. What I thought would be two to three weeks
was months. I did have one issue and that was with the main landing gear. The
attachment points are quite fluid so it was easy for me to get them to not match
up. Since main gear alignment is critical, I would have hoped that Revell would
have made this idiot proof. It is not. I did like the DXM decals and have a few
more schemes on there that I could build. Will I build another Revell F-18F? Not
sure. I have built the Hasegawa version, but not yet have I tackled the Academy
version so the jury is still out on that one. As side note, when I was in
the Navy, an NA tail code was reserved for Pacific Fleet squadrons that had not
yet been assigned to an air wing, hence the NA for not assigned. Guess things
have changed.
Overall, I'm happy with how things turned out. It took
me forever to actually build this. What I thought would be two to three weeks
was months. I did have one issue and that was with the main landing gear. The
attachment points are quite fluid so it was easy for me to get them to not match
up. Since main gear alignment is critical, I would have hoped that Revell would
have made this idiot proof. It is not. I did like the DXM decals and have a few
more schemes on there that I could build. Will I build another Revell F-18F? Not
sure. I have built the Hasegawa version, but not yet have I tackled the Academy
version so the jury is still out on that one. As side note, when I was in
the Navy, an NA tail code was reserved for Pacific Fleet squadrons that had not
yet been assigned to an air wing, hence the NA for not assigned. Guess things
have changed.
| REFERENCES |
https://en.wikipedia.org/wiki/Boeing_F/A-18E/F_Super_Hornet#
2 October 2026 Copyright ModelingMadness.com. All rights reserved. No
reproduction in part or in whole without express permission. If you would like your product reviewed fairly and
fairly quickly, please
contact
the editor or see other details in the
Note to
Contributors.