Minicraft 1/144 KC-135R
| KIT #: | 14708 |
| PRICE: | $44.95 SRP |
| DECALS: | Two options |
| REVIEWER: | Scott Van Aken |
| NOTES: | 2015 tooling |
| HISTORY |
The
Boeing KC-135 Stratotanker
is a military aerial refueling aircraft. It and the Boeing 707 airliner
were developed from the Boeing 367-80 prototype. It is the predominant
variant of the C-135 Stratolifter family of transport aircraft. The
KC-135 was the US Air Force's first jet-powered refueling tanker and
replaced the KC-97 Stratofreighter. The KC-135 was initially tasked with
refueling strategic bombers, but was used extensively
 in the Vietnam War
and later conflicts such as Operation Desert Storm to extend the range
and endurance of US tactical fighters and bombers.
in the Vietnam War
and later conflicts such as Operation Desert Storm to extend the range
and endurance of US tactical fighters and bombers.
The KC-135 entered service with the United States Air Force (USAF) in 1957; it is one of six military fixed-wing aircraft with over 50 years of continuous service with its original operator. The KC-135 is supplemented by the larger KC-10. Studies have concluded that many of the aircraft could be flown until 2040, although maintenance costs have greatly increased. The aircraft will eventually be replaced by the Boeing KC-46 Pegasus, though that will take a long time as the first production aircraft wasn't delivered to the USAF until January 2019.
The KC-135R is the result of a second engine modification program which retrofitted 500 aircraft with new CFM International CFM56 (military designation: F108) high-bypass turbofan engines produced by General Electric and Snecma. The CFM56 engine produces approximately 22,500 lbf (100 kN) of thrust, nearly a 100% increase compared to the original J-57 engine. The modified tanker, designated KC-135R (modified KC-135A or E) or KC-135T (modified KC-135Q), can offload up to 50% more fuel (on a long-duration sortie), is 25% more fuel-efficient, and costs 25% less to operate than with the previous engines. It is also significantly quieter than the KC-135A, with noise levels at takeoff reduced from 126 to 99 decibels.| THE KIT |
 The first thing that caught my eye was the big red 'All new tooling!' on the
box top. This is followed by 'Plus New "R" Engine Tooling!". Well, if it is
ALL new, wouldn't that mean the engines as well? Obviously why I am not in
advertising. However, it does bring up a point that there is an earlier
boxing of this, which by inference is the old tooling.
The first thing that caught my eye was the big red 'All new tooling!' on the
box top. This is followed by 'Plus New "R" Engine Tooling!". Well, if it is
ALL new, wouldn't that mean the engines as well? Obviously why I am not in
advertising. However, it does bring up a point that there is an earlier
boxing of this, which by inference is the old tooling. 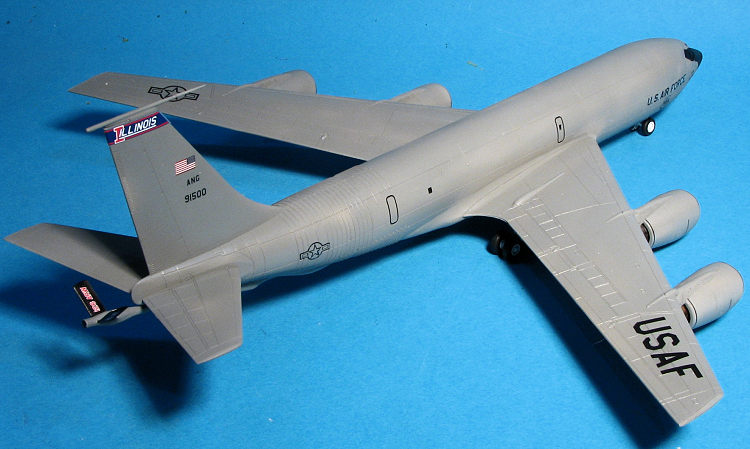 When building the main gear and completing the wells, Minicraft provides
three color options for the ballast tank in the main gear well. One will
also have to fold the outer main gear doors and a diagram is provided to
show how that is done. If one wants to model the plane gear up, there are
instructinos for that as well. A neat touch is the inclusion of a tail prop,
something that is often seen on fully loaded 135s.
When building the main gear and completing the wells, Minicraft provides
three color options for the ballast tank in the main gear well. One will
also have to fold the outer main gear doors and a diagram is provided to
show how that is done. If one wants to model the plane gear up, there are
instructinos for that as well. A neat touch is the inclusion of a tail prop,
something that is often seen on fully loaded 135s.
A nice addition to this kit are a pair of wing tip pods. These are not always carried so it is nice to have a choice in this regard. One also ha to do a bit of trimming to attach the APU exhaust port, which fits within the fuselage reinforcement bands.
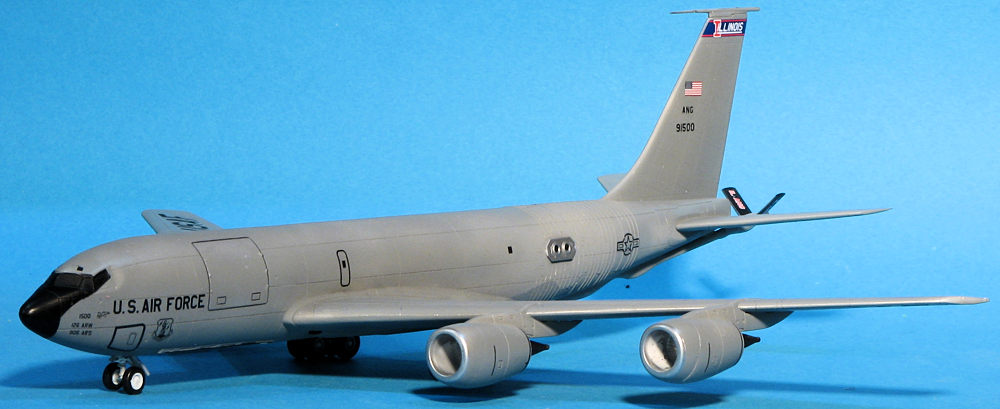
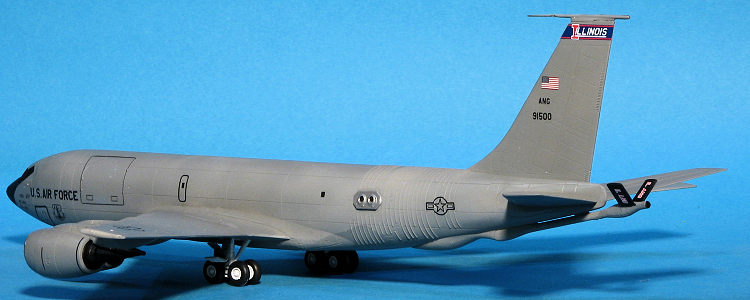
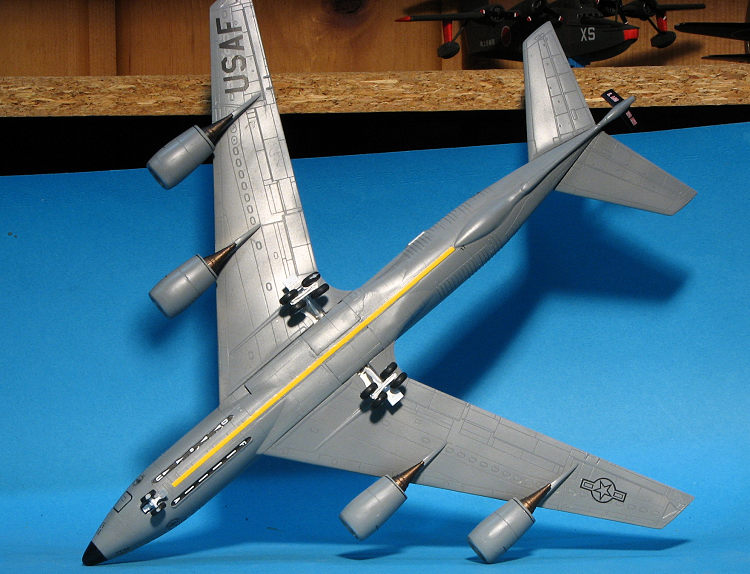
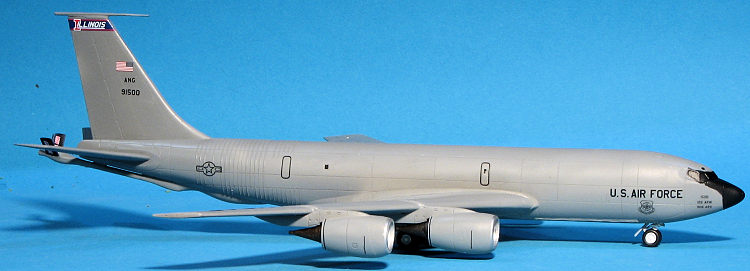
Instructions are nicely done and offer Model Master paint references for the overall airframe. The two markings options are overall AMC grey with a black radome and nose anti-glare panel. Markings are provided for two planes. The box art plane is from McConnell AFB in Kansas with the 22nd ARW in 2013. This seems to have the current tail band. The other is from the 126 ARW, Illinois ANG from nearby Scott AFB in 2005. It has the older tail band and unfortunately, does not include any of the nose art that was so prominent at the time. Decals are nicely done, but I'm wondering if the fuselage alignment stripe is not too orange. I always thought this was closer to yellow. I've included a photo so you can judge for yourself. As I mentioned earlier, there are aftermarket sheets for this kit and those will offer a bunch of additional options.
| CONSTRUCTION |
 Attaching the wings and tailplanes was quite straight-forward. Ensure that
mold pips and seams are removed and you'll get a fairly tight fit. I chose
to have what little gap there is to be on the bottom. I then moved to the
engine pods. These are designed to fit on a specific location. When you get
them built, you will see that they don't fit well where they aren't supposed
to go. Each pod has a three piece 'engine' that juts out the back. These
are, so far, the worst fitting part of the kit. The engine halves are butt
joined and there is no positive locator for the conical exhaust piece which
is also a butt join. The attachment point for the exhaust bits is very thin
and it is difficult to get them lined up properly. The attachment point for
this three piece assembly is quite small. You are supposed to attach this
before closing the cowling/pylon halves, but doing that not only complicates
painting but makes it impossible to get all of the pylon seam taken care of.
Fortunately, though it is a tight fit, you can install the engine
subassembly after all is assembled and painted.
Attaching the wings and tailplanes was quite straight-forward. Ensure that
mold pips and seams are removed and you'll get a fairly tight fit. I chose
to have what little gap there is to be on the bottom. I then moved to the
engine pods. These are designed to fit on a specific location. When you get
them built, you will see that they don't fit well where they aren't supposed
to go. Each pod has a three piece 'engine' that juts out the back. These
are, so far, the worst fitting part of the kit. The engine halves are butt
joined and there is no positive locator for the conical exhaust piece which
is also a butt join. The attachment point for the exhaust bits is very thin
and it is difficult to get them lined up properly. The attachment point for
this three piece assembly is quite small. You are supposed to attach this
before closing the cowling/pylon halves, but doing that not only complicates
painting but makes it impossible to get all of the pylon seam taken care of.
Fortunately, though it is a tight fit, you can install the engine
subassembly after all is assembled and painted.| COLORS & MARKINGS |
 Before applying decals, I decided to put the airframe on its gear. Since the
nose gear was already in place, this meant the main gear. Here I ran into
difficulty. This is because the instructions has you put the landing gear on
the the wrong sides. To have them correctly installed, the oleo scissors has
to point to the front along with the smaller gear strut. This allows the
retraction strut to be properly aligned. It is also a real bitch getting the
gear into place. I had to bend up the small tabs and even then, getting them
properly in place in terms of being vertical and with the bogies aligned
fore and aft was quite difficult. Next 135 I build, I will use the SAC metal
gear as they can be gently tweaked into proper alignment.
Before applying decals, I decided to put the airframe on its gear. Since the
nose gear was already in place, this meant the main gear. Here I ran into
difficulty. This is because the instructions has you put the landing gear on
the the wrong sides. To have them correctly installed, the oleo scissors has
to point to the front along with the smaller gear strut. This allows the
retraction strut to be properly aligned. It is also a real bitch getting the
gear into place. I had to bend up the small tabs and even then, getting them
properly in place in terms of being vertical and with the bogies aligned
fore and aft was quite difficult. Next 135 I build, I will use the SAC metal
gear as they can be gently tweaked into proper alignment.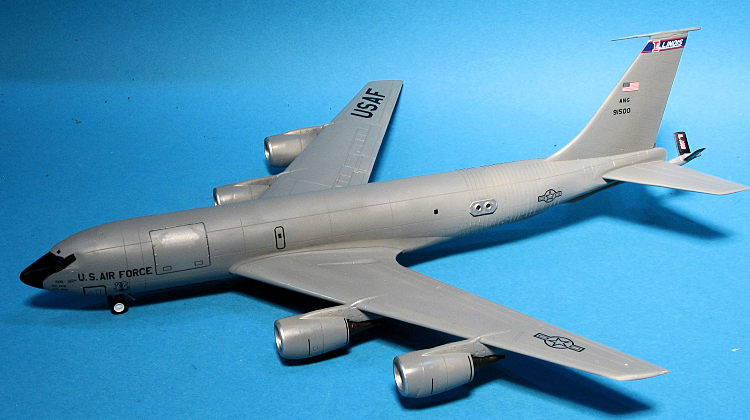 With all the decals in place, I gave the airframe a coat of clear matte,
hoping I'd not have issues with silvering. I did and it was the kit markings
that were the main offenders. I can only assume that either the underlying
surface wasn't gloss enough or I needed to apply stronger setting solution.
With all the decals in place, I gave the airframe a coat of clear matte,
hoping I'd not have issues with silvering. I did and it was the kit markings
that were the main offenders. I can only assume that either the underlying
surface wasn't gloss enough or I needed to apply stronger setting solution.
| CONCLUSIONS |
My experiences with this kit were generally positive. First off, for the most part it fits well. The main gear doors and struts being the exceptions. I found the attachment of the aft engine pieces to be poor and a more positive attachment would make these easier to assemble. Actually, no reasons why the engineering of these is so bad. The shape of the farthest aft window on the cockpit clear bits is so wrong it is amazing no one caught it. Next kit, this will all be puttied over. The decals did not perform as I'd hoped. Again, next time I'll ensure they fit on a more glossy surface. Those wanting greater accuracy will also need to add all the radio/nav antennas as they are not provided in the kit. In passing, it may have been better to duplicate the rear fuselage reinforcements as engravings as they are not as pronounced on the real deal and nearly impossible to connect seamlessly from one fuselage half to another.
So there you have it. Worth the effort? I'd say yes. Easy for a beginner? Probably not. The rest of us will be able to handle things OK.
| REFERENCES |
https://en.wikipedia.org/wiki/Boeing_KC-135_Stratotanker
16 August 2019
Copyright ModelingMadness.com. All rights reserved.
If you would like your product reviewed fairly and fairly quickly, please contact the editor or see other details in the Note to Contributors.