Revell 1/72 F-16C
| KIT #: | 04633 |
| PRICE: | $12.00 'used' |
| DECALS: | Two options |
| REVIEWER: | Scott Van Aken |
| NOTES: | 2002 boxing |
| HISTORY |
 Though initially
designed as a lightweight, point defense fighter, the F-16 steadily grew in
capabilities to where it is more of a medium attack aircraft with air to air
capabilities instead of a straight-forward air intercept plane.
Though initially
designed as a lightweight, point defense fighter, the F-16 steadily grew in
capabilities to where it is more of a medium attack aircraft with air to air
capabilities instead of a straight-forward air intercept plane.| THE KIT |
Prior to the release of the Tamiya F-16CJ in this scale, this was probably the best 1/72 F-16 produced. It went that extra step in detail from the Hasegawa Falcons (which are still very nice kits). First boxings were for the F-16 MLU that was previewed here several years ago. Careful examination of the sprues of that kit and this one will show many similarities. What this one has done is go the extra step and provide parts for the 'big mouth' versions of the Falcon.
It takes an F-16 aficionado to
be able to spout of block numbers and such, but the biggest difference between
the two is that looking at the front, the intake makes one look like it is
'smiling' while the other does not. This is d ue to the different engines in the
'big mouth' version. Later block aircraft also have bulged gear doors (which I
didn't see in the kit) and some other differences that I can't tell
without a guild book of some sort.
ue to the different engines in the
'big mouth' version. Later block aircraft also have bulged gear doors (which I
didn't see in the kit) and some other differences that I can't tell
without a guild book of some sort.
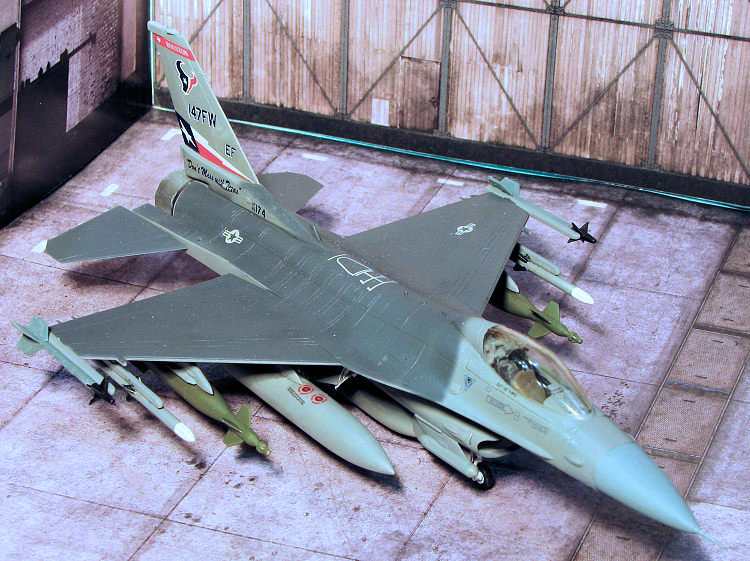
With all those options, this is a kit from which you can build a wide range of different F-16 versions. You can see from the parts scan that there are quite a few areas blacked out as not used in this boxing. Interestingly, this looks very much like the same kit as in the Monogram boxing many years back, including an identical box art save for different unit. You get a full range of weapons as well as a nicely detailed cockpit and bits that are not used in this boxing such as the shorter A tail and the very early stabs. You could probably build a pre-plus F-16A with what's here.
Instructions are standard RoG of the time on near newsprint quality paper, but quite well done. Colors are given in Revell paint number and some FS numbers as needed.
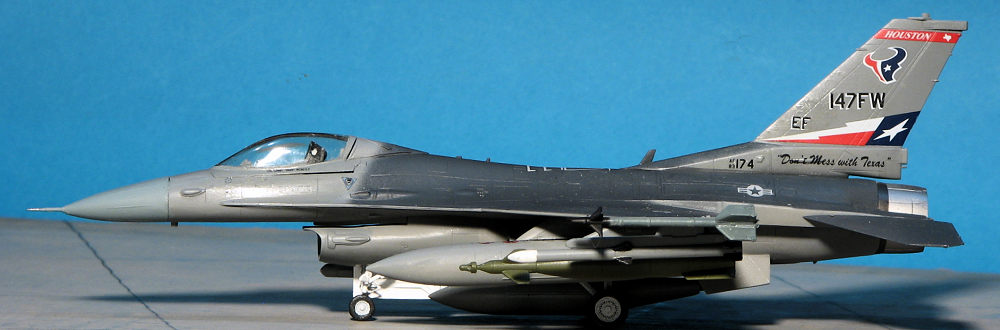
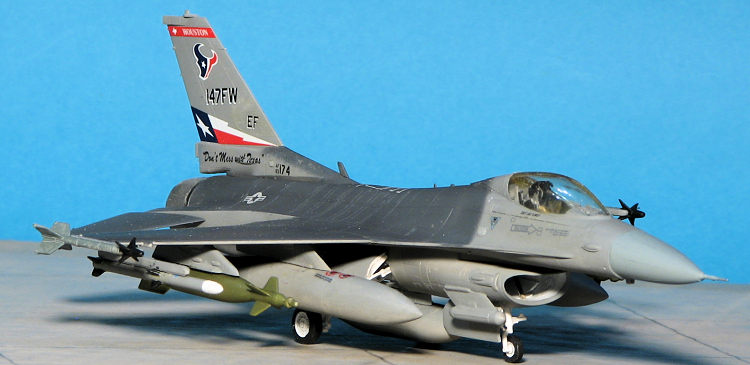
Two markings options are provided. One is the box art plane from the 52nd FW based at Spangdahlem at the time, a logical choice for a Revell of Germany kit. The other is for the 366 wing based at Mountain Home. Both aircraft are shown in the simplified two grey camouflage scheme. Decals are very nicely done and include quite a few stencils. You also get markings for all the weapons and the tanks.
| CONSTRUCTION |
The nice thing about the Revell kit is that it includes all the bits needed to make an earlier F-16C and even parts for an F-16A. I have a bunch of these kits and so decided that this one would be an early F-16C Block 25 as I had a nice decal sheet for an early bird that I wanted to use. This is my first Revell kit of this plane in this scale as all the previous 72nd Vipers had been Hasegawa.
 So I started by gluing together and cleaning up the fuel tanks as I knew I'd
be using them. I then assembled and seat and installed it into the cockpit tub.
It was an incredibly tight fit. The HOTAS was installed and after attaching the
decals to the instrument panel, I glued that in place. This assembly was then
glued into the upper forward fuselage. With that done, the lower section and
rear bit with the wings and such were glued on. Note that there are tabs on the
forward and aft upper fuselage section that need to interlock in order to get
the best fit.
So I started by gluing together and cleaning up the fuel tanks as I knew I'd
be using them. I then assembled and seat and installed it into the cockpit tub.
It was an incredibly tight fit. The HOTAS was installed and after attaching the
decals to the instrument panel, I glued that in place. This assembly was then
glued into the upper forward fuselage. With that done, the lower section and
rear bit with the wings and such were glued on. Note that there are tabs on the
forward and aft upper fuselage section that need to interlock in order to get
the best fit.
With that done, I used the alternate intake bits for the small mouth plane and built up that assembly. As with every F-16 I've built, this piece is a bit fiddly and needed filler on the joins. When the small brace was installed, I then glued this to the fuselage. Next was the exhaust cone. Not the greatest fit and sanding was needed here as well. Again, this builds like every other F-16 and to be honest, it would have been a better fit were there some tabs around the join area. I then attached the fin assembly after a bit of scraping to get the best fit.
The ventral strakes were added and this was followed by the canopy, which I had already masked.
| COLORS & MARKINGS |
 trakes. The tailplanes were painted at this time as well. I also used a couple of
metallic colors on the exterior of the afterburner.
trakes. The tailplanes were painted at this time as well. I also used a couple of
metallic colors on the exterior of the afterburner. | CONCLUSIONS |
As usual with kits like this, the end result is passable and looks nice on the display shelf with the very few other modern jets in my collection. I have to say that I was not pleased with the general fiddly build and the unresponsive kit decals. While this kit is more detailed than the earlier Hasegawa offerings and includes a nice weapons suite, in general the Hasegawa kit fits better and for an early F-16C, would be my next kit for this sort of subject.
| REFERENCES |
https://en.wikipedia.org/wiki/General_Dynamics_F-16_Fighting_Falcon_variants
January 2021
Copyright ModelingMadness.com. All rights
reserved.
If you would like your product reviewed fairly and fairly quickly, please
contact
the editor
or see other details in the
Note to
Contributors. Back to the Main Page
Back to the Review
Index Page
Back to the Previews Index Page