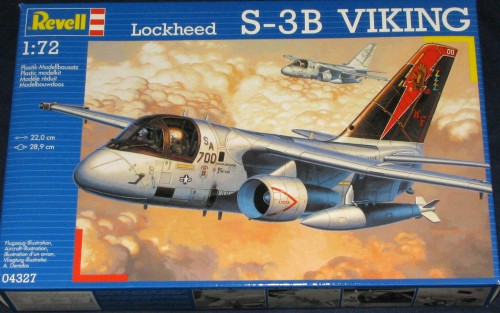
| KIT: | Revell AG 1/72 S-3B Viking |
| KIT #: | 04327 |
| PRICE: | $ |
| DECALS: | Two options |
| REVIEWER: | Scott Van Aken |
| NOTES: | Reboxed Hasegawa kit |
| HISTORY |
Developed as a follow-on to the piston engined S-2 Tracker for use as an on-board ASW platform, the S-3A Viking was as state of the art as one could get in an aircraft when developed in the late 1960s. All electronics systems were computer controlled, allowing the back seaters, the TACCO (TACtical COordinator) and SENSO (SENSor Operator) to be able to have full control of all the missions electronic gear. This included sonobouy operations, radar, Forward Looking Infra Red (FLIR) detector, electronic surveillance system, as well as radios and navigation systems as related to the ASW mission. To be able to have separate systems controls for all the equipment would have meant a very cluttered space and extremely busy operators!
The aircraft started replacing S-2 units in the early 1970s and was upgraded to S-3B status starting in the late 1980s. This basically brought on upgraded electronic systems with new equipment to replace much of what was wearing out and becoming more and more maintenance intensive due to degradation of components. By the time the fleet was fully modified in 1992, the Cold War had ended and basically, so had the mission of the S-3. The aircraft eventually lost its mission as it was turned over to helos and land based P-3 Orions. Though all that new equipment was basically left useless, the Viking was used for general observation (thus changing the name of the squadrons from Anti-submarine to 'Sea Search') and for tanking. The last fleet enlisted aircrewmen went away with this change as did the need for a trained TACCO, though the billet stayed on so more officers could get flight pay.
Finally, the aircraft has started to disappear from carriers. Over half the squadrons that flew the plane have disestablished and one more has gone this last week with the loss of VS-21 in Atsugi, Japan with CAG 5. It is a race to see who will be totally out of the fleet first with the Tomcat leading by a whisker.
| THE KIT |
 The
Revell boxing of the S-3B is, in fact, identical to the Hasegawa S-3A kit.
The same raised panel line detail, the same sprues and everything. The only
thing that has changed is that the canopy is no longer tinted. The builder
will have to do that instead. This means that what you have isn't an S-3B
at all. It is fortunate that for 99% of the modeling population, they won't
know this. The changes from A to B on the outside are minimal at best and
really, there are only three differences that will come to your eye. First
is that there is an additional oval vent on the left nose for improved
cooling of the electronics that is not on the A. Next, the B has
flare/chaff dispensers just aft of the main wheel well and under the
centerline about that location that is not on the A. Finally, the wing tip
pods have square antenna elements on the B where the ones on the A are
round. This was due to moving the attachment points for the little antennas
to the outside so you didn't have to keep taking the pod off to replace
them. I'll repeat what I said for the Hasegawa kit review in regard to this
one as they are the same kit.
The
Revell boxing of the S-3B is, in fact, identical to the Hasegawa S-3A kit.
The same raised panel line detail, the same sprues and everything. The only
thing that has changed is that the canopy is no longer tinted. The builder
will have to do that instead. This means that what you have isn't an S-3B
at all. It is fortunate that for 99% of the modeling population, they won't
know this. The changes from A to B on the outside are minimal at best and
really, there are only three differences that will come to your eye. First
is that there is an additional oval vent on the left nose for improved
cooling of the electronics that is not on the A. Next, the B has
flare/chaff dispensers just aft of the main wheel well and under the
centerline about that location that is not on the A. Finally, the wing tip
pods have square antenna elements on the B where the ones on the A are
round. This was due to moving the attachment points for the little antennas
to the outside so you didn't have to keep taking the pod off to replace
them. I'll repeat what I said for the Hasegawa kit review in regard to this
one as they are the same kit.
"Hasegawa's kit of the S-3 is from the age of raised panel lines. It is made of hard, medium grey plastic and the detail is really rather well done. Building options include an extended refueling probe, extended MAD boom, extended flaps, extended FLIR pod, open crew door, and a choice of bombs or fuel tanks on the wing pylons. Despite its age, the molding is in good shape and only a few ejector pin marks on landing gears and doors to belie its age.
The only interior bits offered are an instrument panel, two sorta OK Escapac seats, two control sticks and a decal for the instrument panel. No decal for the center console and no side consoles at all! The engines include a front and real compressor. Getting the seam out of the front of the engine cowling will be a real trick. I suggest making engine covers from tissue. There is no provision for folding the wings or tail.
Now for a couple of hints from one who knows. Don't have the MAD boom or fuel probe extended. The only time this was done on the ground is when they were undergoing maintenance . The probe also tended to leak as the seals weren't that great and were at times removed from the plane. Not a good idea to extend the FLIR as it was also not extended on deck unless the crew was playing with it or it was undergoing maintenance (I should also mention that this is white and not black as shown on the Revell box build). If you lower the flaps, you'll have to cut the leading edge slats and lower them as well. The under wing tanks are really too skinny and need replaced with something else. You'll also have to fill in that odd little oval window. I have never seen this on any plane.
With the Revell
boxing, you get the usual newsprint-like paper for the instructions with
the first half of them full of various warnings in multiple languages. The
paint chart only references Revell paints so there is the usual requirement
to mix paints. This totally ignores the fact that much of the rest of the
world can't get Revell paint so they should at least provide a standard
reference or even a likely color. Just to give heads up, the cockpit
interior is FS 36231 Dark Gull Grey, though the
 back wall is actually a buff
color as would be the entry way from the back seats. The rest of the
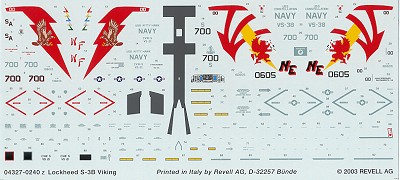
instructions are just fine. Markings are provided for two aircraft. One is
from VS-38 and the other is the box art aircraft from the newly
disestablished VS-21. These later markings are similar to the most recent
Hasegawa boxing and has the CAG bird colors on a gloss black tail. The
VS-38 scheme is also duplicated on a recent Superscale sheet, I believe.
The aircraft are both in FS 36375 light grey with the anti-glare panels in
FS 36321 on the VS-38 plane and black on the VS-21 aircraft. The sheet is
quite comprehensive with all the neat little data markings and warnings
printed. The decals are semi-matte and look good, though I don't know how
they work as I've never used Revell AG kit decals, generally replacing them
with aftermarket. It is interesting that the sheet provides a cover for the
port chaff dispenser but totally ignores the fact that there was one on the
starboard side and lower fuselage!
back wall is actually a buff
color as would be the entry way from the back seats. The rest of the
instructions are just fine. Markings are provided for two aircraft. One is
from VS-38 and the other is the box art aircraft from the newly
disestablished VS-21. These later markings are similar to the most recent
Hasegawa boxing and has the CAG bird colors on a gloss black tail. The
VS-38 scheme is also duplicated on a recent Superscale sheet, I believe.
The aircraft are both in FS 36375 light grey with the anti-glare panels in
FS 36321 on the VS-38 plane and black on the VS-21 aircraft. The sheet is
quite comprehensive with all the neat little data markings and warnings
printed. The decals are semi-matte and look good, though I don't know how
they work as I've never used Revell AG kit decals, generally replacing them
with aftermarket. It is interesting that the sheet provides a cover for the
port chaff dispenser but totally ignores the fact that there was one on the
starboard side and lower fuselage!
| CONCLUSIONS |
So what does all this mean to you? If you care about subtypes, you can't build what is boxed with this kit as the plastic is an S-3A and not an S-3B. If you don't care, you'll build it as is and use the decals that come with it. One of the 'problems' of being knowledgeable about a subject is that you will spot every glitch and error that there is in a kit and that I've done here. When I build this kit, I'm going to do it as an S-3A or get the Eduard etched brass set for it which includes some of those external bits to make a B and also includes a lot of cockpit stuff to fill in the voids that the kit has left.
| REFERENCES |
Many years of working on the darn things.
If you would like your product reviewed fairly and fairly quickly by a site that has nearly 300,000 visitors a month, please contact me or see other details in the Note to Contributors.