| KIT #: | 80269 |
| PRICE: | $24.95 MSRP |
| DECALS: | Two options |
| REVIEWER: | Scott Van Aken |
| NOTES: | Sort of an 'ez-build' and sort of not. |
| HISTORY |
OK, so we all know that the F-18 was the plane designed to replace the F-4, A-7 and A-6 as a fleet defense fighter and both light and medium attack. We also know that it was not able to meet all original specifications, something that has become common with new design US aircraft. We also know that the Navy had it pretty much forced down their throat to keep Northrop and McDonnell/Douglas employed. We also know that the final F-18 design differed so much from the losing YF-17 design in the YF-16/YF-17 flyoff, that it was pretty much a brand new plane that only generally looked like the YF-17.
 F-18A aircraft are mostly out of service by now with only later upgraded F-18A+ planes flying with the Marines and Reserves, some F-18Bs in training units and early F-18As with the Blue Angels. These airframes were superseded by the F-18C/D and here is Wikipedia's take on it. BTW, when Googling this info, there was a link to the
Lockheed F-18, probably something from the History Channel.......
F-18A aircraft are mostly out of service by now with only later upgraded F-18A+ planes flying with the Marines and Reserves, some F-18Bs in training units and early F-18As with the Blue Angels. These airframes were superseded by the F-18C/D and here is Wikipedia's take on it. BTW, when Googling this info, there was a link to the
Lockheed F-18, probably something from the History Channel.......
The F/A-18C is the single-seat variant and the F/A-18D is the two seat variant. The D model can be configured for training or as an all-weather strike craft. The "missionized" D's rear seat is configured for a Weapons and Sensors Officer to assist in operating the weapons systems. The D model is primarily operated by the U.S. Marine Corps in the night attack and FAC(A) (Forward Air Controller (Airborne)) roles.
The F/A-18C and D models are the result of a block upgrade in 1987 incorporating upgraded radar, avionics, and the capacity to carry new missiles such as the AIM-120 AMRAAM air-to-air missile and AGM-65 Maverick and AGM-84 Harpoon air-to-surface missiles. Other upgrades include the Martin-Baker NACES (Navy Aircrew Common Ejection Seat), and a self-protection jammer. A synthetic aperture ground mapping radar enables the pilot to locate targets in poor visibility conditions. C and D models 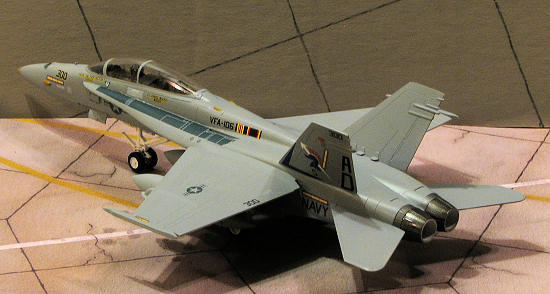 delivered since 1989 also include an improved night attack capability, consisting of the Hughes AN/AAR-50 thermal navigation pod, the Loral AN/AAS-38 NITE Hawk FLIR (forward looking infrared array) targeting pod, night vision goggles, and two full-color (previously monochrome) MFDs and a color moving map.
In addition, 60 D model Hornets are configured as the night attack F/A-18D (RC) with ability for reconnaissance.These could be outfitted with the ATARS electro-optical sensor package that includes a sensor pod and equipment mounted in the place of the M61 cannon.
Beginning in 1992, the F404-GE-402 enhanced performance engine, providing approximately 10% more maximum static thrust became the standard Hornet engine. Since 1993, the AAS-38A NITE Hawk added a designator/ranger laser, allowing it to self-mark targets. The later AAS-38B added the ability to strike targets designated by lasers from other aircraft.
Production of the F/A-18C ended in 1999. In 2000, the last F/A-18D was delivered to the U.S. Marine Corps.
| THE KIT |
Many of you know Hobby Boss from their easy to build 1/72, under $10 aircraft kits. These kits are generally no more than a few pieces with most of the fuselage already together to some degree. Hobby boss also does larger 1/48 kits that are just as good as other standard kits. Recently, they have ventured out into doing larger jets and so the price has increased commensurate with that. This is one of them.
The kit is still somewhat simplified as the upper fuselage, wings and horizontal stablilzers are one piece and the lower fuselage is the other. There are large attachment tabs for the landing gear doors and the fuselage alignment pins and holes are also quite large. Hobby Boss has added some 'lips' to a few sections to help in getting things properly aligned. The detail level is good for 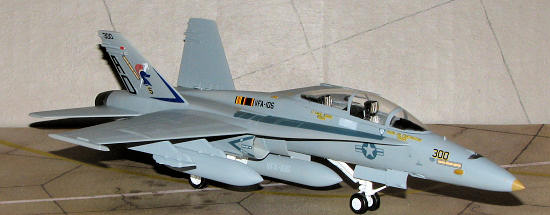 these kits, though if one really looks, the detailing isn't as intensive nor is it as petite as one will find on the much older Hasegawa kit.
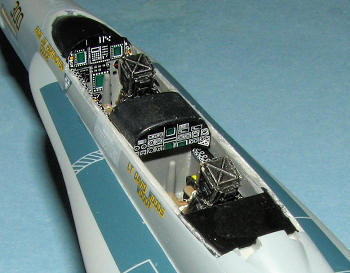
Before going much farther, this is not a copy of the Hasegawa kit, though there are similarities (like no weapons and decals for instrument detail). Other things different are no boarding ladder or even the engraved panel line for it. The cockpit tub is abbreviated with a straight rod for the control sticks molded in place. The seats are somewhat generic as well with the basic shape of an SJU-17, but then it could be used as an ACES seat as well. Intakes are well molded with a conical intake that needs a backing plate added to prevent seeing into the fuselage. The speedbrake is molded in the open position, a very unusual sight on the ground. One can cut the attachment points to glue it in a more normal mode. Though there are no weapons, there are a centerline and two wing racks. These have fuel tanks for the centerline and outboard wing racks with a bomb rack for the inner ones. Break out the Hasegawa weapons set if you want anything on them. For some reason, you get F-18B and F-18D fins, but you'll want to use the ones listed in the instructions. The kit also has but one canopy and that is a single piece unit that cannot be posed open.
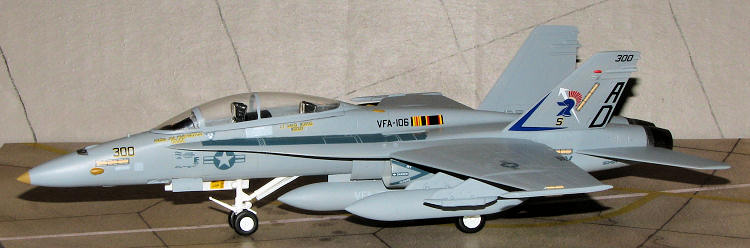
Instructions are basically four diagrams to show where the bits go, each diagram with a few more bits on it than the one before. Color information is Gunze reference with generic names on the nicely done full color painting and markings guide. I believe the greys are FS 36320 upper and 36375 underside, not the highly contrasted shades shown. The decals are superbly printed and while others have commented on difficulty with them, I've not experienced that. Markings are for two planes. One is the box art plane for VFA-106 and fortunately the insignia on the sheet are not as distorted as those shown on the box or drawing. The other is the boss plane for VMFA-225. There are also a number of very nicely done aftermarket sheets that have F-18D options on them.
| CONSTRUCTION |
Hobby Boss kits tend to simplify things a bit and so a ton of small, fiddly parts the kit does not have. I particularly like the large tabs and slots for the gear doors as well as the hefty gear attachment points, something that will help when it comes to building the kit.
Part of this simplification also extends to the bang seats. There isn't much that can really be done to the interior itself, but replacing the ejection seats was a major priority. Fortunately, the proper SJU-17 seats are easy to locate and so I used a set of 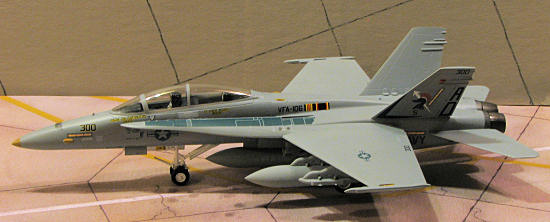 True Details seats in this one. These were painted up and set aside. I then got to looking for subassemblies, of which there are few. Basically the drop tanks and the bomb rack/pylon.
Then it was time to start into the proper construction. In this case, I started by gluing on the inserts under the lerex. These have some pretty prominent gaps so quality time was spent with filler. I also had to use this material when getting the intakes installed in the lower fuselage as the fit is only fair. There is no blanking plate so you need to install one or paint the surrounding area in black. I also glued on the various cockpit bits like the aft instrument panel anti-glare shield and the aft canopy attachment area. It is obvious that this same basic airframe is used for the single seat version. The speed brake required some fussing and trimming to get it to fit closed. The kit would have you display it open, a very unnatural pose for a plane at rest.
What would be a natural pose at rest is having the flaps and ailerons dropped down, but no 1/72 Hornet kit I'm aware of provides this option.
There is no worry about wing/stabilator alignment as these are molded with the upper fuselage. Once the upper and lower fuselage are glued together, then the seam will need attention. The fins fit rather well so no filler needed there.
| COLORS & MARKINGS |
 Despite my glacial building pace of late, the kit was ready for the initial painting. First step was to paint all the gear wells (which are devoid of any detail) and the landing gear with gloss white. Once dry, I used the really nice Leading Edge F-18 wheel well masks. These are not designed for the Hobby Boss kit, but the Academy one and still fit quite well. Their foam design means that they can be reused on future projects so don't toss them once you are done.
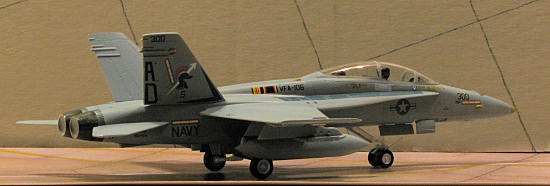
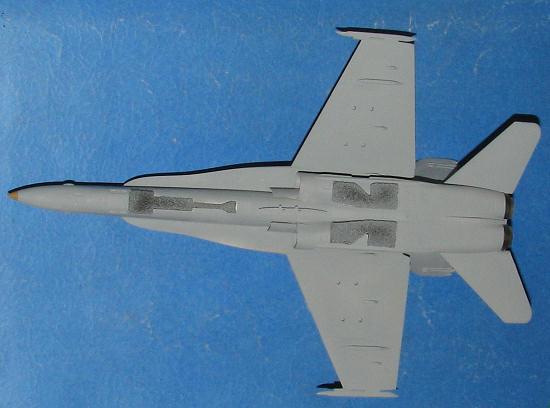
The two colors for this are FS 36320 and FS 36375, two shades that are almost identical so care has to be made when painting these on. I used ModelMaster enamels for these shades. The very rear fuselage and afterburner cones were painted with Alclad II Steel with the cones having their Jet Exhaust misted on. The interior of the burners were painted white to simulate the ceramic coatings. I painted the interior with Dark Gull Grey then glued in the seats. I glued on the canopy then masked it using the masks in the Leading Edge set. These fit quite well though I did have to cut a couple of additional bits as they 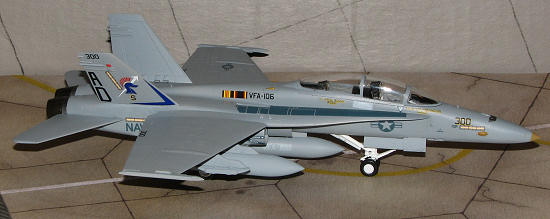 are not designed for this kit. I then glued on the landing gear and sprayed on a coat of clear gloss acryic in preparation for decals.
Hobby Boss decals have been given a bad rap by some, but I've never had any real trouble with them. Then do need setting solution, but otherwise behave as well as most aftermarket decal sheets. I had wanted to use the fine MAW markings to do a Marine plane, but realized that the kit needed so many updates to it to provide a decent replica that I felt I needed to save these for a more worthy project. So in that light, I picked the markings of VFA-106, the Hornet training unit on the east coast. Hobby Boss' full color markings guide was helpful, but as always, there were a number of decals on the sheet that were not shown on the instructions. I used most of them. Once on and dry, the model was wiped down and sprayed with a mixture of Gunze flat base and Future to deaden the finish. It was during this evolution that I realized I'd not installed the instrument panel decals. Looking at the instructions, I was struck by the lack of any note regarding these so carefully pried off the canopy, popped out the seats and installed the decals.
| FINAL CONSTRUCTION |
 The last things to do were to install the wheels, gear doors and things that dangle under the plane. The gear doors have a huge tab on them and are a very tight fit so take care not to give too much 'oomph' or you'll break one. Trust me on this. The fuel tanks were glued to the pylons and the wing pylons were simply pushed into place as the fit is quite tight. It was then that I noticed something was not right. Hobby Boss had decided that the Hornet was land based and neglected to provide a tail hook! Rather odd omission considering one has to install the 'beware hook' decal on the back. I have to say that all the ones I have in the spares box were no where near as beefy as what was needed for this project so it was left off. I removed the masking and that was it.
| CONCLUSIONS |
Several things of note regarding this kit. It is nicely done with very nice surface detail. It is also considerably simplified, even when comparing it to the now 25 year old Hasegawa kit. I do not have the Academy 1/72 kit for comparison, but would imagine it to be of a higher detail and parts standard. Despite my slow build on this, the kit is  designed for those who don't want to fuss with a lot of parts. It is not a snap kit but has several of the features of one in the large attachment tabs and lack of interior detailing. I'm not sure if it is worth the money, but then, it is new mold and that is about what these kits are fetching so isn't too awful by comparison. If I had my druthers, I druther have the Hasegawa kit, but couldn't find a D model in any of the stores.
Bottom line is that it looks quite nice when you get it finished, it is a bit basic in several areas, and may well be something that you might want to consider buying for yourself or a newer modeler.
| REFERENCES |
http://en.wikipedia.org January 2009
Copyright ModelingMadness.com. All rights reserved. No reproduction in part or in whole without express permission.
If you would like your product reviewed fairly and fairly quickly, please contact the editor or see other details in the