| KIT #: | 814 |
| PRICE: | 800 yen when new |
| DECALS: | Two options |
| REVIEWER: | Scott Van Aken |
| NOTES: | 1987 release |
| HISTORY |
Though initially designed as a lightweight, point defense fighter, the F-16 steadily grew in capabilities to where it is more of a medium attack aircraft with air to air capabilities instead of a straight-forward air intercept plane. While a variant of the F-16A was modified for the Air Defense role, which added Sparrow capabilities to the aircraft, that was only issued to the ANG and its service life there was fairly short. Indeed, two ANG units operated the ADF in the air to ground role.
No longer in the active USAF or ANG inventory, the early A model is used by a variety of nation's air arms and still remains a viable aircraft once its older avionics is upgraded. The B model is basically a combat trainer, meaning that it maintains all of the capabilities of the single seat F-16A.
| THE KIT |
 Hasegawa
released their F-16A/B kits in the late 1980s, using the now common method of
having a baseline kit and adding or deleting parts of the sprues to make the kit
that is being boxed. This means that unless you have a fairly early kit, there
will be a few issues with mold wear. This wear mainifests itself in softer edges
and some flash.
Hasegawa
released their F-16A/B kits in the late 1980s, using the now common method of
having a baseline kit and adding or deleting parts of the sprues to make the kit
that is being boxed. This means that unless you have a fairly early kit, there
will be a few issues with mold wear. This wear mainifests itself in softer edges
and some flash.
The kit is pretty standard for a 1/72 kit even today. you get a cockpit floor onto which you put a pair of seats, instrument panels and control sticks. The side consoles are molded in with the floor as is a small rear bulkhead. Rudder pedals are simple wedges molded on the floor. Decals supply the instrument panels/side consoles. Hasegawa provides a pair of crewmen to occupy the fairly bare seats.
Before closing the horizontally split fuselage, one installs fore and aft main gear wells and the cockpit. No indication of nose weight is shown, but I'd put in a little anyway. The nose gear is incorporated into the five piece nose intake assembly, which I've always found to be fairly difficult to assemble cleanly. This fits into the lower forward fuselage and in the back a burner assembly fits. I would smooth in and paint then mask the burner once it is attached as masking it after attaching the fin and stabs can be tricky.
Wings and stabs are a single molding. If one isn't using all the pylons, then there will be holes to fill in the underside of the wing. The B model often flew without many or even any wing pylons so make a choice before attaching them. The landing gear are well done with the nose gear incorporating the wheel.
A boarding ladder is provided and one can pose the canopy open if one wishes. For things under wings you have a centerline and two large wing tanks, a pair of bombs and four missiles so that you can fill all the pylons.
 Instructions
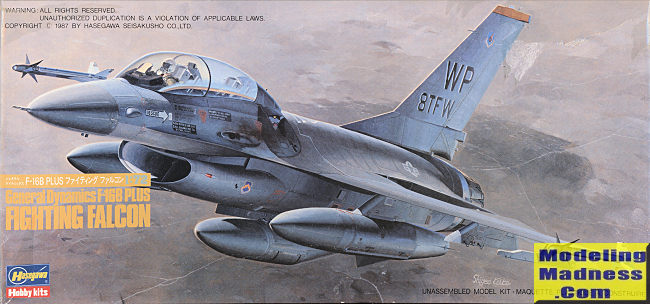
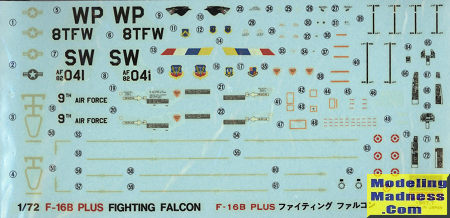
provide Gunze paint references and both options are in the three greys scheme.
This includes the box art plane from the 80 TFS/8 TFW and from the 17 TFS/363
TFW. Both of these planes are the 'plus' version with the enlarged stabs. To do
an earlier version, you'll have to rob these items from another kit or get resin
ones. Decals are old school which means they are thick, will need hot water, and
have off white whites. The sheet includes all the needed stencils as well.
Frankly, at this stage they would probably do better if replaced by aftermarket.
Instructions
provide Gunze paint references and both options are in the three greys scheme.
This includes the box art plane from the 80 TFS/8 TFW and from the 17 TFS/363
TFW. Both of these planes are the 'plus' version with the enlarged stabs. To do
an earlier version, you'll have to rob these items from another kit or get resin
ones. Decals are old school which means they are thick, will need hot water, and
have off white whites. The sheet includes all the needed stencils as well.
Frankly, at this stage they would probably do better if replaced by aftermarket.
| CONCLUSIONS |
I have built several of the F-16A+ kits and they are fairly trouble free. No one seems to be doing new F-16A/B kits though Revell did a few several years back, but those are fairly fussy builds. Well worth picking up and they are not very expensive.
September 2019 Copyright ModelingMadness.com.
All rights reserved. If you would like your product reviewed fairly and fairly quickly, please contact the editor or see other details in the
Note to
Contributors. Back to the Main Page
Back to the Review
Index Page
Back to the Previews Index Page