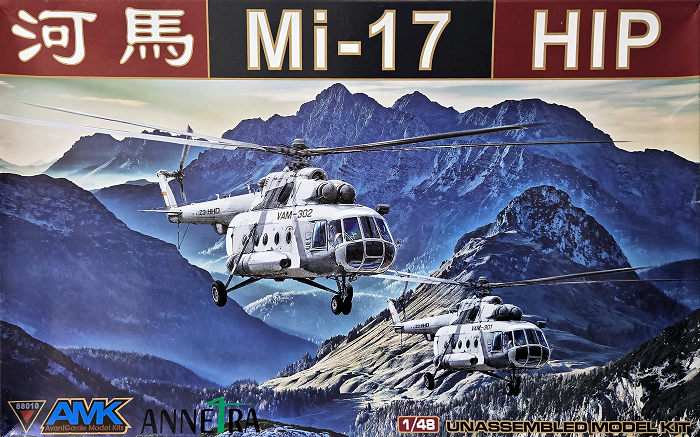
AMK 1/48 Mi-17 'Hip'
| KIT #: | 88010 |
| PRICE: | $84.00 |
| DECALS: | Four Options |
| REVIEWER: | Scott Van Aken |
| NOTES: | 2022 release |
| HISTORY |
Developed from the basic Mi-8 airframe, the Mi-17 was fitted with the larger Klimov TV3-117MT engines, rotors, and transmission developed for the Mi-14, along with fuselage improvements for heavier loads. Optional engines for "hot and high" conditions are the 1,545 kW (2,072 shp) Isotov TV3-117VM. Recent exports to China and Venezuela for use in high mountains have the new Klimov VK-2500 version of the Klimov TV3-117 engine with FADEC control.
The designation Mi-17 is for export; the Russian armed forces call it the Mi-8MT. The Mi-17 is recognisable by the tail rotor on the port side instead of the starboard side, and dust shields in front of the engine intakes. Engine cowls are shorter than on the TV2-powered Mi-8, not extending as far over the cockpit, and an opening for a bleed air valve outlet is present forward of the exhaust
| THE KIT |
 I
have not built an AMK kit, but have heard quite a few positive things about
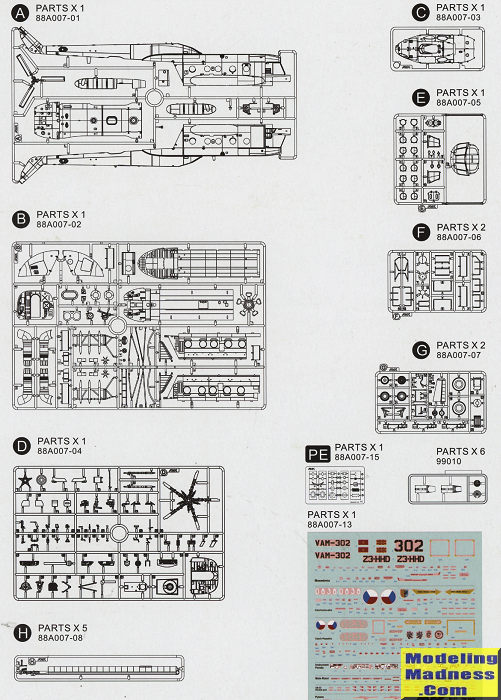
them. One thing for sure is that there are a lot of parts in the box. The
tooling looks very nice as one would expect from a pricey modern kit. It would
have been great if s
I
have not built an AMK kit, but have heard quite a few positive things about
them. One thing for sure is that there are a lot of parts in the box. The
tooling looks very nice as one would expect from a pricey modern kit. It would
have been great if s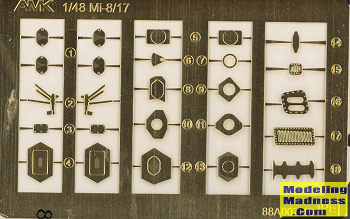 ome
canopy masks had been included, but there it is. What is included is a photo
etch fret. This provides items that replace the molded in plastic items that go
across the seam on the tail boom. Oddly, it does not include seat harnesses for
the pilot and co-pilot, which is usually the norm when a p.e. fret is included.
ome
canopy masks had been included, but there it is. What is included is a photo
etch fret. This provides items that replace the molded in plastic items that go
across the seam on the tail boom. Oddly, it does not include seat harnesses for
the pilot and co-pilot, which is usually the norm when a p.e. fret is included.
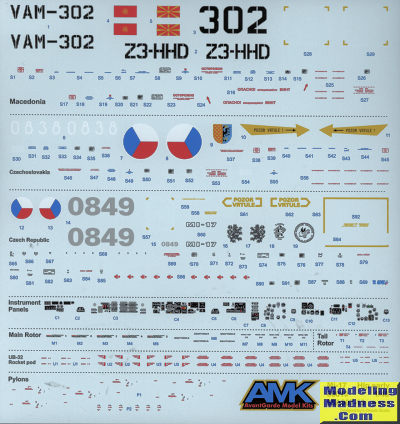
Quite a bit of the detail with the kit goes in the interior. The cockpit is very well detailed as you might expect and you'll be able to see quite a bit through the transparencies. You will notice on the decal sheet that there are quite a few instrument decals available. The way AMK deals with these is to have a separate section in the colors area of the instructions for you to place these items rather than having that info during the construction sequences. If you are one who simply jumps in and starts building, you may well miss this detail.
The kit comes with a full cabin as well and you are provided with jump seats along both sides. These must be assembled using a lot of very thin sections of plastic so one has to take care. Each completed side is then attached to the floor section. It is important to think things through as it would be easier to prepaint some of these items rather than try to do that later. The completed cockpit/cargo area makes into a subassembly that will later be installed into the fuselage halves. Note that the cabin windows are installed from the inside so either prepainting or masking will be required.
Once the interior is trapped between the fuselage halves, the upper section with its intake and exhaust subassemblies is built up and glued onto the fuselage. There are a myriad of handholds and latches that are then to be attached to this structure. Things then move to the cargo doors in the rear. Again, a lot of detail to be attached. These can be posed either open or closed as you choose. Then the canopy section is attached and construction moves on to attaching a lot of the small detail parts to the fuselage along with attaching the landing gear and tail rotor.
 The kit
provides six rocket pods along with the pylons to attach them to the side of the
fuselage. I think this is more appropriate for the Czech offerings than for the
other, but choice is yours. Next is the left entrance door, which can be posed
open or closed as you might choose. Main rotor is next and it is very nicely
detailed. Drooped rotor blades are provided. Finally, the instructions show what
bits on the tail boom need to be removed and replaced with p.e. bits.
Personally, I think this step should appear much earlier in the construction
process before a lot of easy to knock off or break bits are attached. I would
put this part right after joining the fuselage halves.
The kit
provides six rocket pods along with the pylons to attach them to the side of the
fuselage. I think this is more appropriate for the Czech offerings than for the
other, but choice is yours. Next is the left entrance door, which can be posed
open or closed as you might choose. Main rotor is next and it is very nicely
detailed. Drooped rotor blades are provided. Finally, the instructions show what
bits on the tail boom need to be removed and replaced with p.e. bits.
Personally, I think this step should appear much earlier in the construction
process before a lot of easy to knock off or break bits are attached. I would
put this part right after joining the fuselage halves.
Instructions are nicely drawn with detail inserts where required. I found that it would have been nice to include decal placement in the construction sequence as well as moving the p.e. section to an earlier part of the build. Color information and the camouflage schemes are in the front of the instructions before the construction sequence, which is different. Markings are for four aircraft. Two of them are in overall white and are the same plane at different times so the North Macedonian flag on the fin is different. The other two are Czech planes. One is for the Czechoslovak AF in 1991 and the other is a current Czech plane. The first is in green and tan while the second is in green with two greys. Both have blue-grey undersides. The decal sheet looks very nice and is well printed. Stencils are provided for both the aircraft and the rocket pods.
| CONCLUSIONS |
My impression is that this will make into a superb model. It will take time and careful construction as there are a great number of parts. It will also take up a fair amount of shelf space thanks to the large main rotor. However all the work should be worth it.
| REFERENCES |
https://en.wikipedia.org/wiki/Mil_Mi-17
May 2026 Copyright ModelingMadness.com. All rights reserved. No
reproduction in part or in whole without express permission from the editor. Thanks t If you would like your product reviewed fairly and fairly quickly, please
contact the editor or see other details in the
Note to
Contributors.