OZ Mods 1/72 Pilatus PC-9
| KIT #: | OMKIT 7201 |
| PRICE: | AUD$39.60 direct from www.ozmods-kits.com |
| DECALS: | Two options |
| REVIEWER: | Scott Van Aken |
| NOTES: | Short run with resin parts |
| HISTORY |
The PC-9 is a more powerful evolution of the PC-7. It retains the overall layout of its predecessor, but it has very little structural commonality with it. Amongst other improvements, the PC-9 features a larger cockpit with stepped ejection seats and also has a ventral airbrake.
The PC-9 program officially started in 1982. Although some aerodynamic elements were tested on a PC-7 during 1982 and 1983, the first flight of the first PC-9 prototype took place on 7 May 1984. A second  prototype flew on 20 July of the same year; this prototype had all the standard electronic flight instrumentation and environmental control systems installed and was thus almost fully representative of the production version.
Certification was achieved in September 1985. By this time, the PC-9 had lost the RAF trainer competition to the Short Tucano. However, the marketing links that Pilatus built up with British Aerospace during the competition stood them in good stead, as it soon led to their first order from Saudi Arabia.
The aircraft has had success in military sales including a large order from the United States for 700 of a modified version to be built by Beechcraft with royalties going to Pilatus. The Royal Australian Air Force operates 67 aircraft – two were supplied directly by Pilatus, 17 were assembled from Pilatus-supplied kits and 48 were built in Australia by Hawker de Havilland. The type is also used by the Roulettes aerobatic display team of the RAAF. These replaced the jet powered Macchi 326.
| THE KIT |
This is OZ Mods first venture into 1/72 injected plastic kits as far as I can tell. The kit is a low pressure short run kit as is evident from the fairly substantial sprues. All of the parts show some small amount of flash on them, but this is not an issue as one would be cleaning the mold seam lines anyway. I did notice some stress cracks on the surface of the large parts. These are quite shallow and may well disappear once one primes the white plastic parts.
The kit has a one piece upper wing that includes the wing tips of the lower section (which is also a single casting. The tailplane and fin section are also a single piece. Other parts in plastic are the landing gear, wheels, gear door, prop, and spinner. The kit provided an 'engine running' prop or gives you the option  of installing separate blades so the prop can be displayed as feathered, a standard feature of turboprops when the engines shut down. My full prop was missing a blade and it was not to be found anywhere so it must have broken off prior to packaging or at least before the unsealed zip bag was put into the box. This will not be an issue for me as I build my planes on the ground with the engine off.
Resin is used for the cockpit bits and the nose gear door (for the gear up option) as well as for the engine exhaust. The resin is well done and as often happens, one of the control sticks in my sample had broken free. I fully blame the poor handling by the postal system for this as the box for my sample was badly crushed when it arrived and I'm surprised more was not broken. The kit includes both an injected as well as two vacuformed canopy for those who would prefer the thinner option.
Instructions are well done and show photos of all the parts as well as exploded views for construction. The only color info during building is to paint the cockpit FS 34227 green and google for more details. The instructions also suggest 7-8 grams of nose weight and a 'how to' when it comes to coating a canopy with Future to improve its clarity. I saw no information on inner gear wells/doors so will assume these are the now-standard white. Gear legs and wheels are aluminum according to photos on the net. The instructions also recommend cleaning all the parts and test fitting prior to cementing, always good advice for short run kits.
 Markings are provided for two very colorful planes. One is the box art plane for the RAAF display team, the Roulettes. You are provided the dark blue areas as decals and a variety of serial numbers so you can model any plane for which you have a photo. Masking will be needed for the rest of the red/white scheme. It would have been nice to have a pair of 2 FTS tail markings to do a standard trainer, but perhaps that will be in a future boxing. The other option is for a plane of the Thai Air Force display team. Again, the dark blue bits are given as decals and a full round of serial numbers for the nose gear doors are provided to do any plane in the team. The decals themselves are superbly printed by Ronin Graphics and include the full array of data markings as well.
| CONSTRUCTION |
 Meanwhile I worked on the wings. The fit here is not that great and I had to do a lot of sanding and scraping to get a decent fit. Still had some gaps along the leading edge that required filler to repair. I then glued the nose gear well in place on one fuselage side. The other side was taped and before the glue set, I adjusted it to get the best fit. This was easy to do through the large cockpit opening. When that dried, I installed the cockpit and then glued the fuselage halves together. All this took a bit of time to get the best fit. I also needed quite a bit of weight in the front to keep this one from tail sitting as the wheelbase is quite short.
  was cut a rectangular section out of the lower intake and then filled it with plastic card which was later filled and sanded to shape.
 | COLORS & MARKINGS |
With all that done, it was time to paint. I highly recommend a stiff wash and then a good primer. I did neither and had issues with 'fish eyes' when I painted the airframe white. The white paint showed a lot of glitches and I had to go back several times to fill in gaps that I had initially missed. I then sprayed on primer and more white. I used Tamiya gloss white for this.
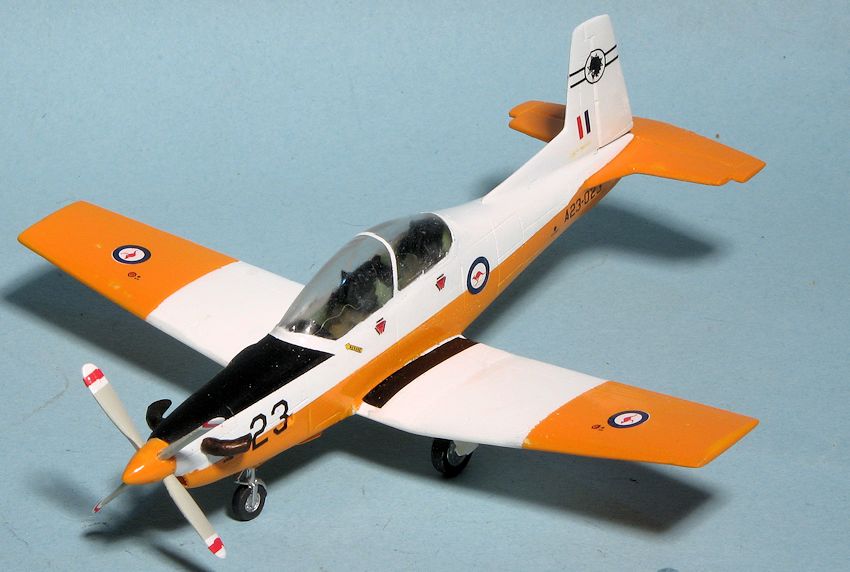
The project stalled for a while as I really was not into the schemes that came with the kit. An e-mail to Greg at OZ Mods had a sheet from a later boxing on its way. This is for the orange and white trainer schemes that I think look very nice. This required some masking and that was done. I used rattle can Tamiya bright orange as it pretty closely matched the lighter orange used on these planes. Once that was sprayed on, the upper fuselage anti-glare panel was painted black.
Meanwhile I got the landing gear ready and after the paint dried, got the airframe on its gear. The kit showed a distinct and rather excessive nose down attitude. I broke free the main gear legs and removed a portion from the m and reattached them. It is still nose down, and while it looks a lot better, I think the only solution to this would be to extend the nose gear leg as well. With it on its gear, the resin exhaust were attached as was the prop spinner. When at rest, the props on most small turboprops will feather to keep the wind from turning the gearbox. To allow for this, OZ Mods provides an standard 'in flight' prop and separate blades for on the ground. The prop hub was painted and then it was glued to the front of the airframe. The blades were painted light grey with white tips and had the red stripe brush painted.
I then started applying the kit decals. These are VERY thin and in fact, require quite a bit of patience to apply the larger markings. They fold up very easily and once folded are pretty well going to stay that way. I had issues with the wing walk markings more than the other decals. All the serials and nose numbers are separate and I recommend having alternate serials in mind. I was going to do A23-022, but had a couple of the 2s fold on me so had to do 023 instead. I picked the 76 Squadron option. The tail band is a bit short so had to be placed higher on the fin than what is shown in the placement diagram. I put enough stencil markings on it to make it look nice. The decals are ready to apply within seconds of getting wet so you have to put them on one or two at at time at most.
The last bits added were the prop blades and the gear doors. The way the plane currently sits, the prop blades would probably hit the tarmac, so perhaps I should have shortened the blades a bit. The masking was removed and while there were some issues, nothing as horrendous as I'd initially thought.
| CONCLUSIONS |
So there you have it. It is a kit that is not recommended to beginners as you'll have to do some work on it, but it is not beyond the abilities of the average modeler. The markings options available in the various boxings are colorful and the end result will be a nice model of an important trainer type.
| REFERENCES |
http://en.wikipedia.org/wiki/Pilatus_PC-9
July 2015 Thanks to OZ Mods for the review kit. Get yours today at this link. If you would like your product reviewed fairly and fairly quickly, please contact the editor or see other details in the