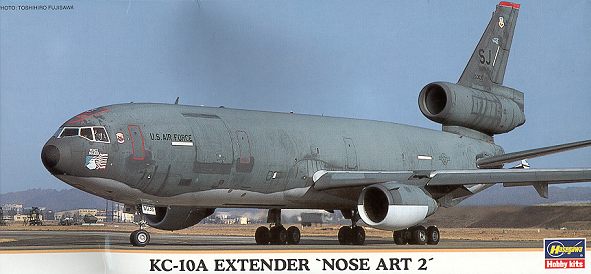
Hasegawa 1/200 KC-10A
|
KIT # |
01332 |
|
PRICE: |
@$19.00 |
|
DECALS: |
2 aircraft of 4th Wing |
|
REVIEW : |
|
|
NOTES: |
'Nose Art 2' |
|
HISTORY |

Back in the mid-1970s, there was seen a need for additional tanker aircraft in the USAF. The KC-135s had been out of production for over 15 years and there was little likelihood of the production line being reopened. Searching around for another aircraft that could combine cargo and tanking missions, proposals were requested and the winning design was a modification of the civil DC-10.
First entering service in 1980 or so, the KC-10 fleet has been a real workhorse for the Air Force. In addition to being able to hold prodigious amounts of fuel, it also has a very large cargo-carrying capability. So far, of all the KC-10s delivered, only one has been lost, and that was due to a ground fire in 1986. When the first aircraft entered service, they were all assigned to SAC and painted in a very attractive scheme of white upper, grey lower with a large blue cheat line that wrapped over the cockpit section. This eventually gave way to the upper color being camouflaged in a dark grey that not only looked ugly, but faded rapidly and was a pain to maintain. This is the 'shamu' scheme shown on the box art. The current scheme is an overall AMC grey which will not as dark, still fades rapidly and is difficult to keep clean
During the Air Force reorganization of the mid-late 1980's, SAC and TAC were disbanded and combined into the new ACC. Overnight, tail codes sprouted on a number of former SAC assets such as B-1s, B-52s, and the tanker fleet. A huge number of C-130s were also transferred from AMC to ACC and began sprouting codes as well. After years of juggling these assets, all the tankers and most of the cargo birds were retransferred back to AMC. Tail codes have left all the non-combat big aircraft, to be replaced by rather boring tail stripes.
|
THE KIT |
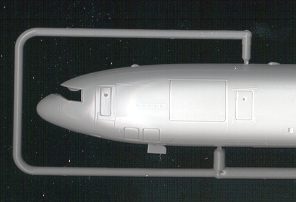
 If you have built any of the DC-10 1/200 airliners, then this will
look quite familiar. All the panel lines are raised with only hatches, doors and
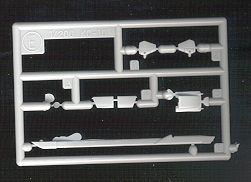
control surface hinges engraved. Different from the airliner kit are new
fuselage halves and the tail boom assembly. All other bits and pieces are
straight from the airliner kit. The only transparency is the cockpit window.
There is no interior as none is really needed in this scale.
If you have built any of the DC-10 1/200 airliners, then this will
look quite familiar. All the panel lines are raised with only hatches, doors and
control surface hinges engraved. Different from the airliner kit are new
fuselage halves and the tail boom assembly. All other bits and pieces are
straight from the airliner kit. The only transparency is the cockpit window.
There is no interior as none is really needed in this scale.
The decal sheet is new giving two aircraft from the 4th Wing with SJ
tailcodes and a red fin tip as on the box art. The sheet is quite complete and
while not having the color of the airliners, is well
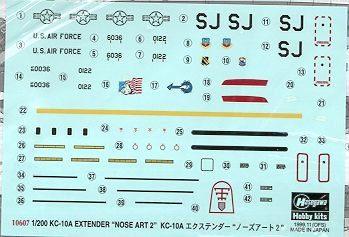 done. The instruction sheet is from the
initial release of this kit back in 1987. It is typical Hasegawa being quite
complete and giving good detail to the assembly sequence. Unlike most kits nowadays,
a display stand is included, but it does not have the nice, big nameplate decal
to go on it that the original issue did.
done. The instruction sheet is from the
initial release of this kit back in 1987. It is typical Hasegawa being quite
complete and giving good detail to the assembly sequence. Unlike most kits nowadays,
a display stand is included, but it does not have the nice, big nameplate decal
to go on it that the original issue did.
|
CONSTRUCTION |
Having built several of the airliners, there were no surprises with construction of this kit. The first thing done was the installation of the two-piece plastic noseweight. This fits into a slot just aft of the cockpit section. The cockpit was then painted a very dark grey (FS 16081) as were the intakes for all the engines. The fuselage halves were then glued together. While that was drying, the fan blades were painted aluminum and then installed into the engine halves. The halves were then glued together. At this same time, the wings were glued together.
 After all those bits had
dried, they were inspected for fit and need for filler. The fuselage needs quite
a bit as so the underside of the wings. For some reason, the underside of the
wings were designed with the joining seam running through the control surfaces
rather just at the edge of them as on so many other Hasegawa kits. Filling this
seam was easy enough, but it required the destruction of all the panel lines on
them. I just removed all the panel lines from the bottom of the wings to make
things easy. The engine pylons have large ejector pin holes that need filled. In
fact, I used filler on most of the seams for this kit.
After all those bits had
dried, they were inspected for fit and need for filler. The fuselage needs quite
a bit as so the underside of the wings. For some reason, the underside of the
wings were designed with the joining seam running through the control surfaces
rather just at the edge of them as on so many other Hasegawa kits. Filling this
seam was easy enough, but it required the destruction of all the panel lines on
them. I just removed all the panel lines from the bottom of the wings to make
things easy. The engine pylons have large ejector pin holes that need filled. In
fact, I used filler on most of the seams for this kit.
Once the tail section had the engine fan in it and was glued together, the engine front was glued in place. It also needed sanded down as it was a touch too large. There is also a large hole in the bottom that needed filling. After the marathon sanding session was over, those panel lines on the fuselage that I removed were replaced simply by running an Xacto knife over them. The raised plastic left by this is pretty close to the raised detail on the rest of the kit.
Major sanding and smoothing complete, the tail and the wings were glued in place as was the cover for the boom operator's window. The flying boom was also glued together at this time. Then the underwing flap hinges were glued in place as was a small exhaust at the rear of the aircraft. It was then time to do some painting
|
PAINT & DECALS |
 Now the instructions tell you to paint the underside FS 36622,
which is a Vietnam era underside grey. The actual color is a Douglas Number
3536, which is, as far as I know, unavailable from the major paint companies.
Requests for info were put to the internet and a Dana Bell article in the July
1992 Fine Scale Modeler was consulted. The Bell article suggested FS 16515 or
Xtracolor X150 or 301. Folks on the net suggested RAF Light Aircraft Grey as a
good match. Not having any of those colors, I used Xtracolor RLM 63, which seems
to be pretty close to the color needed. This was sprayed on the underside of the
aircraft, in the wheel wells and on the landing gear struts. The wheels
themselves were painted aluminum with Aeromaster Tire color on the tires
themselves.
Now the instructions tell you to paint the underside FS 36622,
which is a Vietnam era underside grey. The actual color is a Douglas Number
3536, which is, as far as I know, unavailable from the major paint companies.
Requests for info were put to the internet and a Dana Bell article in the July
1992 Fine Scale Modeler was consulted. The Bell article suggested FS 16515 or
Xtracolor X150 or 301. Folks on the net suggested RAF Light Aircraft Grey as a
good match. Not having any of those colors, I used Xtracolor RLM 63, which seems
to be pretty close to the color needed. This was sprayed on the underside of the
aircraft, in the wheel wells and on the landing gear struts. The wheels
themselves were painted aluminum with Aeromaster Tire color on the tires
themselves.
The underside grey was masked off when dry, and the upper color was then sprayed on. The instructions and all references tell me to use FS 36081 and I had some Gunze FS 16081 Engine Grey which I then used. In case you are not familiar with FS numbers, the first digit tells you how glossy the paint is with 1 being gloss, 2 being semi-gloss and 3 being matte. Using a gloss paint means you don't have to overcoat it with a clear gloss before putting on decals. The engine exhaust cones and pylons were painted in 16081 as per directions. Later, the very ends were masked off and painted steel with the inner cones painted burnt iron.
 After the usual back and forth painting, the kit was ready for
the decals. A note on the upper surface color. Though engine grey, the USAF
version of this paint does have a slightly greenish tint to it. I added a bit of
Aeromaster Russian Topside Green (acrylic) to the Gunze to give it that greenish
tint and it seems to look about right. Just as I was getting ready to put the
first decal in the water, something caught my eye. It was a rather prominent
seam that has seemingly (no pun intended) appeared overnight on the top of the
fuselage. Well, I couldn't let that stay there so out came the 1200 grit
sandpaper and I gently sanded the seam area. Yep, the filler had shrunk and left
me with yet another seam to fill. This time I used superglue as it was such a
shallow one. Only goes to prove that when it comes to filler, dry doesn't mean
cured! After the offending trench was filled and sanded smooth, it was touched
up with the old spray gun and the decaling got underway in earnest.
After the usual back and forth painting, the kit was ready for
the decals. A note on the upper surface color. Though engine grey, the USAF
version of this paint does have a slightly greenish tint to it. I added a bit of
Aeromaster Russian Topside Green (acrylic) to the Gunze to give it that greenish
tint and it seems to look about right. Just as I was getting ready to put the
first decal in the water, something caught my eye. It was a rather prominent
seam that has seemingly (no pun intended) appeared overnight on the top of the
fuselage. Well, I couldn't let that stay there so out came the 1200 grit
sandpaper and I gently sanded the seam area. Yep, the filler had shrunk and left
me with yet another seam to fill. This time I used superglue as it was such a
shallow one. Only goes to prove that when it comes to filler, dry doesn't mean
cured! After the offending trench was filled and sanded smooth, it was touched
up with the old spray gun and the decaling got underway in earnest.
There are quite a few decals for an aircraft this small. A nice touch is that there are decals to cover the open holes for the fuselage windows. They work quite well, though there are those of you who may wish to fill those holes before applying the window decals. All the decals fit well and responded well to the various setting solutions that I tried on them, including Champ solution. Hasegawa decals have come a long way in the last few years and I do appreciate that. Though still a bit thick, they can take a lot of handling and are the proper shades and colors. It took several days to decal the aircraft as I like to do it by major section and let that section thoroughly dry before tackling another. Once all done, the airframe was wiped down with a damp cloth to remove dried setting solution.
 Once the decals were put on, then it was time to finish things
up. The windscreen was cut from the sprue, and to my shock, there were a myriad
of tiny and not so tiny air bubbles in it! Well, no time to ask for a
replacement as I was getting this kit ready for a contest. The windscreen was
masked with Bare Metal Foil and sprayed with aluminum. While that was drying,
the landing gear struts, doors, and wheels were glued in place. I found that the
center main gear stuck down farther than the outboard ones so had to sand down
the center wheels to get it all to sit evenly. Then the engine pods were glued
on as were the horizontal stabilizers and the refueling boom: all using
superglue. The windscreen was then glued in place and the aircraft sprayed
clear flat on the upper surfaces. The lower surfaces remained gloss. Then the
nose was painted flat black with a brush and the masking taken off the
windows.
Once the decals were put on, then it was time to finish things
up. The windscreen was cut from the sprue, and to my shock, there were a myriad
of tiny and not so tiny air bubbles in it! Well, no time to ask for a
replacement as I was getting this kit ready for a contest. The windscreen was
masked with Bare Metal Foil and sprayed with aluminum. While that was drying,
the landing gear struts, doors, and wheels were glued in place. I found that the
center main gear stuck down farther than the outboard ones so had to sand down
the center wheels to get it all to sit evenly. Then the engine pods were glued
on as were the horizontal stabilizers and the refueling boom: all using
superglue. The windscreen was then glued in place and the aircraft sprayed
clear flat on the upper surfaces. The lower surfaces remained gloss. Then the
nose was painted flat black with a brush and the masking taken off the
windows.
This kit took about two weeks from start to finish, the normal time for one of these airliner type kits. How many hours that is, I don't know. I always wonder how some of these people know how long it took to build something. They must keep time or something and write down how long they spent on it. I just build them.
|
CONCLUSIONS |
Overall, quite an enjoyable kit. No real glitches, no surprises, good fit, minimal hassle, nice decals. I mean, what more could one ask from a kit? The end result looks pretty much the way I expected and I expected it to look quite nice. It even comes with a display stand. I marked a little pip in the lower fuselage so that I can drill out the hole for the stand if and when the cats knock it off the shelf and destroy the landing gear!!
I can recommend this kit to just about all building levels. Now if only this kit was released in the current AMC grey scheme in addition to the early white and grey one, that would be great!!
Please note that this was a 1996 special boxing of the standard DC-10 kit and as of this writing, is no longer available.
March, 2000
Copyright ModelingMadness.com. All rights reserved.
If you would like your product reviewed fairly and fairly quickly, please contact the editor or see other details in the Note to Contributors.
Back to Reviews Page 2020