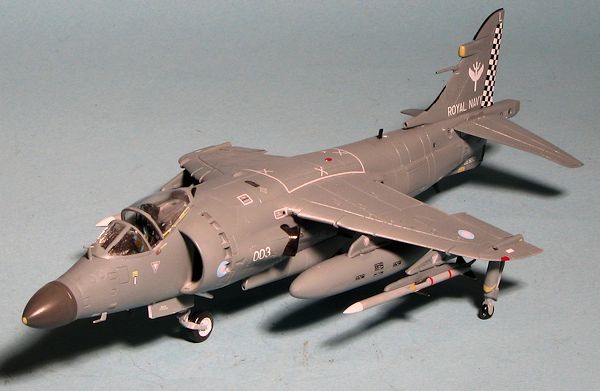
Airfix 1/72 Sea Harrier FA.2
| KIT #: | A04052 |
| PRICE: | $16.95 SRP |
| DECALS: | Three options |
| REVIEWER: | Scott Van Aken |
| NOTES: | Pavla C72096 Cockpit set, U 72-122 radome, and U 72-123 control surfaces used. |
| HISTORY |
The British Aerospace Sea Harrier is a naval VTOL/STOVL jet fighter, reconnaissance and attack aircraft, a development of the Hawker Siddeley Harrier. It first entered service with the Royal Navy in April 1980 as the Sea Harrier FRS1 and became informally known as the "Shar". Unusual in an era in which most naval and land-based air superiority fighters were large and supersonic, the principal role of the subsonic Sea Harrier was air defence from Royal Navy aircraft carriers.
The Sea Harrier served in the Falklands War, both of the Gulf Wars, and the Balkans conflicts; on all occasions it mainly operated from aircraft carriers positioned within the conflict zone. Its usage in the Falklands War was its most high profile and important success, where it was the only fixed-wing fighter 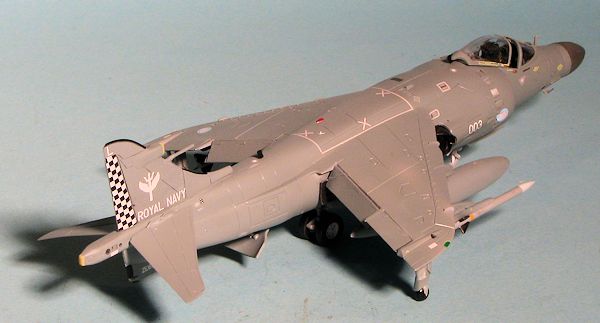 available to protect the British Task Force. The Sea Harriers shot down 20 enemy aircraft during the conflict with one loss to enemy ground fire. They were also used to launch ground attacks in the same manner as the Harriers operated by the Royal Air Force.
The Sea Harrier was marketed for sales abroad, but by 1983 India was the only operator other than Britain after sales to Argentina and Australia were unsuccessful. A second, updated version for the Royal Navy was made in 1993 as the Sea Harrier FA2, improving its air to air abilities and weapons compatibilities, along with a more powerful engine; this version continued manufacture until 1998. The aircraft was withdrawn early from Royal Navy service in March 2006 and replaced in the short term by the Harrier GR9, now itself retired, although the intended long term replacement is Lockheed Martin's F-35 Lightning II. The Sea Harrier is in active use in the Indian Navy, although it will eventually be replaced by the Mikoyan MiG-29K. Although withdrawn from active Royal Navy service, Sea Harriers are used to train naval aircraft handlers at the Royal Navy School of Flight Deck Operations. One Sea Harrier FA.2 is airworthy in the United States and makes appearances at some air shows.
| THE KIT |
Valom hOpening the now familiar folded thin cardboard box, one finds three grey sprues and one bag with the clear bits in them. The molding on the kit isn't bad. Though I find the engraved work to be a bit overdone, it is not a deal killer and is well excecuted. I found no flash, not ejector pin marks that would be seen, but I did find a few sink areas on drop tanks and fuselage halves opposite the rather large alignment pins. The ejector marks on the wing halves should be sanded flush to be sure they don't interfere with fit. As you might expect, two of the three grey sprues are identical to thos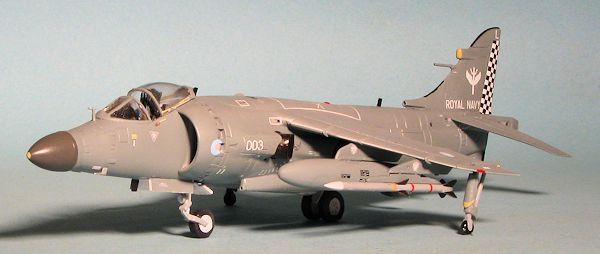 e offered in the FRS.1 kit with only the fuselage sprue being different.
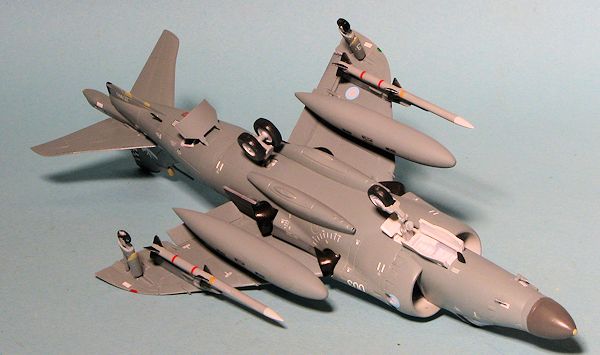
The kit has a multitude of options. There are inserts to the intakes that can portray the aux intake doors either flush with the surface or with the upper ones dropped down as they are with the engine off. Gear doors can either be posed full open, with the main ones closed or all of them closed as in flight, though there is no in flight display stand. Other options are open or closed canopy. Unlike the FRS.1 kit, the FA.2 does not offer the gun packs, though there are AAMRAMS to use. In addition to the aforementioned drop tanks, there are Sea Eagle ASMs and two different Sidewinder set ups; one with a single launch rail and one with twin rails.
Detail is fairly good for the cockpit with a three piece bang seat. The landing gear is nicely done and main wheels are flattened. Gear wells have good detail though for most, the doors will be closed making that a moot point. There is also a posable speed brake and the exhaust nozzles can be rotated. Like all Sea Harrier kits, you can see the huge fan blade through the intake.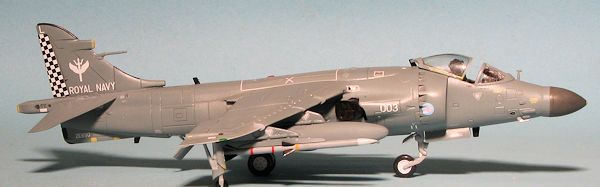 Instructions are very nicely drawn, though frustratingly, Airfix still insists on only supplying Humbrol paint numbers instead of giving a nice conversions chart with real paint information. This does not, however, extend to the full color decal and painting guide, where the shades are called out. There are three markings options with all aircraft in Medium Sea Grey. One is the box art plane from 800 NAS, while planes from 801 NAS and 899 NAS are also provided. Decals are first rate and should work beautifully.
| CONSTRUCTION |
This kit had been sitting next to my work bench since it was initially released in mid-2010. I also had three Pavla upgrade sets for it and despite the knowledge that upgrade sets severely increase the build time, I decided it was time to go ahead and get this one built.
First thing I did was to remove the pour stubs from the various bits in the Pavla cockpit set. I also installed the kit control stick after drilling a hole for it. Not that the upgrade bit was bad, but it was broken, an issue I often have with Pavla sets as fine parts like this are just not designed for the rough handling they take in the journey from the Czech Republic. The cockpit area on the Airfix kit was modified as directed in the instructions, though I overdid one side. I also cut and removed the fin and the ailerons and flaps. The latter two were easy to do by scribing and then snapping the bits free. Thanks to Airfix's somewhat soft plastic, such work is not at all difficult. I also trimmed the openings, making sure the resin replacements fit. Pavla includes new aileron actuator fairings and apparently ones for the flap, but these later bits are molded 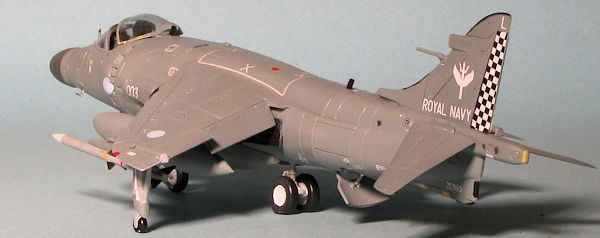 backwards from what I can see. They would work great if they were to go on the upper wing, but they are lower wing bits and would have the flaps sticking up in the air! There are also a couple of other unidentified (at least at the moment) bits on the control surfaces set (this set has no instructions).
I assembled the wing halves and applied filler at the joins as they are a bit large. I also put together the drop tanks and the exhaust nozzles. The nozzles could use an aftermarket resin set and while Pavla makes a set for the Airfix 1/72 FRS.1 kit, they do not fit, being a bit undersize for the openings and a bit too tall as well. The interior bits, including the sidewall pieces, were painted dark gull grey. This may be a bit darker than they should be so I'll lighten them up. The instructions would have you reduce the thickness of the cockpit alignment tabs, but it is easier to thin the resin of the cockpit tub.
I then installed all the gear wells and the speedbrake well. The engine intake subassembly was painted and built up as well. This is a rather tight fit and was glued in place after I glued in the cockpit and sidewalls. Then the fuselage halves were glued together. Again, a very tight fit in the front and keeping the various wells aligned was a bit tricky. All of this was done before the glue fully dried so I could wiggle things around a bit. Since I was not doing my Shar in flight, I installed the ground intake door section into the intake lips. These were then glued in place. Again, fit is tight and this time not all that great so prepare yourself to fill some gaps.
 Once that was pretty well done, the wing was cemented in place and the usual filler applied to the gaps. I used a motor tool to open the nose cone area after sanding down the lip for the kit cone. Then Pavla nose cone fit very well. I also attached the Pavla fin and rudder at this time. Since it is a butt join, one has to be cautious in lining things up. I had some trouble locating the small tail cone on the Airfix sprues, but finally found it and installed it.
Moving to the underside, I installed the small piece in the front of the speedbrake well and then the guns. I may have gotten things wrong, but it seems the instructions show the wrong part number for the right or left side. Just ensure that the shell ejector chutes are aiming outboard. I drilled out the muzzles before installation. Next, the ailerons and flaps were glued in place with the flaps deployed.
I then looked to getting the landing gear ready. During this process I discovered something odd. There is only one rear axle stub when there should be two. The instructions show this misshapen rear gear so I am wondering if they are all like this. It was a simple matter fix by drilling a #55 hole in the side missing the stub and inserting a section of stretched sprue.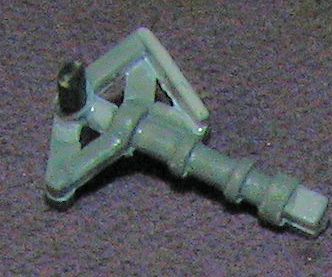
Looking at the instructions they show three gear/doors options. One is for gear up and doors closed. Another is for gear down and all the gear doors open. The third is for gear down and all the gear doors closed. I looked at many photos on Google and came to the conclusion that unless the engine was running, the main gear doors were up and the nose gear doors were down. So I got ready to install the main gear doors up. Airfix does not offer additional 'closed door' pieces as they do on newer kits. In this case, the mounting lugs on the main doors need to be cut off, something the instructions fail to note. An additional issue is that the doors are too long and too wide to fit as they are with the lugs cut away. They need some sanding to reduce their size to fit into the well. Even then they are bit thick, but I took care of that by sanding them flush. Thanks to the soft plastic, all of this is pretty easy. I then attached the windscreen and tacked the canopy in place after masking them. The windscreen was a tight fit due to the height of the resin instrument panel piece.
| COLORS & MARKINGS |
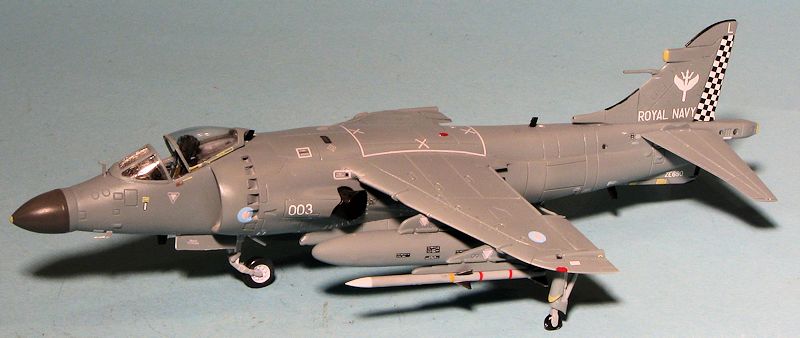
 Seemed like a good time to start painting. The Shar as done in the kit, as well as pretty much all FA.2s was painted medium sea grey using Testors paints. The exhaust nozzles were painted jet exhaust and the rear heat plates were done in steel. Landing gear and missiles were painted light ghost grey, FS 36375. The forward radome was painted dark sea grey. Don't forget to paint the inside of the speedbrake in the exterior color as that was standard practice to make it less visible when deployed in combat.
| FINAL CONSTRUCTION |
I then installed the landing gear, followed by the nose gear doors. With the flaps lowered I had to trim the back pin on the fuselage blast plates to get it to fit. The nozzles were then glued in place. I also attached the tailplanes. When the gear was dry, the main wheels were glued in place. I had decided to use the AMRAAMs and fuel tanks under the wings so those pylons were glued in place and they were touch up painted in place. The nose gear doors were then attached, followed by the outriggers. Then the airframe was given a gloss clear in preparation for decals.
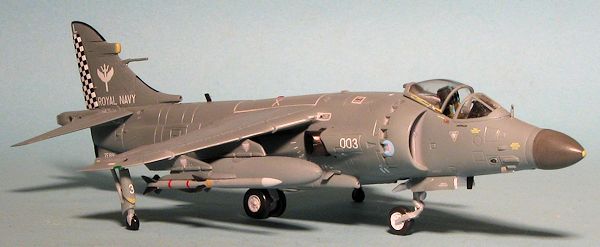
 The Shar FA.2 did not fly with a ton of units and while there are markings out there for several of the special schemes, I wanted to do a standard plane. So I went to the kit decals and chose the 801 NAS offerings. Since this is a typical modern jet, the decal application was something that took nearly a week, thanks to all the data markings. The decals are superb and reacted well to Microsol. One thing I did find is that the placement and painting drawings are more detailed than the actual panels on the kit so sone has to do some interpolation when it comes to placement.
With all the markings in place, I did some detail painting. I used Vallejo buff for some of the antennas and black for the other bits. I also had to attach various pieces that had been left off for fear of knocking them off while applying the markings. This includes the myriad of antennas and probes. The Pavla set included a superbly thin tail probe, but it was broken so I cut away the kit one and glued that in place. The speedbrake was attached and the Pavla resin MB Mk10 seat was painted up. I then gave the kit an overall semi-matte clear coat to seal in the decals. The masking was removed from the clear bits and the canopy removed. I was less than pleased to find out that by pressing down on the windscreen to keep it in place, I induced a mass of stress cracks in it. The last steps were to install the seat, attach the drop tanks and the missiles and replace the canopy section. I left it slightly open as it wouldn't clear the antenna just behind it.
| CONCLUSIONS |
Surprisingly, adding all the resin to this one did not slow down the build as much as I thought. While the fit on this wasn't quite what I was hoping it to be, despite the glitches, the end result is what really matters and in that I'm quite pleased. The Pavla sets did their job of enhancing the kit and can be recommended. I was also pleased at how well the kit decals functioned. Hornby seems to have taken care of one of the biggest complaints regarding Airfix kits and that is good for us all.
| REFERENCES |
http://en.wikipedia.org/wiki/Sea_Harrier_FA.2
July2013
Copyright ModelingMadness.com. All rights reserved. No reproduction in any form without express permission from the editor
If you would like your product reviewed fairly and fairly quickly, please contact the editor or see other details in the