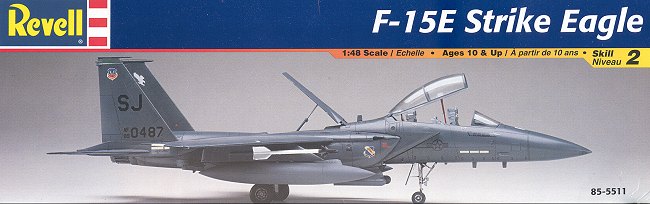
| KIT # | 5511 |
| PRICE: | $18.50 MSRP |
| DECALS: | 390 FS and 335 FS |
| REVIEW : | |
| NOTES: | New Tooling |
| HISTORY |
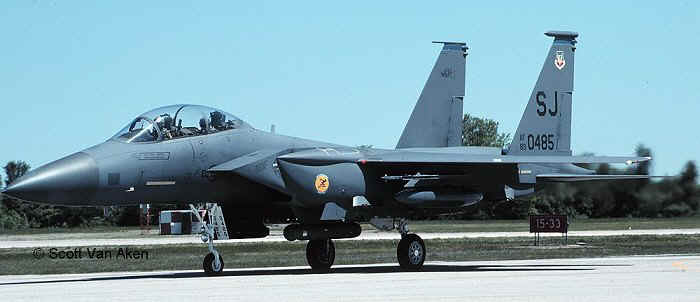

Developed from the single seat F-15 Eagle, the F-15E is built asa multi-role aircraft, unlike it's earlier cousins, which are strictair-superiority aircraft. A dedicated two-seater, the F-15E is equipped withconformal fuel tanks and a number of hardpoints on which it can carry a widearray of current air to ground ordnance. There are also pylons on which areattached an infrared seeker and a navigation pod that are so necessary for thedelivery of modern guided weapons.
The Strike Eagle first entered squadron service with the 405thTactical Training Wing at Luke AFB in Arizona. From there, pilots went to the4th Tactical Fighter Wing (now 4th Fighter Wing) at Seymour-Johnson AFB, NouthCarolina on the east coast, once there were enough Strike Eagles to fill thewing. Since then, all Strike Eagle training has been switched to the 4th FighterWing as Luke is now an all F-16 base. Other units flying the Strike Eagle arethe 366 Wing at Mountain Home AFB in Idaho, the 3rd Wing in Alaska, and the 48thFighter Wing in England.
F-15E production is now almost over, though the localpoliticians in Missouri manage to have a few trickle off the assembly lines.Foreign customers for the E version are Israel with the F-15I and Saudi Arabiawith the F-15S.
| THE KIT |
 This particular kit has been long awaited by Eagle fans worldwide. The previous kit in this scale by Hasegawa was not a true F-15E, but adoctored up version of its F-15D, missing a number of items such as the bulgedgear doors. These have all been taken care of in this new kit from Revell,which, by the way, is made in Korea, as all the parts bags proudly announce.
First thing you notice is that this kit is in that miserable newbox that Revell is so proud of. My copy had a large rip in the back of the boxthat had been patched with a piece of scotch tape. In addition, the glue for thebox was defective and upon opening the shrink wrap, my box basically selfdestructed!! Not a very auspicious start, but frankly, most of us who build newRevell kits have a nice Tamiya or Hasegawa box laying about to put the piecesinto while we build it.
The sprues are packed one or two to a bag, which is very niceand keeps the parts nice and scratch free. An even nicer touch is that thesprues interlock with each other to prevent them from moving around! I noticedthis on the Ju-52 and applaud its use.
 The parts aresuperbly detailed, as one expects from Monogram......err Revell kits of currentvintage. The exhaust, for instance, includes all the actuating rods for theafterburner petals. No more having to use resin aftermarket bits orscratchbuilding. I can see a lot of letters to Revell requesting extra burnercans!! The kit also includes nice long intakes that will surely be a challengeto assemble without having a visible seam. For those of us who are cowards,there are also intake covers provided!
The tree with the fuel tanks and Sidewinders on it has somelarge blank areas on it. Undoubtedly, this is where the bombs would be had theybeen supplied with the kit. But they are not, and this is probably the biggestcomplaint I have heard about this kit. For a kit of a supreme mud-mover to comedevoid of bombs and other explosive thingies is not a pleasant surprise. Itisn't the first time we have seen this as Hasegawa has been doing the same thingfor years, but it is a disappointment. I have heard that there will be two otherboxings of this kit; one with AMRAAMS and the other with all the bombs we wouldhave liked to have had now. I guess this is marketing for you, and something I'mnot real fond of.
 Enough whiningabout the lack of weapons, for now. On to the instruction sheet. It is 16 pagebooklet with multiple steps and a very good set of diagrams. All the parts arecalled out by name and any colors that are needed are listed on each step. Onevery nice addition to the instructions is that they tell you the sequence ofputting together some parts. For instance on the section where you glue thecockpit section and wings to the rest of the fuselage, there are large blockletters telling you to glue the lower wing, then the upper wing, then thecockpit section. If you have seen the ProModeler instruction sheets, then thisis quite similar, but without the photographs.
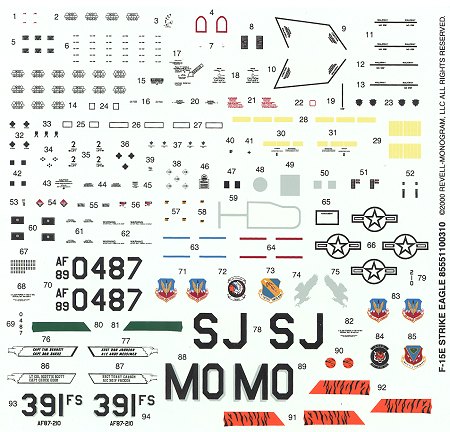
Painting this kit should be a breeze as it is overall 36118. Noneed to freehand camouflage. No need for extensive masking. The decal sheetcovers two aircraft; one from the 335FS/4FW (SJ), and the other for the391FS/366WG (MO). Other than the plethora of mainenance markings so common onmodern aircraft, the unit markings are confined to the tail and small badges onthe intakes. Face it, the F-15E is not a very colorful aircraft! The decal sheetlooks superb and since it isn't done by Scalemaster, is in sharp register. Itactually looks very much like a contemporary Aeromaster or Superscale sheet inquality. Could it be that after 30 years of harping about their decals thatRevell has finally listened to us?? I sure hope so.
Well, there you have it in a nutshell. It looks like a superbkit and one that I know I will be building very soon. Stay tuned, same Bat-time,same Bat-channel. BTW, the Revell copyright is on the underside of the lefttailplane, so some things never change!
| CONSTRUCTION |
Then the interiorbits were taken away to be painted Dark Gull Grey using Testors Model MasterEnamels. While that was happening, I glued the engine intakes and compressorfaces together. There are a number of large ejector pin marks on the inside ofthe intake parts. Those and the daunting task of smoothing out that long intakeallowed me to make the coward's decision to use the intake covers. Therefore theintakes and compressor faces were not painted, but just glued together. Theywere then glued into the fuselage bottom after 8 holes were drilled out for thevarious pods, racks and cooling intakes. Fit of the intakes is superb.
Next the upperfuselage half was glued in place after the gun barrel was glued to the lowerhalf. Fit here was very good as well, much better than the older Monogramoffering. You will have to use filler or at least do some sanding on the areabehind the wing. I fear there is no real way to prevent this from happening asevery F-15 kit I have ever built has this problem. Then the wings were glued inplace. You are given stub upper wings with the upper fuselage half to which youglue a lower wing section. Then the remaining upper wing piece (which has thecomplete lower wing tip) was glued in place. Fit was good, but not great and asmall amount of filler was needed. I used Mr. Surfacer 500 to take care of theproblem.
 While all that wasdrying, it was back to the interior for more painting. The proper bits werepainted black with light grey knobs and a few bits of red, yellow, and greenadded in there to break up the monotony of greys. Meanwhile, the seats werepainted flat black with the ejection handles painted yellow. Back in theinterior, the control columns were painted Dark Gull Grey with flat blackhandles and glued in place. The backseater's two grips were painted flat blackand glued in place. On the instrument panels, the screens were filled withTamiya clear green and once dry, the panels glued in place.
Meanwhile, thelanding gear, wheels, wells and inside of the doors were painted flat whiteusing Colors by Boyd's flat white primer. I know these are supposed to be glossand they will be after a coat of Future, but the flat white coats well and driesfast. When dry, the nose gear well (which is made of four parts) was glued tothe bottom of the interior. Test fitting showed that it would be impossible toglue in the nose gear once the forward fuselage halves were glued together, soit was glued in place at this time. There is a small strut that goes to the aftnose gear door and that was glued to the door. This door is an integral part ofthe aft section of the nose gear well. Having it on there makes it easy to getgood alignment for the door, but makes it very difficult to sand the seam rightunder it when the forward fuselage parts are cemented together.
Once that was dry,the forward fuselage halves were glued together after I put a weight in thenose. The instructions don't call for weight, but I just wanted to play it safe.Fit was very good. When dry, the nose section was glued to the rest of thefuselage. The fit here is a lot better than I would have thought, requiring onlya bit of sanding to smooth things out. The seams are along panel lines whichreally helps.
Next, the forwardintakes were glued on. These items are really movable on the real aircraft andRevell includes the hinge bulges, but they must be glued in the full upposition. It is imperative that you fill the three large ejector pin holes onthe inside of each part as they really are quite visible. Assembly of theseparts was quick and very straight-forward. Engineering on this part is alsoquite good. So far, I am impressed with this kit as it is logically designed.
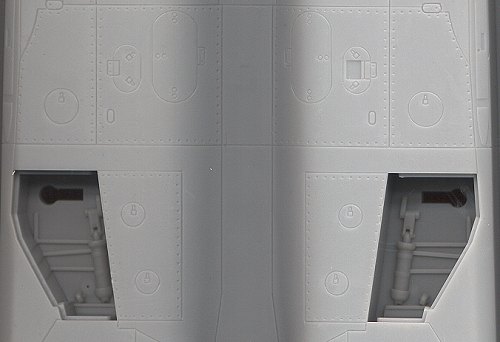
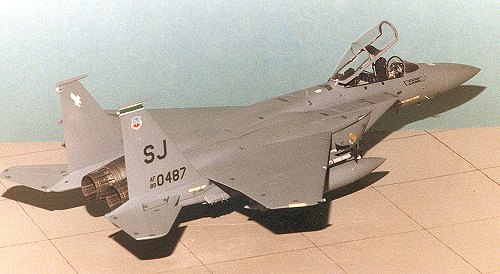
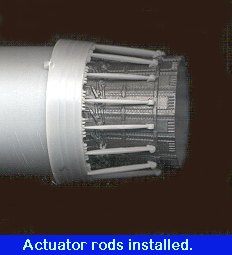 While all this was drying, I assembled the exhaustcones. Thankfully, Revell supplies the 15 separate actuating rods for theafterburner section rather than making this a one-piece affair. First one paintsthe inside of the exhaust flat black. Then the three sections of the afterburnerpetals are glued into the exhaust. Fit is a bit sloppy and there are some gapsbetween the three pieces that need additional applications of glue to fill. Thencomes the daunting task of gluing on those 15 actuating arms. This took a while.I found that the rods are a teeny bit shorter than I would have liked and thesmall holes they attach to are not deep enough for the pins on the rods. Again,a bit of extra glue to bridge the gap was needed and I gave a swipe of sandpaperto the pins so the hinge end would fit well. As you can see from the image, theylook great when done.
Now on to theconformal fuel tanks. First one needs to glue the small exhaust vents to the aftsection of the aircraft. These are what determines how far back the tanks fit,so they MUST be good and solid before gluing the tanks. As one may suspectfrom long, semi-flimsy structures like these tanks, fit was a bit of a struggle.I had to glue it in stages and use clamps where they would fit. Thankfully, thereal things don't fit flush, however they also don't have gaps in them so muchcare is needed during this part of the build. It is obvious that Revell intendsto use this mold for other F-15 versions or they would have molded the conformaltanks as part of the fuselage and saved us the extra work. At this time, thespeed brake was glued in the closed position. It is only used to slow theaircraft down or to impress photographers so is normally not seen in thedeployed position.
 While those bitswere drying, completed the cockpit section. This involved installing a littlespacer and the HUD for the front guy and the anti-glare shield and grab bar forthe back guy. Then the canopy was glued onto the frame (which had already beenpainted) and a front section was also glued in place. Since there is a nicebubble section to the canopy, there is a seam that needs to be removed. This wasdone using various grades of sand paper and a buffing pad. It was then masked.When I tried to install it on the aircraft, I found that it would not fit in theclosed position. Not sure why, but there it is. Next, the windscreen was gluedin and also masked. The open cockpit sections were then sealed off with tape inpreparation for painting.
I always like tohave all the bits that are to be painted the same color glued in place beforepainting if at all possible. That saves me the embarrassment of spilling glue onnice paint. Well, it cuts back on it a bit anyway! Returning to theunderside, the various bomb racks were glued in place. The kit instructions wantyou to glue on the smaller outer racks to the conformal tanks first, but I gluedthe long inner rack first. Good thing too as I needed some clamping and theouter racks would have gotten in the way. Then the smaller outer racks wereglued in place. All fit very well, but the aft one is a bit tricky to get in theright position. Then the centerline rack and the two pods were glued to thelower fuselage. Finally, the forward nose gear door was glued in place. That isnormally closed when on the ground.
I had thought aboutmasking off the nose gear and door prior to painting, but it would have been areal hassle. Instead, I'll either brush paint over the overspray, or mask offthe nose and spray the white parts again, which in this case seems a lot easier.This wasn't done for the main gear. Here, a bunch of toothpicks were placed inthe gear well so the kit wouldn't have to touch the spray bench while drying.Then it was off to the paint shop.
| PAINT & DECALS |
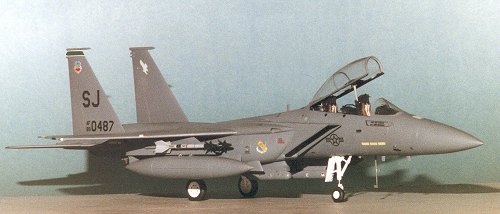
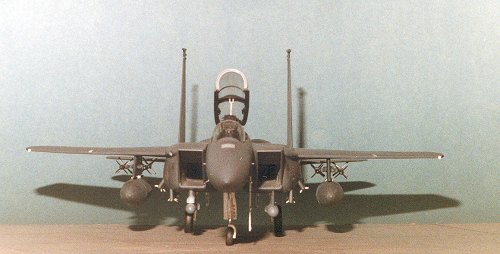
This is the easy part. The whole aircraft is simply overall FS36118, Gunship Grey. I used Aeromaster Enamels for this and it was a piece ofcake to paint. It does take quite a bit of paint to cover all the aircraft plusthe drop tanks and various pylons. On some Mudhens, the nose radome is a bitbrowner than the rest of the aircraft. I'll leave it up to you to decide if youwant to paint that a different color. Once it was dry, the aircraft wasovercoated with Future gloss acrylic in preparation for the decals. Then thetail section was masked in preparation for getting what on the instructions saysshould be titanium paint. I used Tamiya tape for the masking and sprayed thearea with Testors Titanium Metallizer. The very ends of the jet pipes and theinside of them was sprayed with Burnt Iron Metallizer. After taking off all themasking and looking at books, I realized that the Titanium Metallizer is toodark. What would have been more appropriate is a lighter metallic like steel oreven aluminum. Something to think about.
 Well there certainly are enough decals to make everyone happy.Typical of modern aircraft, there are zillions of small maintenance decals to goon. Enough so that decaling itself took several hours. It was during this phasethat I noticed that not all of them were in register. Specifically those withwhite in them, the white seemed to be the culprit. Not a major problem as thereis darn little white on the sheet, but something you may wish to consider.Another glitch is that the nose 'slime lights' are larger than the engraved areaon the nose in which they fit. It also seemed to me that the call outs forplacement of some of the maintenance decals didn't exactly seem to correspondfor what was where the decals were placed. For instance, the grounding decalsweren't near any grounding jacks that I could see. Those that work on the planewill undoubtedly be able to find more.
The decals themselves are really excellent. They go on as wellas any aftermarket sheet and are as thin as any Aeromaster or Superscale sheet.I used the Superscale system on them with the more recalcitrant decals gettingthe Champ treatment. I chose the 4th TFW scheme from Desert Storm, mainlybecause of the nose bomb markings, the eagle on the inside of the tails, andbecause I wanted a TAC bird, not one from ACC. As mentioned in the instructions,this bird also has the distinction of wasting an in-flight Iraqi helo with aPaveway laser guided bomb!
A downside of applying all those decals on a rather largeand heft kit is that there were sections along the leading edges where I woreoff all the clear coat and paint! These needed to be touched up before the finalclear coats could be added. Let me tell you, it was rather nerve-wracking havingto do touch-up spray painting on a kit that was already decaled! Once that wasdry, a couple of coats of semi-matte clear were sprayed on to seal the decals.
| CONSTRUCTION CONTINUES |
 Now that it was all painted, the last fiddly bits were added,and on this kit there are a lot of them! For one thing, there were a myriad ofsway braces to add on. In addition, there were various sensor intakes and pitottubes, the fuel tanks were glued to the pylons which where glued to the wings.Then the Sidewinders (which, by the way, are not white but ghost grey with blackheads) had their decals put on them and were glued to the pylons. The tail hookwas decaled and installed as was the boarding ladder and main gear doors.Finally, the canopy and windscreen were unmasked, the afterburner cans pluggedin, any touchup paint needed in the cockpit was done, the seats installed aswere the canopy actuator and prop, and finally the canopy glued in. Whew!!
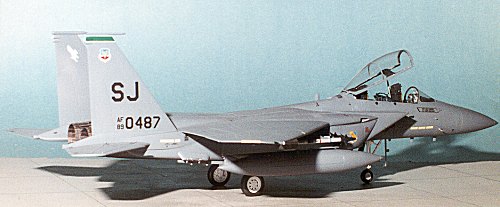
A bit more painting of lights and antennas and it was done. End result was one very nice looking Strike Eagle that didn't take two months to build. Sure, most folks will take a bit more time and undoubtedly do a bunch of more detailing than I did, but modern aircraft are not my purvey. I didn't anguish over whether this bit was the right one or if this particular aircraft had white antenna covers near the exhaust.
| CONCLUSIONS |
A really great kit and one that everyone who does modern jets should have in their collection. Would have been even better with a full suite of ordnance! I'm sure that there will be several aftermarket sheets for this aircraft as I can think of over a dozen squadrons that have flown this aircraft. Highly recommended.
| REFERENCES |
Combat Aircraft Magazine. January 2000
April 2000
Copyright ModelingMadness.com. All rights reserved. No reproduction in part or in whole without express permission.
Review copy courtesy of me and my wallet!
If you would like your product reviewed fairly and fairly quickly, please contact the editor or see other details inthe Note toContributors.
Back to Reviews Page 2021