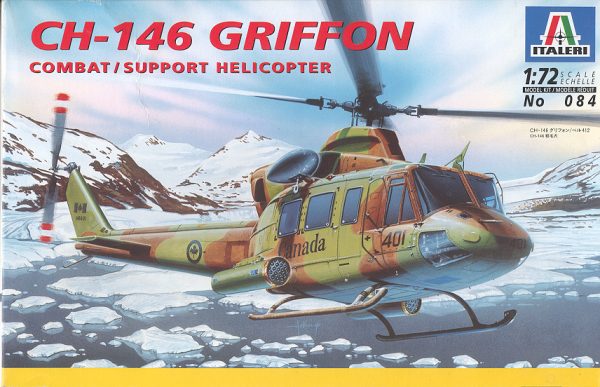
Italeri 1/72 CH-146 Griffon
|
KIT # |
084 |
|
PRICE: |
$14.00 |
|
DECALS: |
Three aircraft |
|
REVIEW : |
|
|
NOTES: |
` |
|
BACKGROUND |
Follow the link to get a look at what's in the box and a brief historical preview
|
CONSTRUCTION |
Since this kit
was bought at a swap meet and devoid of decals (pays to check the box before
forking over the funds), it became this years helo model. I don't build many
helos, though I do like the genre. For some reason they just don't get the bench
time that other kits do. Anyway, this one looked pretty nice. You could tell by
fitting some of the parts together that this is definitely based on an earlier
Bell 212/UH-1N kit. Much of the fuselage is the same, only the rotor head and
gearbox area seems to be much different from the earlier type.
First thing was to build up the interior. This was painted in a darkish grey as
per instructions after many of the components that were to be the same color
were installed. This included the three piece seats, the controls and rudder
pedals as well as some framework in the nose area. I managed to break a couple
of the rudder pedals getting them off the plastic trees. The connections are a
bit large so take care. The next area was the roof, the back cabin wall and the
aft seats. These were all painted in Israeli AF green with aluminum bits. The
fit of the stanchions for the forward canvas seat was not very good. Mine lean
and I don't think they are supposed to. The instrument panel was painted flat
black and drybrushed. At this time the interior was fit into the fuselage
halves. 'Fit' is term used loosely.
Now, let me back up a bit. Before installing the roof section, I painted the
upper eyebrow windows with clear green and glued them in place. Fit was not
good. In fact, one of them fell into the helo after all the doors had been glued
on. Getting it back in place with be a real trial. I also found the windscreen
to be a less than perfect fit. The clear parts for the side doors were a strange
mixture. On the very small doors, the clear bits fit perfectly. Same for the
left cabin door. Not the same for the right. The clear bits are not marked left
or right for these parts so I'm at a loss. I glued the cabin doors in place. Fit
wasn't bad, but there were gaps, again, more prevalent on the right side, and
I'm positive I didn't install it upside down! The tailplanes fit well and were
then glued in place as were the landing skids. The skids have several ejector
pin marks that will need filled and sanded. By this time, I didn't think it was
worth the effort as no way would this be a contest kit. With the airframe
basically complete, I masked off the transparencies and a few other places and
headed for the paint shop. The rotor mast was then
assembled, painted and glued in place on the upper side of the interior roof.
The next step was to install the cockpit door transparencies. Actually this
should have been done before the fuselage halves were glued together, but I
forgot. The interior top was then glued in place, again, fit was not that great.
The roof section was next. Again, fit is pretty poor. Much detail was expended
in filling gaps. Are you seeing a trend in fit? This sloppy fit was found to be
the case with just about all the major airframe components. On the real helo,
this would result in gaps 3-4 inches wide in some cases. This is particularly
true of the parts that make up the engine exhaust, engine covers, and
gearbox/rotor shaft fairings. I adjusted the parts the best I could to enhance
fit, but it wasn't enough. After getting the gearbox cover on, the rotor shaft
was found to be too far forward and there is no way the rotor head is able to
turn as it is jammed up against the forward section of the upper opening.
The rotor mast was then
assembled, painted and glued in place on the upper side of the interior roof.
The next step was to install the cockpit door transparencies. Actually this
should have been done before the fuselage halves were glued together, but I
forgot. The interior top was then glued in place, again, fit was not that great.
The roof section was next. Again, fit is pretty poor. Much detail was expended
in filling gaps. Are you seeing a trend in fit? This sloppy fit was found to be
the case with just about all the major airframe components. On the real helo,
this would result in gaps 3-4 inches wide in some cases. This is particularly
true of the parts that make up the engine exhaust, engine covers, and
gearbox/rotor shaft fairings. I adjusted the parts the best I could to enhance
fit, but it wasn't enough. After getting the gearbox cover on, the rotor shaft
was found to be too far forward and there is no way the rotor head is able to
turn as it is jammed up against the forward section of the upper opening.
|
CAMOUFLAGE & MARKINGS |
Then the kit was trotted back to the workbench to have the various antennas
and such attached. The Slovenian antenna fit is different from any of the
options given in the kit. Fortunately, there are enough of them provided so that
you don't have to root around for spare parts. The kit also provides cable
cutters and a radar nose, as some of the Slovenian 412s are outfitted with
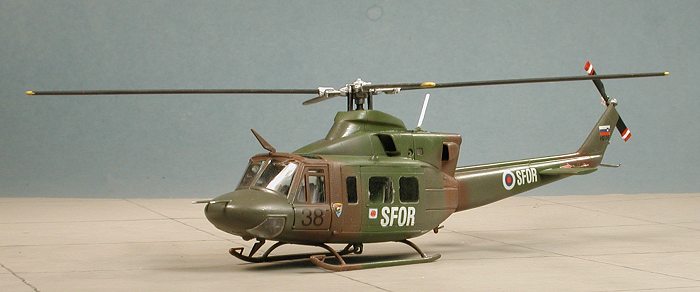
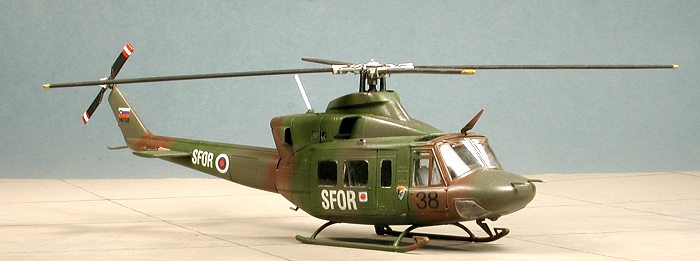
radar. I chose not to use it as the fit is not good. The Insignia sheet gives one the opportunity to do the Slovenian Bell 412s in
a variety of markings. I decided to do the ones with the large 'SFOR' on the
doors and tail boom. These helos were used during peace-keeping duties in the
Balkans during 1998/99 (and perhaps after, though the sheet stops in 1999). The
Insignia decals are well printed and quite reminiscent of Modeldecals, so I am
assuming that the same folks are used. One
Once the decals were on and dry, the kit was resprayed with clear to seal in
the decals. Then there was the usual touchup painting. Getting the clear part
that fell into the interior reseated was a real chore. I eventually had to
'unglue' one of the side doors to get this thing in place. Not a lot of fun at
all! With that firmly in place, the remaining lower transparencies were glued
in, but not before I installed a few weights in the very nose of the plane.
Unfortunately, this helo is a tail-sitter and there isn't really anywhere else
to put weight! With the weight in, the lower transparencies were glued in place
as best I could get them. The tape was then taken off the other transparencies, the tail and main rotors
glued in place, a bit of touchup was done with the paint, and the helo was finished.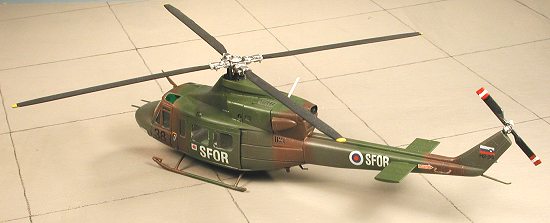 If you recall from the
Insignia Special on Slovenia and Macedonia, there
were a number of Bell 412s in Slovenian service. I decided to do one of those.
Shortly after the type entered service, they were given a camouflage scheme in 2
greens and a brown. In many photos, especially black and white, it looks like a
single color. The shades are FS 30111, 34096 and 34128, none of which are
available as premixed paints. FS 595 fan deck in hand, I started looking for
stuff that was close. For the 30111, I used Japanese primer brown, for the
34096, I substituted 34097 and for 34128, RLM 71 was used. These paints were by
Aeromaster, Testors, and Gunze; acrylic, enamel, and acrylic respectively. The
colors were airbrushed on in a random pattern as I figured few could tell the
difference!
If you recall from the
Insignia Special on Slovenia and Macedonia, there
were a number of Bell 412s in Slovenian service. I decided to do one of those.
Shortly after the type entered service, they were given a camouflage scheme in 2
greens and a brown. In many photos, especially black and white, it looks like a
single color. The shades are FS 30111, 34096 and 34128, none of which are
available as premixed paints. FS 595 fan deck in hand, I started looking for
stuff that was close. For the 30111, I used Japanese primer brown, for the
34096, I substituted 34097 and for 34128, RLM 71 was used. These paints were by
Aeromaster, Testors, and Gunze; acrylic, enamel, and acrylic respectively. The
colors were airbrushed on in a random pattern as I figured few could tell the
difference!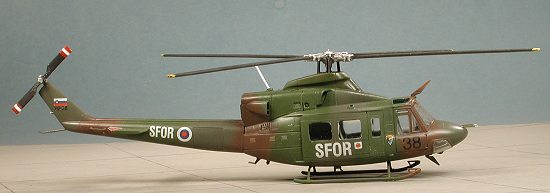 During this time, the main rotor was glued together and painted. Actually it
is the other way around. While the attachment points on each blade are very
flimsy and easy to break, once glued to the center bits, it assembly becomes
quite sturdy. Blades are black with yellow tips and various metal colors for the
hub. There are two nose pitot tubes to glue on. I highly recommend drilling out
attachment holes for them as they look terrible just glued onto the nose. With
all this stuff now firmly glued in place, it was back to get some more paint
sprayed on. That accomplished, the kit was then sprayed with clear acrylic in
preparation for the decals.
During this time, the main rotor was glued together and painted. Actually it
is the other way around. While the attachment points on each blade are very
flimsy and easy to break, once glued to the center bits, it assembly becomes
quite sturdy. Blades are black with yellow tips and various metal colors for the
hub. There are two nose pitot tubes to glue on. I highly recommend drilling out
attachment holes for them as they look terrible just glued onto the nose. With
all this stuff now firmly glued in place, it was back to get some more paint
sprayed on. That accomplished, the kit was then sprayed with clear acrylic in
preparation for the decals.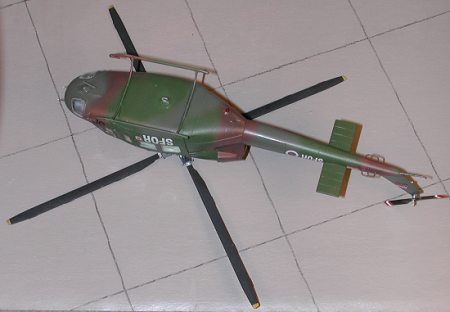 is always worried about how opaque
the white is on decals and I'm glad to say that these are quite opaque. They
also succumbed to Solvaset with no troubles at all.
is always worried about how opaque
the white is on decals and I'm glad to say that these are quite opaque. They
also succumbed to Solvaset with no troubles at all.
|
CONCLUSIONS |
I build darn few helicopters, usually averaging only about one a year. This one is not really going to be high on my list of fun kits to build. The fit troubles that I had may be only due to my inexperience with the genre, but it definitely didn't make this a super fun kit to build. I'd be interested in hearing from others who may have built this or the UH-1N kits by Italeri to see if my problems were totally self inflicted. Needless to say, I can only recommend this kit to those who are willing to put up with the fiddly-ness and less than great fit that I experienced.
PS. I just noticed that I put the tail flag markings on backwards. No need to send e-mails about it. I'll just chalk that up to one more glitch on the kit!
|
REFERENCES |
Air Forces of the former Yugoslavia 1991 - 1999 Part 2: Slovenia and Macedonia (which is also the decal sheet).
September 2001
Copyright ModelingMadness.com. All rights reserved.
Review kit courtesy of me and my wallet!
If you would like your product reviewed fairly and fairly quickly, please contact the editor or see other details in the Note to Contributors.
Back to Reviews Page 2020