
Kit: Revell-Monogram Star Fury Mk 1
Scale: 1/72
Kit Number: 85-3621
Price: $12.75
Media: Injected Plastic
Decals: five versions: Two Presidential Escort, Psy Corps, Cdr Ivanova, Capt Sheridan.
Date of Review: 21 April 1998
Review and Photos by: Scott Van Aken

I have liked Babylon 5 ever since it first aired about 5 years ago. The
story is interesting and the vehicles are pretty wild. The Star Fury
is the standard Earth Force interceptor carried by all stations and destroyers.
Many of them carry personal markings of some sort on the top of the
hull and upper wings.
When you open the box of this R-M kit, you step back in time to the early
1980s. No superdetailed parts, no engraved panel lines, a large decal
sheet of extremely thick and glossy decals, and a minimalist instruction
sheet with few painting guides and a lot of drawings. I was warned
that Sci-Fi kits are rarely cutting edge and this one proves it. There
are few parts and all of them fit poorly. The large wing sections required
multiple coats of putty and much sanding to fill the trenches between parts.
The fuselage components also required this treatment, albeit to a lesser
extent. Much of the raised panel line detail on the engine pods was
erased during construction and had to be rescribed.
Probably the most in furiating part of construction is where to place the
guns. It is almost as if they are an afterthought. They are poorly
molded and have no firm mounting. The lower ones are relatively easy
to install, but the upper ones are impossible. There in no set way for them
to be mounted. I just stuck them in there and slathered superglue around
in hopes they will not fall out!!
The rest of the pieces are part of the engine pods and fit onto their
proscribed mounting places fairly well. I used superglue to mount all
of them. The cockpit can be installed after the rest of the craft is
painted if you carve away a tab on the top. There is some detail there
and a pilot. Both are acceptable and can be made to look good by painting,
washes and drybrushing. The canopy was the last part installed and
fit where it touched. Of course it could have been made to fit better, but
by this time I was thoroughly fed up with all the fit problems. Actually,
it isn't as bad as it sounds--it's worse ;)

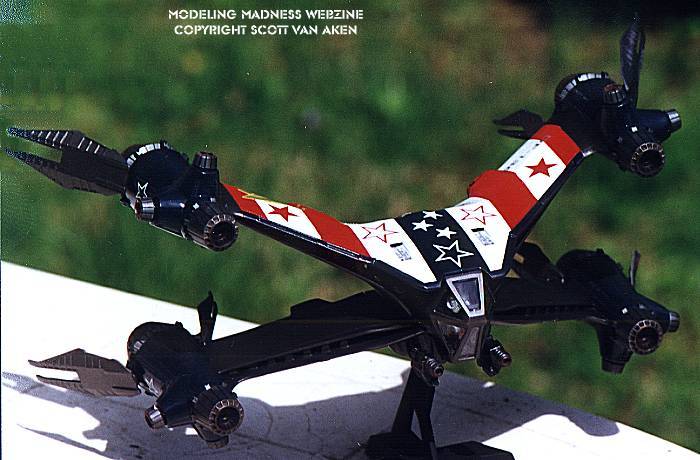
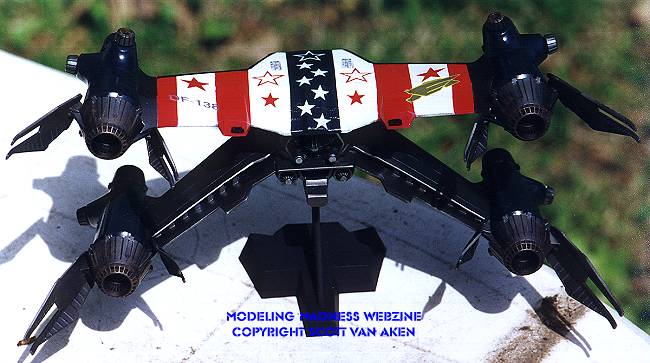
Most of the construction time of this kit was spent painting. The basic
Star Fury is overall gloss grey---about the same color as ADC grey.
However, I wanted something flashy and a bit different. First off,
I painted the upper wing/fuselage area gloss white. Then I masked off
areas and painted them red. Finally, the other areas and engine pods
were painted Dark Sea Blue. The red, white and blue were Testor's Model
Master enamels. Once dry (and I'm compressing several weeks worth of
painting into a few sentences), I masked them with Parafilm M (the only thing
to use for convoluted surfaces) and sprayed the rest of the kit (other than
the engine nozzles) and the outside of the exhaust deflectors a special mixture
of Metallizers that I did for this kit. Once that was done, the engine
exhausts were painted Titanium, the inside of the deflectors Burnt Metal
and Exhaust, and the guns were Gunmetal (naturally!). The exhaust nozzles
were then detailed with a Rapidograph and then drybrushed with Burnt Iron.
Finally they were brushed with various pastels. The rest of the
fuselage detail was washed in dark brown and drybrushed with Steel as were
the guns.
I used a few of the kit decals and the rest were from the spares bin and various other sources. Since there are no landing gear, a semi-sturdy stand is supplied with the kit and that was painted flat black. As with other R-M kits, the final result does not show all the hassles and efforts put into making an acceptable model. I do recommend this kit despite all the work, and realize that most will be built in a few hours and then happily flown around the room zapping aliens. After all, that is the market it is aimed at. As to it being 1/72, I doubt it as the pilot looks larger than that. Serious modelers will undoubtedly spend several weeks, as I did, in building this kit, and they will hopefully be as pleased with the result as I am.