Hobby Boss 1/350 HMS Astute
| KIT #: | 83509 |
| PRICE: | $25.99 MSRP |
| DECALS: | One option |
| REVIEWER: | Scott Van Aken |
| NOTES: | Includes stand and photo etch fret |
| HISTORY |
HMS Astute is the lead ship of her class of nuclear-powered submarines. Astute was ordered from GEC's Marconi Marine (now BAE Systems Submarine Solutions) on 17 March 1997. She was laid down on 31 January 2001, 100 years to the day since the keel was laid down for HMS Holland 1, the first Royal Navy submarine. The vessel was built at BAE's submarine facility in Barrow-in-Furness and was launched on 8 June 2007 by HRH The Duchess of Cornwall.
Astute is the second submarine of the Royal Navy to be named for the characteristic of shrewdness and discernment. The first was the World War II Amphion-classAstute. Now that she has been commissioned, Astute is one of the most 'advanced 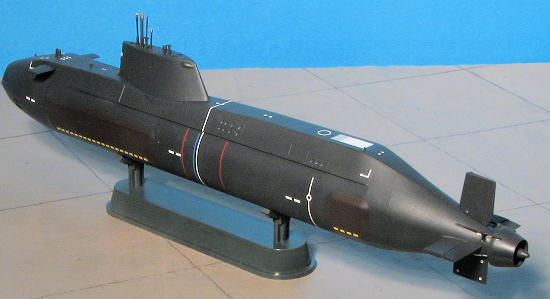 submarines in the world'.
Astute left Faslane for sea trials and dived for the first time on 18 February 2010 and was commissioned on 27 August 2010, when she was given her HMS prefix, in a ceremony watched over by her patron, HRH The Duchess of Cornwall.
On 22 October 2010, the Ministry of Defence confirmed that Astute had "run into difficulties" off the Isle of Skye while on trials after eye-witnesses reported the submarine had run aground a few miles from the Skye Bridge. There were no reports of injuries. The captain of the vessel elected to wait for tug assistance, rather than use the submarine's own power to clear the stern from the obstruction, to minimise the damage to the hull's anechoic tiles. A Royal Navy spokesperson said the vessel had been grounded on silt, and was re-floated at high tide. The Maritime and Coastguard Agency chartered emergency tow vesselAnglian Prince was despatched to the scene from Stornoway.
During the operation to tow Astute clear, there was a collision between the rescue tug and the submarine, which resulted in damage to her starboard foreplane. The submarine returned under its own power to Faslane, where the damage incurred in the grounding and afterwards was described as "minor".
| THE KIT |
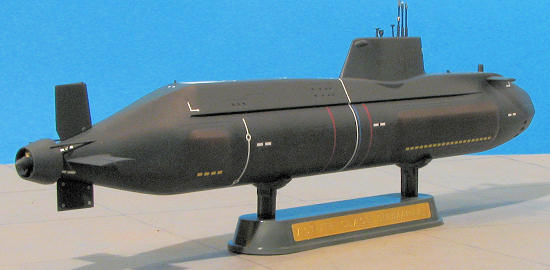
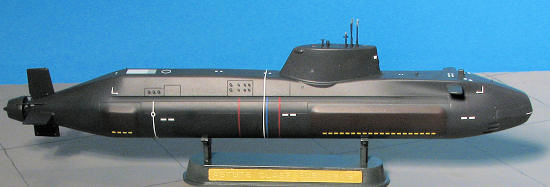
Hobby Boss' new 1/350 modern submarine is a great addition to their growing sub fleet. This one is about as simple as they come. The hull is divided into upper and lower sections, wit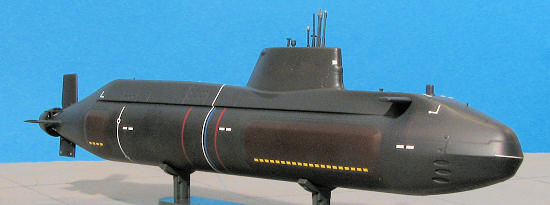 h the sail molded into the upper hull. Thee are dive planes, rear fins and rudders to add along with a ducted prop. Atop the sail, one can install a section that has all the various antennas and periscopes buttoned up, or one can build the sub with all of these extended.
There is a photo etch fret that has the boat's nameplate, a prop (there is also a plastic one), and some small deck fittings. All of this fits atop a small display stand on which the nameplate fits.
Instructions are well done with well drawn construction steps. Paint references are for a number of different brands and decal placement is shown on the full color five view color and markings guide.
| CONSTRUCTION |
Step one was to cement the upper and lower hull sections together. It is not a totally smooth fit and there will be some filler and sanding needed. Step two is to realize that one forgot to open the holes in the bottom of the hull for the stand. Step three is to assemble the stand and cut off the little tabs that were to go in the holes one forgot to open in step one. See, even something this 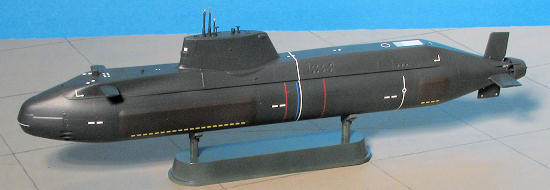 simple can be screwed up. After thoroughly berating myself, I sanded the ejector pips off the bottom of the sail insert (the one with the holes for the various masts) and glued that in place.
The seam for the hull took some sanding and light touches with super glue for filler to get things looking right. I then started attaching bits, starting at the back with the rudders and 'elevators', moving to the front with the dive planes and the two plastic bits that fit atop the forward hull.
Next, the photo etch bits for the upper hull were attached. The four circular pieces were easy, but bending those tiny hoops for the front and rear were quite a task. I'm surprised I didn't lose any. What I did lose was one of the various bits that stick atop the sail. However, it isn't that noticeable that it is gone what with all the other stuff up there. I then glued the prop and baffle to the rear and at that point, decided to paint.
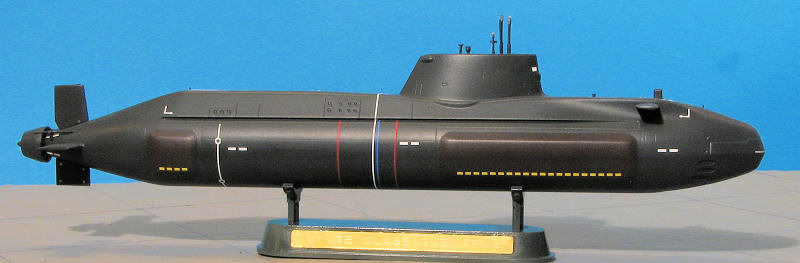
| COLORS & MARKINGS |
The markings instructions provide an overall darkish grey for the sub with various bits picked out in gold or light grey. Looking at photos from the reference, it seems that most of the submarine was almost black with the forward section in a lighter, but still dark, grey. I decided to use Agama's RLM 66 for the overall color as it was nearly black, but not quite so. I obviously mixed it wrong as it literally took days for it to dry.
 For the forward area, I masked and used Floquil Weathered Black as that seemed to fill the bill. I then brush painted the gold and light grey bits before attaching the shroud to the prop area along with the accompanying braces. These have small photo etch supports to be bent around them. Fortunately, this area is marked on both the parts and the p.e. bits so is not that difficult a task. Or so I thought. The actual attempt at getting this 'things' to wrap around the shaft and then get properly splayed out totally eluded me. One would need an army of nano-bots to do small stuff like this. Anyway, I got them close and was happy that I did so.
I then mixed some black with Tamiya's Hull Red for the rectangular thingies on the sides of the sub. The paint was misted on and it really does look pretty good. The rear with the newly attached bits was then sprayed again with RLM 66 and once dry, the entire sub was given a gloss coat. During this process, the once obviously different grey of the Weathered Black blended in with the RLM 66 so all that masking went to waste.
Really the last thing to do in terms of adding stuff was to put on the decals. The decal suite for this sub is really pretty extensive. The instructions are well done and after a few hours of application, I had them all in place. The decals worked perfectly and gave me no problems with curling, cracking, being too thin or not working with setting solutions. When all were on, I gave it a coat of Polly scale clear mostly matte. I thought about giving it a black wash and dry brushing it to help bring out a bit more detail, but in the end, did not as I wanted to move on to other projects. The stand was painted RLM 70 the brass plate glued on and the kit was done.
| CONCLUSIONS |
 This was probably the most fun submarine I've yet built. The fit was excellent, the photo-etch appropriate and minimalist and the subject interesting. While I'd not recommend it for a bare beginner due to the somewhat delicate parts and the p.e., I see no reason why most wouldn't be able to handle it with aplomb. Some of you would finish this in two days while it took me a week. It isn't so huge as to overwhelm your display, but yet big enough not to disappear on the shelf. Give it a go, I'm sure you'll be pleased.
| REFERENCES |
November 2010
Copyright ModelingMadness.com. All rights reserved.
If you would like your product reviewed fairly and fairly quickly, please contact the editor or see other details in the Note to Contributors.