| KIT #: | |
| PRICE: | $ a gift from my friend Kevin. |
| DECALS: | One option |
| REVIEWER: | Scott Van Aken |
| NOTES: | Resin |
UGH Models 1/350 Centauri Liner
| KIT #: | |
| PRICE: | $ a gift from my friend Kevin. |
| DECALS: | One option |
| REVIEWER: | Scott Van Aken |
| NOTES: | Resin |
| HISTORY |
In the Babylon 5 universe, the Centauri liner was a
personal ship reserved for Centauri of important stature, such as Lord Kiro. This
type of liner can be armed with pulse weapons. During the running of the
 show,
there were two liners mentioned.
show,
there were two liners mentioned.
Molios: In 2259, the Centauri liner Molios was waiting to dock at Babylon 5, when the Narn transport, Na'Tan attacked and destroyed the Molios. The battle was witnessed by an Interstellar Network News crew on the Earth Alliance transport, Hyerdol. The survivors and bodies from the vessel was brought to the station. The Narn claimed the Molios was transporting weapons to the Centauri front. An investigation from Babylon 5 confirmed the presence of weapons on the Molios.
Vellurian: In 2259, the Vellurian left Babylon 5 for Centauri Prime. Lady Timov Mollari and Ambassador Londo Mollari's newly ex-wives were passengers on the vessel.
| THE KIT |
I
have seen other kits by this company. They were also in light blue resin,
superbly cast, and with a minimum number of parts. The castings are quite clean
and will require a minimum amount of preparation. The 'worst' area I found was a
step on the underside of the main hull, but
only on one side and the upper surface was perfectly smooth. What this means is
that the left boom will be a bit thicker than the one on the right and there
will be a ramp from the for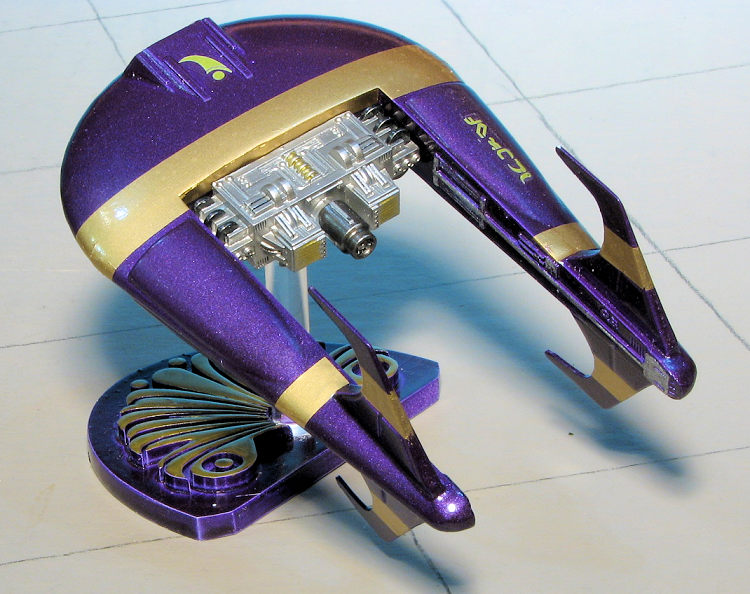 ward hull to the boom which isn't on the right side.
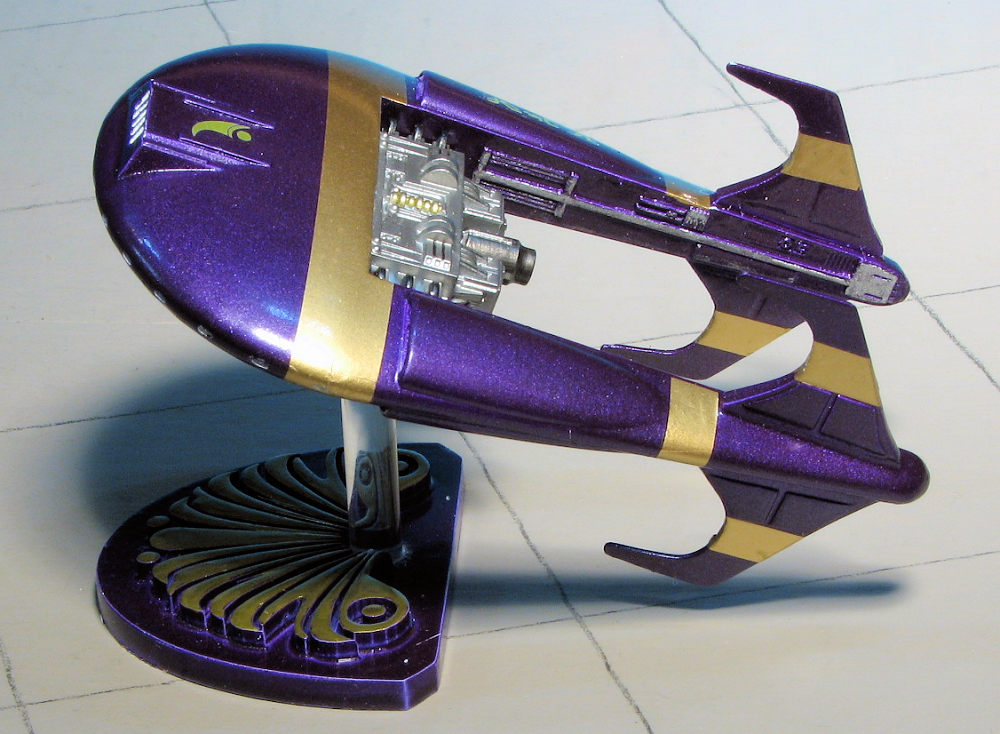
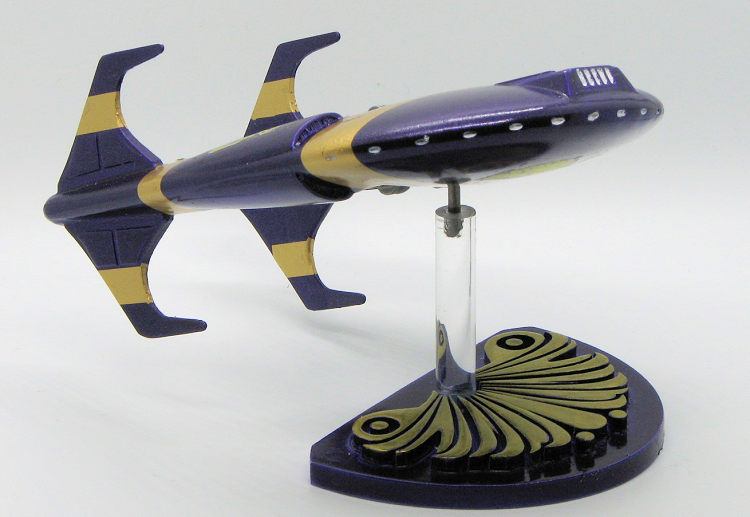
With only six parts, assembly will be swift once the parts are prepped. The fins are on a sprue and the detailing on one side is considerably more pronounced than on the other. The kit comes with a semi-circular stand with nicely raised markings. There is a depression in the stand for a 1/4 inch post. Most folks, myself included, will probably use a plastic rod and then install a much smaller diameter section of wire in it on which to mount the model. Conversely, one could use magnets with one glued on the post and the other to the underside of the model. They make some that are quite thin and pretty powerful.
Instructions are quite basic and adequate for building the kit. A small ALPS printed decal sheet is provided in gold. There is no indication of the colors to be used on the kit nor is there any hint as to where to put any of the decals. The box art photo is no help in this regard. Apparently the vessel is an overall purple of some darkish shade with large gold stripes. There is some fan art on line, but it tends to be quite dark.
| CONSTRUCTION |
 First thing I did was break out the sanding stick to get rid of the step. It
took a while and it really did end up leaving a ramp on the inside of the
boom. I also had to use some filler on this section. It is fortunate that
this is on the underside and will be painted a relatively dark color so
hopefully it will not be as visible in the finished model.
First thing I did was break out the sanding stick to get rid of the step. It
took a while and it really did end up leaving a ramp on the inside of the
boom. I also had to use some filler on this section. It is fortunate that
this is on the underside and will be painted a relatively dark color so
hopefully it will not be as visible in the finished model. | COLORS & MARKINGS |
 I also primered the engine module and then painted it with dark aluminum
from the Alclad II line. Then, using various Vallejo metallics, I brush
painted areas to help break up the solid color. I also painted the gold trim
on the base using these paints. Not unexpectedly, I found this to be a
difficult task as the Testors paint dries very gloss and the Vallejo's
rather thin acrylic did not want to stick. I found that I needed to sort of
'pool' the paint on the raised surfaces and allow it to dry before attacking
it again with another round. This took quite some time.
I also primered the engine module and then painted it with dark aluminum
from the Alclad II line. Then, using various Vallejo metallics, I brush
painted areas to help break up the solid color. I also painted the gold trim
on the base using these paints. Not unexpectedly, I found this to be a
difficult task as the Testors paint dries very gloss and the Vallejo's
rather thin acrylic did not want to stick. I found that I needed to sort of
'pool' the paint on the raised surfaces and allow it to dry before attacking
it again with another round. This took quite some time. | CONCLUSIONS |
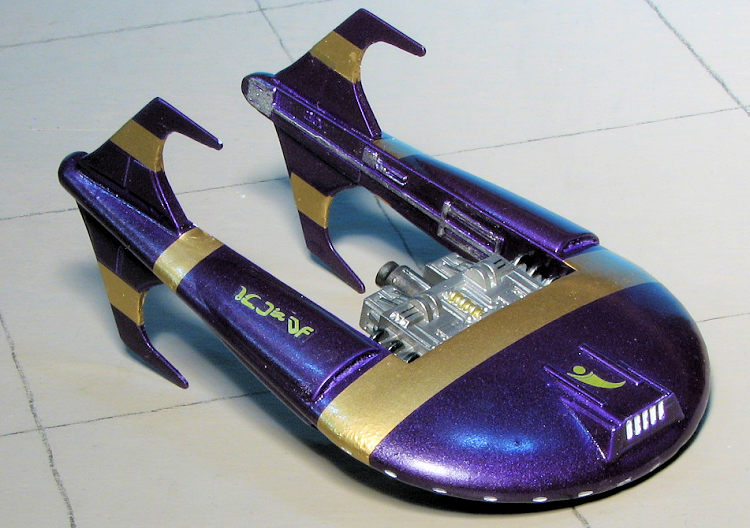
This kit very much epitomizes the comments that few pieces do not always mean an easy build. Nothing horrendous, but more work than I thought it would be. The end result is quite pleasing and adds another interesting type to the shelves.
| REFERENCES |
http://babylon5.wikia.com/wiki/Centauri_liner
June 2018 Copyright ModelingMadness.com.
All rights reserved. Thanks to Kevin P for the kit. If you would like your product reviewed fairly and
fairly quickly, please
contact
the editor or see other details in the
Note to
Contributors.