| KIT #: | POL916/06 |
| PRICE: | $69.95 SRP |
| DECALS: | None |
| REVIEWER: | Scott Van Aken |
| NOTES: | Deluxe Edition |
| HISTORY |
Ah yes, the mid 1950's; everything is turning space age.
Eisenhower is in office and other than worries about the Red Menace, the country
is optimistic about the future and looking towards it. Designers are using what
they see as the future in everything from toasters to automobiles. X-planes are
breaking speed and altitude records and we are dreaming of men in space
and trips to other planets and stars. These trips are common
 occurrences in a
Los Angeles suburb called Hollywood, where movie producers and directors are
cranking out space flicks at a rapid clip. Some of these movies are a bit much
and have the usual collection of monsters and other horrible space aliens. Some
of them are really good and the team uses these people called 'writers' to give
us things called 'plots' and they have subjects that make us think. These movies
are those titled 'War of the Worlds', 'When Worlds Collide', and 'Forbidden
Planet'. These films all have cutting edge special effects that wowed the
audiences of the day and are still very watchable even 50 plus years later.
occurrences in a
Los Angeles suburb called Hollywood, where movie producers and directors are
cranking out space flicks at a rapid clip. Some of these movies are a bit much
and have the usual collection of monsters and other horrible space aliens. Some
of them are really good and the team uses these people called 'writers' to give
us things called 'plots' and they have subjects that make us think. These movies
are those titled 'War of the Worlds', 'When Worlds Collide', and 'Forbidden
Planet'. These films all have cutting edge special effects that wowed the
audiences of the day and are still very watchable even 50 plus years later.
| THE KIT |
This is not the first C57D that has been produced by Polar Lights. About a decade or so back, they did a huge kit that, aside from the one at the Polar Lights table at the Nationals, I've never seen built. It is a daunting kit that suffers from what it has in common with other big kits; no where to put it. I've still got it and one of these days I may well give it a build. But for now, that is not required as Polar Lights has brought out a smaller version that looks to be much more buildable.
Though the box does not show scale, I have been informed that it is 1/144. Even at this scale it has a 12" disc (that is with a C...), so still is fairly large. My visit to the LHS saw that they got in the de luxe version (said with some snobbery) and I knew I wanted it. Actually, the thing that makes it de luxe is that it has a PC board with lights in it that will probably not be with the standard kit. I missed out on my opportunity to buy one of these for a reasonable price on the bigger kit and perhaps that is why it is still on the shelf.
 There are not a ton of parts.
Not quite as featureless as Testors' 'salad bowl' Area 51 saucer, but pretty
featureless. A goodly part of the construction will be spent assembling the
stairs (which can be posed lowered or raised), and installing the lights. The
system looks pretty simple and while the components are not what I'd call
aircraft grade, should work fairly well. It appears that the lights spin because
they are hooked to a motor, not due to any circuitry, which may be a better way
to do it depending on the quality of the motor.
There are not a ton of parts.
Not quite as featureless as Testors' 'salad bowl' Area 51 saucer, but pretty
featureless. A goodly part of the construction will be spent assembling the
stairs (which can be posed lowered or raised), and installing the lights. The
system looks pretty simple and while the components are not what I'd call
aircraft grade, should work fairly well. It appears that the lights spin because
they are hooked to a motor, not due to any circuitry, which may be a better way
to do it depending on the quality of the motor.
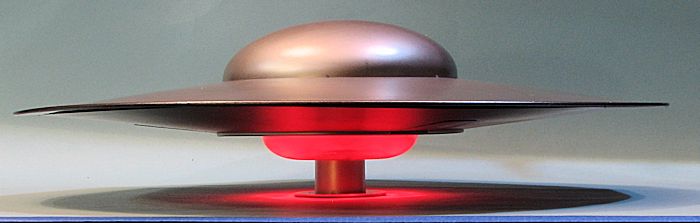
There is no interior and several clear bits for the top and the lower section of the saucer. One is advised not to paint the lower windows as the LEDs are red. The only other optional part is a landing post or one can model it 'in flight'. No stand is provided.
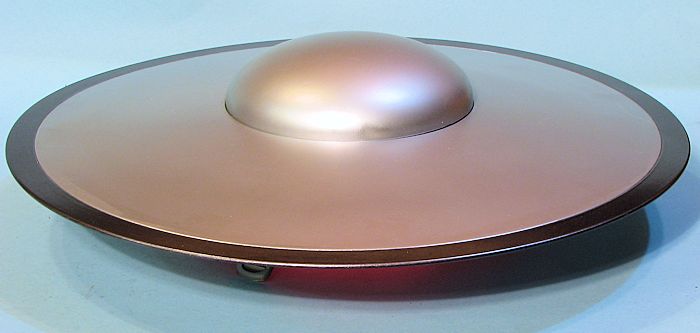
Instructions are pretty simple and with a kit that has no more than a few dozen parts, I would have to say that most of the time will be spent painting it. Paint information is provided during the build. The saucer is basically two shades of silver as shown on the box art. No decals are provided though I do seem to recall that the C-57D did have a registration number on the saucer. I'll have to watch the movie again to determine that. If it does, it will be a simple matter for most of us to make some using our printers and clear decal paper.
| CONSTRUCTION |
Since this is a pretty simple kit in terms of parts, I'll
combine all the usual sections into one. The first thing I did was to paint all
the parts that required it a silver color using Tamiya Silver Leaf in the rattle
can. Typical 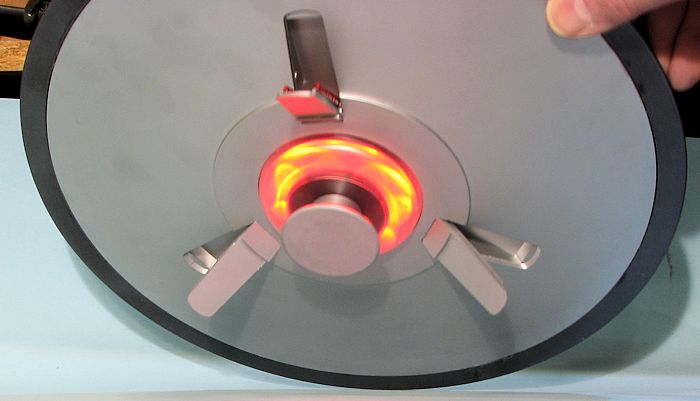 of Tamiya's acrylic lacquer paints in went on smooth and dried to
the touch in less than a half hour. However, I usually let the paint cure
overnight at a minimum just to let it get good and hard in preparation for
masking. The lower area where the lights will be was painted black in accordance
with the instructions. I also painted the outer lip of the saucer in Gunmetal.
of Tamiya's acrylic lacquer paints in went on smooth and dried to
the touch in less than a half hour. However, I usually let the paint cure
overnight at a minimum just to let it get good and hard in preparation for
masking. The lower area where the lights will be was painted black in accordance
with the instructions. I also painted the outer lip of the saucer in Gunmetal.
One of the things I noticed about this kit is the smell of the plastic and how it seems to have more flex to it. I think it is probably ABS instead of styrene so you'll have to find a cement that is compatible. Not all plastic cements are, but Tamiya is.
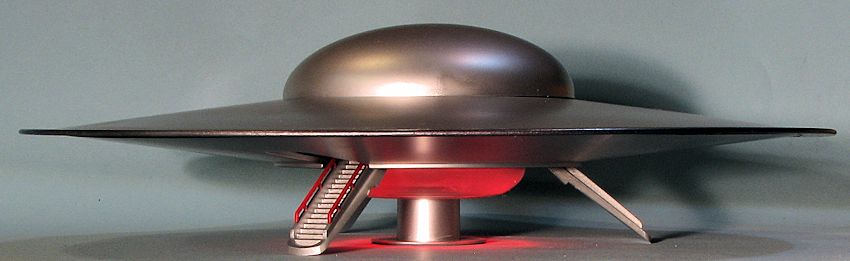
There is actually very little in the way of construction, but what there is will take a bit of care. First off, I assembled the ramp assemblies after painting all the bits. One has stairs, one a conveyer belt and the other is slick. I brush painted the interiors of these with Tamiya Flat Aluminum so they'd look a bit different from the outside hull. The conveyer was painted a dark grey, while the hand holds on the stairs were painted white then red. The mechanism that allows the stairs to be up or down is rather clever and works well. When cementing these in place, I discovered that the rear part of the stair assembly would break loose when moving the stairs up or down. The front part stayed firmly glued in place.
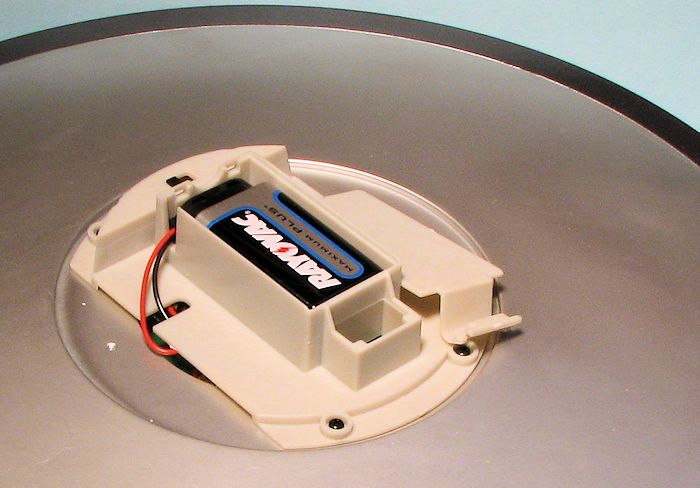 The most
difficult part was installing the motorized assembly. This is because the screws
are tiny and very difficult to screw into the plastic. I had to use some blu-tak
to hold in the switch assembly screws. All of the solder connections are rather
haphazard so those of you with the skills might want to re-do them. The 16
windows in the bottom of the saucer should be removed with a razor saw. Cutters
will only cause issues on one end of them as the material is so thin. When
installing these windows, slide them in with the thick side first and then press
in the thinner part. Then apply cement. You'll find it much easier.
The most
difficult part was installing the motorized assembly. This is because the screws
are tiny and very difficult to screw into the plastic. I had to use some blu-tak
to hold in the switch assembly screws. All of the solder connections are rather
haphazard so those of you with the skills might want to re-do them. The 16
windows in the bottom of the saucer should be removed with a razor saw. Cutters
will only cause issues on one end of them as the material is so thin. When
installing these windows, slide them in with the thick side first and then press
in the thinner part. Then apply cement. You'll find it much easier.
I had difficulty getting the two saucer halves to fit well. There were large bulges in the join despite getting it properly keyed on joining. There is a small keyway that allows everything to line up properly. I ended up using super glue to hold the lips in place and it isn't pretty so do this first. I tested the electronics and it all works just fine. You are provided two lower plates. One for in flight and one for landing. There is a one piece dome that fits over the switch assembly. It is a very tight fight and, like the stairs, requires a fine Xacto blade to get into the gap to pry these items off or open. Not exactly what you'd want with something that has to be removed to activate the lights as one inevitably gouges the plastic and scratches the paint in the process. I think that PL dropped the ball on engineering this. As there are no decals, that pretty much ends the build.
Here is a link to a short video on how the light effect looks.
| CONCLUSIONS |
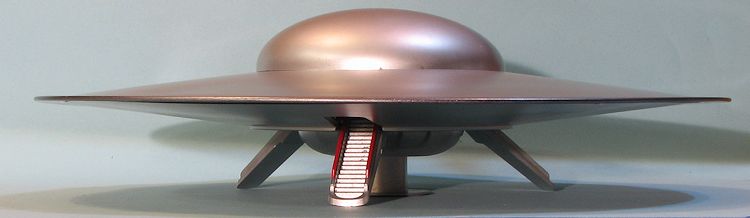 The kit is
really a very quick build, especially once everything is painted. I'll have to
take off points on the method of accessing the power switch and for the
tightness of fit of the stairs and the dome. However, it is a very cool looking
kit when it is done and at a mere food in diameter, is something that can
actually be displayed. Is it worth $70? Not really, but you can find it at
discount and there is a non-lighted version. Those of us who think that
Forbidden Planet is one of the top five Sci Fi movies ever made will want
to get one.
The kit is
really a very quick build, especially once everything is painted. I'll have to
take off points on the method of accessing the power switch and for the
tightness of fit of the stairs and the dome. However, it is a very cool looking
kit when it is done and at a mere food in diameter, is something that can
actually be displayed. Is it worth $70? Not really, but you can find it at
discount and there is a non-lighted version. Those of us who think that
Forbidden Planet is one of the top five Sci Fi movies ever made will want
to get one.
| REFERENCES |
Forbidden Planet, watched probably hundreds of times over the last 40 years or so!
March 2014
Review kit courtesy of me and my quickly emptying pocketbook!
If you would like your product reviewed fairly and fairly quickly, please contact the editor or see other details in the Note to Contributors.