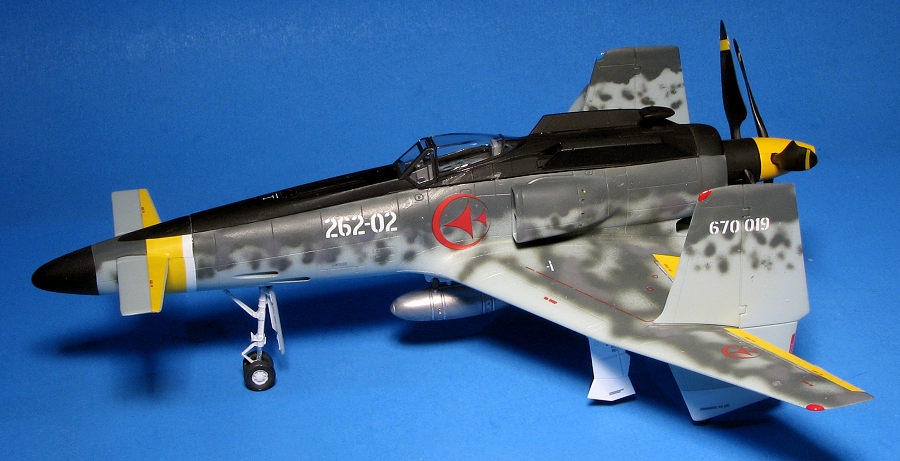
Fine Molds 1/48 Sanka B
| KIT #: | SC01 |
| PRICE: | $25.00 on sale plus shipping and tariff |
| DECALS: | One option |
| REVIEWER: | Scott Van Aken |
| NOTES: | 2025 boxing |
| HISTORY |
The Sky Crawlers (スカイ・クロラ Sukai Kurora) is a 2008 Japanese anime film, directed by Mamoru Oshii. It is an adaptation of Hiroshi Mori's novel of the same name. It was released across Japanese theatres by Warner Bros. Japan on August 2, 2008.Animated by Production I.G, the film was written by Chihiro Itō, featuring character designs by Tetsuya Nishio and music by Kenji Kawai. The 3D CG animation for the movie was produced by the Polygon Pictures studio, who also produced the 3D CG for Oshii's previous film Ghost in the Shell 2: Innocence.
 The Sky Crawlers is set in an alternative history timeline where although the
world is at peace, in order to ease the tension of a populace accustomed to war
and aggression, private corporations contract fighter pilots to engage in actual
combat operations against each other. The film introduces a mystery involving
characters called Kildren (キルドレ Kirudore?,
"kill-dolls") - humanoids genetically engineered in a way that enables to live
eternally in adolescence.
The Sky Crawlers is set in an alternative history timeline where although the
world is at peace, in order to ease the tension of a populace accustomed to war
and aggression, private corporations contract fighter pilots to engage in actual
combat operations against each other. The film introduces a mystery involving
characters called Kildren (キルドレ Kirudore?,
"kill-dolls") - humanoids genetically engineered in a way that enables to live
eternally in adolescence.
For those who want to see a movie that is superbly done and has both a lot of action and will make you think, I highly recommend picking this up or watching it on the various streaming anime sites. Here is a link to the opening of the film from You Tube.
All of the aircraft look like very modern WWII types that are vaguely based on planes with which many may be familiar. There are at least eight identified aircraft types in the film. Two have been kitted by Bandai in 172 soon after the movie was released. This one is the Sanka Mk.B, the standard single seat fighter of the Rostock Iron Works. It is quite reminiscent of the Kyushu J7W Shinden.
| THE KIT |
A few years back I built the Bandai version of the Sanka B in 1/72 and enjoyed that experience. I was doing some surfing and discovered that last year, Fine Molds released this aircraft in 1/48. Several sources had the kit, but most were asking a fairly high price for it. One had it at over 50% less than the others so even with the high cost of shipping from Japan (all Japanese stores will only ship to the US via Fed Ex or DHL) and the tariffs, I ordered it. Four days later it was delivered.
This one is typical of all modern Fine Molds kits with excellent detailing and what appears to be equally excellent engineering. You get a full cockpit that has detail parts added to the interior sidewalls. Decals are used for the instrument panel which is added to a flat piece or you can used the one with raised detail and paint it.
 The kit as the option to have a raised refueling probe if you so wish it. The
nose section minus the canards is built and no indication of the need for nose
weight is given, but I would add some just in case. Then the upper fuselage with
its various engine intakes is built along with the aft section for the props.
The kit offers a fairly complex gearing so that the contra-rotating prop can be
workable. I would use some grease or Vaseline to help the plastic gears mesh
well. Engine cowl flaps can be built open or closed.
The kit as the option to have a raised refueling probe if you so wish it. The
nose section minus the canards is built and no indication of the need for nose
weight is given, but I would add some just in case. Then the upper fuselage with
its various engine intakes is built along with the aft section for the props.
The kit offers a fairly complex gearing so that the contra-rotating prop can be
workable. I would use some grease or Vaseline to help the plastic gears mesh
well. Engine cowl flaps can be built open or closed.
Next, the side intakes are assembled and attached to the fuselage halves. These halves are attached trapping the rear bulkhead in place. The interior fits from beneath through an opening where the wing fits. All the upper fuselage sections as well as the nose and nose gear well are then attached. The engine and prop gearing assembly is then installed. Next are the wings and canards. The wings need the holes for the drop tank opened up if you are going to install that item. The wing is then put in place followed by the large fins. Personally, I would leave the fins off until after painting.
 The rest of the build consists of building up and attaching the landing gear.
Then the drop tank and pylon. This is followed by the windscreen and canopy. The
canopy looks like it can be posed open. The last steps are the construction and
installation of the props. I would leave off the spinner until after the kit is
painted so that it can be painted yellow to match the yellow on the decal sheet.
The rest of the build consists of building up and attaching the landing gear.
Then the drop tank and pylon. This is followed by the windscreen and canopy. The
canopy looks like it can be posed open. The last steps are the construction and
installation of the props. I would leave off the spinner until after the kit is
painted so that it can be painted yellow to match the yellow on the decal sheet.
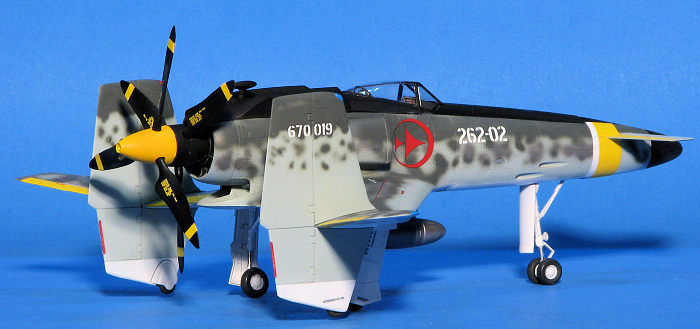
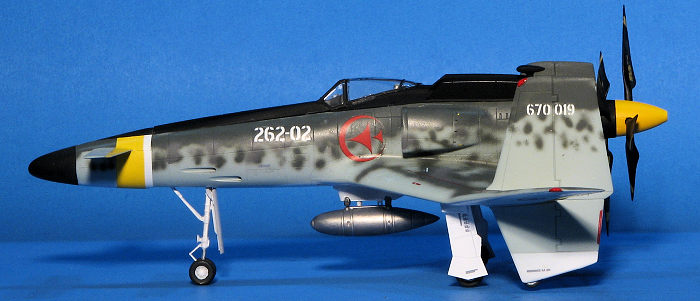
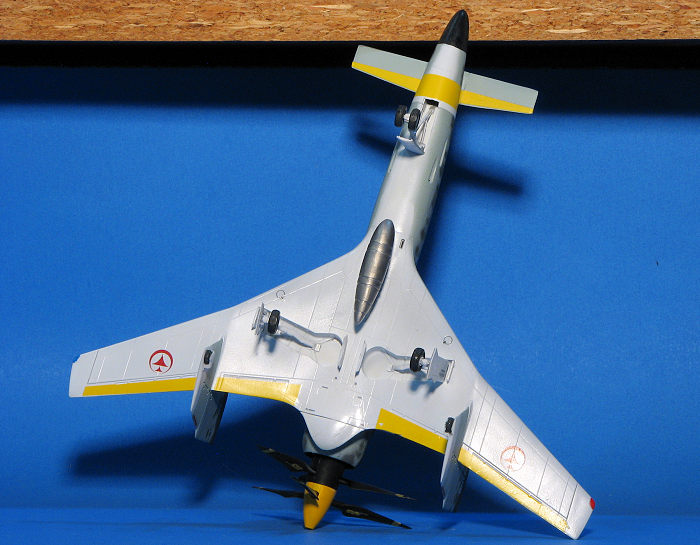
Instruction booklet is nicely done with color information in Gunze, Tamiya, and generic. Everything in the instructions is written in Japanese, but it looks to be very easy to build the kit, though some of the notes will be unreadable to many outside Japan. There is a nice decal sheet that includes all the yellow bits other than the spinner. One option is provided and that is for the main character in the movie. I thought that the airplane was overall unpainted metal with green mottling, but that is apparently not the case. The underside is flat white as is the lower part of the fin. the upper surface is RLM 76 with black upper fuselage and part of the upper sides in RLM 74 Mottling in RLM 74/75. Since the underside and landing gear is white, I'd attach the gear minus wheels and doors before painting.
| CONSTRUCTION |
For this kit I took the reckless chance and pretty much followed the instructions. When building the cockpit, I found that the control stick was too flimsy and broke it several times. I then built up the nose section and later realized I'd have been better off not gluing the cap in place. There are detail bits to attach to the inside of the sidewalls and I found some of the placement areas a bit vague. The cockpit was painted mostly RLM 66 with intermediate blue details. When the cockpit was built up it was set aside.
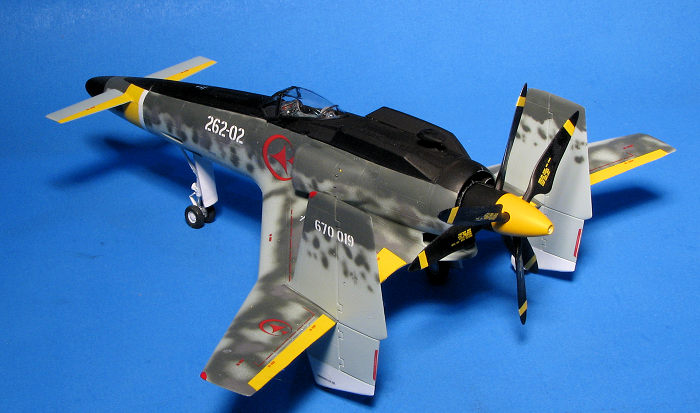 I chose not to build the IFR probe exposed so on the upper forward fuselage
piece simply glued the door in place. I then built up the aft upper fuselage
piece with the large intakes. This along with the forward section were then
painted flat black. Moving to the back, the engine pieces were painted flat
black and the prop mechanism was then built. The gears are not to be glued in
place and I discovered that the mechanism not only worked well, but also did not
require any cement to hold the assembly together.
I chose not to build the IFR probe exposed so on the upper forward fuselage
piece simply glued the door in place. I then built up the aft upper fuselage
piece with the large intakes. This along with the forward section were then
painted flat black. Moving to the back, the engine pieces were painted flat
black and the prop mechanism was then built. The gears are not to be glued in
place and I discovered that the mechanism not only worked well, but also did not
require any cement to hold the assembly together.
The area for the cowl flaps, so to speak, was built up with the flaps open and then painted RLM 76 as shown in the instructions. Next were the side intakes which had the insides painted RLM 66 before they were glued to the fuselage sides. The cowl flap section was attached to a blanking plate then trapped between the fuselage halves. Then the interior was installed from the underside. I did not attach the upper fuselage pieces as I first wanted to paint the airframe.
The next move was to assemble the wings and drill out the mounting holes for the centerline pylon. The nose section had the nose gear well installed and then it was glued on. Canards were glued in place and the wing attached. It was at this time that the instructions told me to paint the airframe before moving on so that is what I did.
| COLORS & MARKINGS |
This aircraft is white on the underside, RLM 76 on the upper surfaces and fins, with RLM 74 on the very upper surface with most of the mottling in this shade and a little bit of it in RLM 75. Fins are also in this sequence of colors. This took a few days as I painted one shade first, then when dry, the next shade and so on. I used Tamiya for the flat white and Mr.Color for the RLM 74/75/76 and Tamiya for the flat black. Hataka was used for the yellow spinner.
Once it was painted, I installed the nose and main landing gear. Then it returned to the paint shop for a gloss clear coat. After that, the wheels were painted and installed. Note that the main wheels are keyed.
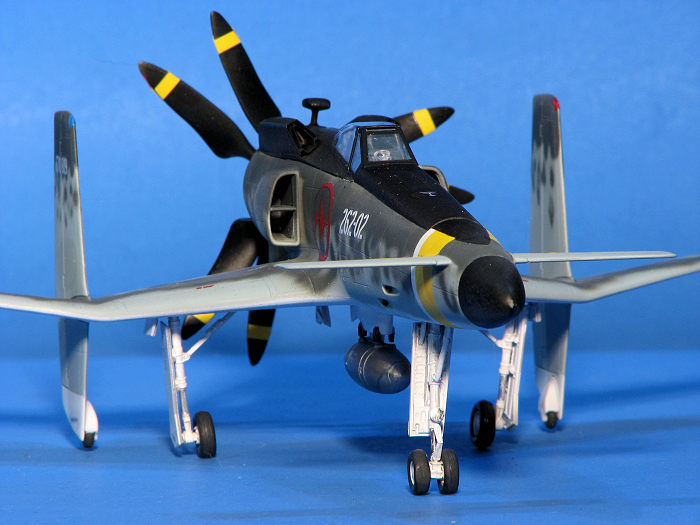 Then it was time for decals. Typical of a modern jet, there are a fair number
stencils so applying decals will not be a rapid excursion. The large yellow bits
are also decals and fit quite well.
Then it was time for decals. Typical of a modern jet, there are a fair number
stencils so applying decals will not be a rapid excursion. The large yellow bits
are also decals and fit quite well.
The last items took a fair amount of time as well. This included the wheels and doors. Note that the nose gear door needs to be installed before the nose gear. I did not do this, but found that the hinge piece could be cut and installed with no issues. The two upper fuselage items were installed and after masking and painting, the windscreen and canopy were attached using Cementine clear glue.
The already assembled props were then pushed in place. They are quite a tight fit, but the gearing works and the props are able to work in a contra-rotating manner. Perhaps using some Vaseling would make it operate a bit more smoothly. The last things were the fins. These are an easy fit and almost touch the ground. No nose weight is required. I sprayed on a clear matte coat, painted the navigation lights, and removed the canopy masks.
| CONCLUSIONS |
I fully realize that kits like this are not for everyone. However, I am quite pleased that this has been brought out in 1/48 scale. I'd very much like it if Fine Molds did other aircraft from the series as there are some pretty interesting designs. This kit turned out like many other FIne Molds kits. It was well engineered, not fussy, and fit quite well. Well worth picking up.
22 May 2026
Copyright ModelingMadness.com. All rights reserved. No reproduction in part or in whole without express permission from the editor.
If you would like your product reviewed fairly and fairly quickly, please contact the editor or see other details in the Note to Contributors.
Back to the Main Page Back to the Review Index Page Back to the Previews Index Page