Blap Models 1/72 Silver Dart Hypersonic Re-entry Vehicle
| KIT #: | ? |
| PRICE: | $65.00 from Blap Models. Includes shipping |
| DECALS: | One option |
| REVIEWER: | Scott Van Aken |
| NOTES: | Resin kit. |
| BACKGROUND |
“The Silver Dart is the DC-3 of the space industry,” said Geoff Sheerin, PlanetSpace president and CEO, in a telephone interview. “It has so many things going for it in terms of performance.”
Sheerin’s Silver Dart program is separate from his Canadian Arrow effort to use a proven V2 rocket design to build a three-person rocket ship for suborbital flights. Plans for the Silver Dart date back about four years as Sheerin was researching the Canadian Arrow rocket to compete in the $10 million Ansari X Prize competition for suborbital spaceflight.
“About five percent of my time has been looking and poring over the program,” Sheerin said of the Silver Dart plans.
But NASA’s intention to purchasecommercial services for both cargo and crew flights to the ISS encouraged Sheerin and his team to push forward with their work. NASA plans to retire its three remaining space shuttles – Atlantis, Endeavour and Discovery – in 2010.
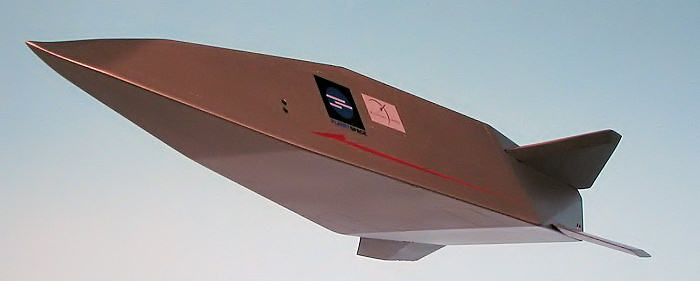
 Based on the U.S. Air Force’s Flight Dynamics Laboratory-7 (FDL-7) program, the Silver Dart is a lifting body designed to glide from hypersonic speeds of Mach 22 down to landing, PlanetSpace officials said. The spacecraft is expected to launch vertical atop a stack of about 10 Canadian Arrow rocket engines andland horizontally on an aircraft runway, they added.
The first Silver Dart spaceflight is expected follow the inaugural manned Canadian Arrow launches, the first of which is slated for 2008 with four more to follow, Sheerin said.
“You want to have a multitude of vehicles,” said PlanetSpace chairman Chrinjeev Kathuria. “With the Canadian Arrow, you’d want to enter the [spaceflight] market very quickly. The second stage is the Silver Dart.”
NASA based its X-24B test aircraft on the FDL-7 lifting body and valued the added range and stability the sleek, sharp-nosed design, according to documentation from the space agency’s Dryden Flight Research Facility in California.
Paul Cyzsz, an engineer who worked on the original FDL-7 effort and is guiding PlanetSpace’s Silver Dart work, said the new spacecraft would use a 1960-1970s era shell wrapped around a lighter inner body with updated, modern electronics.
“The advantage of an all metal aircraft is that you can land in any kind of weather,” said Paul Cyzsz, adding that unlike NASA’s space shuttle – which does not land in rain to prevent damage to its exterior. “You can’t trap it in space, it can always get back to the continental United States.”
Cyzsz said the FDL-7’s lifting body design would also give the Silver Dart about twice the lift coefficient as NASA’s space shuttles at subsonic speeds.
Background courtesy of www.space.com
| THE KIT |
 The kit comes superbly packaged in a sturdy box. The nose of the kit is protected with foam and the smaller parts are in a separate bag. None of the usual laborious clean-up is needed for this kit as all the stubs have been removed down to just a small area that will take but a few minutes to remove. The edges will also benefit from a quick swipe of a sanding stick. The resin is superbly molded with thin engraved panel lines on the fuselage. I did fine one tiny air pocket on the underside of a fin that will need to be filled and I also noted that one of the main rocket nozzle holes was filled more than the other so this will need a bit of grinding to get the nozzle to fit flush. These are trivial items that even the bare beginner will have little difficulty handling.
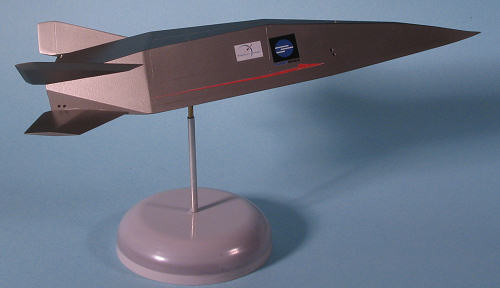
The rest of the pieces were perfect and test fitting the fins and other nozzles showed that the fit is superb. The end result will be a model that is going to be pretty much trouble free to build. The kit includes a superbly molded display stand and a very nice set of JBot decals. Duplicates of all the markings are provided in case they are needed for these appear to be ALPS printed. This means they are quite thin and are easily scratched if one is not careful when handling them. The overall color is a silver and so you can use just about any silver paint you have, though it would be best to prime the model with a lacquer primer to assure good stick. The only thing the modeler needs to supply is a piece of metal rod to go between the stand and the model.
| CONSTRUCTION |
 First thing to do is to make sure the parts are free from any mold seams. Not really much to worry about on this one, though there is a pour stub remnant on all the parts. My kit had an additional small rocket nozzle and I'm glad they included it. I also had a bit of a dent in the back of the main body where the cutting pliers were a little bit too aggressive. This was filled with epoxy filler and then sanded down. I overdid this a bit and released an air bubble or two on the back. Easy enough to fix, but it shows that one has to be cautious when sanding any resin, no matter how great it looks at the start.
It was at this time that I did a bit of drilling and grinding. Drilling for the mounting hole in the base and the bottom of the model. I used a piece of brass tubing to mount this and have it about the center of gravity so there isn't that much stress on the tubing. Just pick a size and height that you can live with. I also slid a piece of aluminum tubing over it just because it was there!
With the mounting all done, I then proceeded to paint the model.
| COLORS & MARKINGS |
You may think this is early in the build to be painting, but I wanted the main body and the fins to be done before attaching them. A good thing, too as I ran afoul of all sorts of problems when painting. Basically, I'd get a large section done and then either do something stupid to scratch the paint or put it on too heavy and have to remove it. I sanded down all the parts with 600 grit paper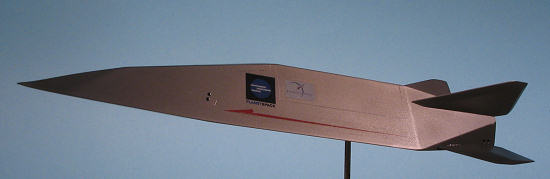 and didn't use an undercoat as I just can't get it smooth enough. I should have tried anyway as the paint is quite easily scratched or rubbed off. Not super-easy, but such that handling is kept to a minimum.
When I screwed up some area, I first tried my old standby Strip-A-Kit, but it has no effect on Alclad 2. I tried feathering it and then repainting, but it was painfully obvious where the original coat had been. No option but to sand it off. Fortunately, the kit is faceted so I only had to sand the facet that was giving me trouble. I used 600 grit wet and dry followed by 1200 grit for this.
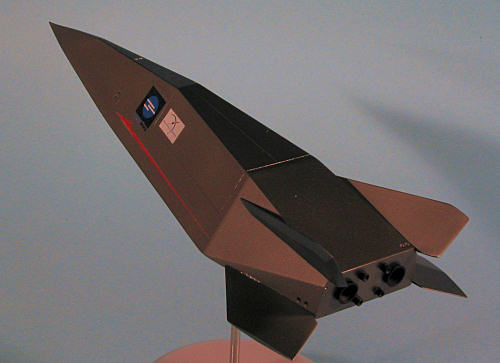
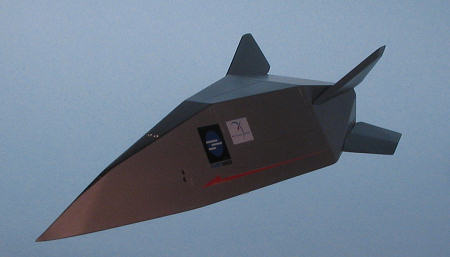
Thanks to my many screw-ups and other things, it took about three weeks to get it all painted. I gave it several clear coats using Testors Metallizer Sealer (though that didn't seem to affect the somewhat fragility of the paint). I wanted a dark scheme so I used Alclad 2 Steel.
| FINAL CONSTRUCTION |
At this time, I glued on the rocket nozzles at the back after painting them Burnt Metal. One of the larger nozzles needed some gunk cleaned out of the mounting hole in the back of the body, but that was rapidly done. The little mounting pins on the smaller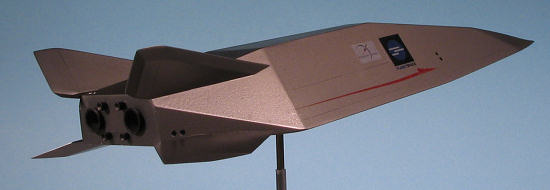 nozzles were not as clear as I'd like and though I was able to get most of them to fit, one had to have the pin sheared off to fit flush. I also lost one to the carpet gnomes so was quite glad a spare was provided. The fins fit superbly as they are properly angled and really went in well.
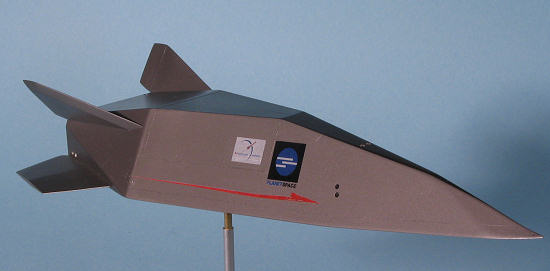
The last step was decals. These are printed by JBOT and seem to be ALPS or a similar process as they have a single carrier and are ultra thin. A double set is provided and good thing as I totally screwed up one of the side stripes. The white is not totally opaque so applying these does darken them against the somewhat dark background. I also found the very long stripes to be difficult to apply, but did manage to get them on after destroying one. That poor marking had folded over on itself when applying and all attempts to flood it off the model were unsuccessful. Eventually I tore it and had to use the spare.
Last step was a dab or two of superglue and attachment to the stand.
| CONCLUSIONS |
 Really, this is a great introductory resin kit and a super real-space kit in its own right. No fussy landing gear or doors and a well molded kit to boot. For those wanting to get into spacecraft, it is a fine kit that is easy to build. It's one that I can highly recommend and I'm sure you'll like it as well.
Late Note: I have been informed that I put the fins on wrong and so I have. The short ones go on the top and the long ones on the bottom. Not sure how that slipped by , but it did.
August 2006
#1428 in a series
Review kit courtesy of Blap Models .Order yours direct.
If you would like your product reviewed fairly and fairly quickly, please contact the editor or see other details in the