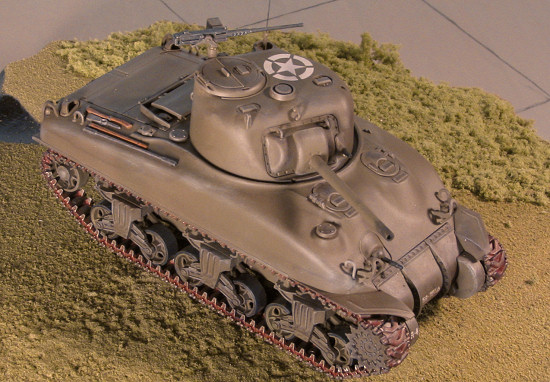
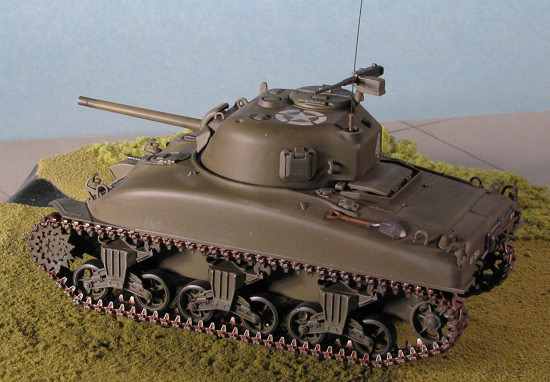
Tamiya 1/48 M4A1 Sherman (early)
| KIT #: | 32523 |
| PRICE: | $26.00 MSRP (20.00 at WingsnTreads) |
| DECALS: | Three options |
| REVIEWER: | Scott Van Aken |
| NOTES: | Die cast hull |
| HISTORY |
 (Taken from the kit instructions) "In 1941, with German forces sweeping across Europe, American efforts to design a new generation battle tank reached a fever pitch. These efforts culminated in the M4 Sherman, which would go on to serve as one of the driving forces behind the Allied victory. The previous generation M3 medium tank featured the reliable VVSS suspension and a powerful aircraft engine, but had serious drawbacks such as a main gun with limited traverse. In order to speed production, the prototype M4 utilized a modified M3 chassis with standardized production beginning in October 1941. Production soon kicked into high gear with a number of versions being produced concurrently by different manufacturers. The first production model was the M4A1 and possessed a distinctly rounded cast hull. A total of 6,281 M4A1 tanks were produced between Feb 1942 and December 1943.
Armed with a 75 mm cannon and powered by a 350 hp Continental R-975 air-cooled radial engine, the M4A1 could attain speeds of 38 kph. Early versions used the M34 gun mount with a narrow shield while the three piece gear housing was changed to a single piece in later production runs. Applique armor was often added to the upper hull and turret in order to enhance protection. The first combat use of the Sherman was with the British 8th Army at El Alamein in North Africa, where it contributed to the victory over German forces.
| THE KIT |
 For a look at what comes in the box, pleasevisit the preview. I'll just add that Tamiya is going to be selling a lot of these kits. They provide a plethora of options right from the box (two types of road wheels/idler, two styles of transmission cover, and three types of drive sprocket, for instance). There is also a sprue of the usual stuff that shows up on the outside of these tanks and includes an additional 50 cal machine gun. Two styles of gun mantlet are also provided as well as some appliqué armor. In fact, you could do all three options provided on the decal sheet and the tanks would be a bit different from each other.
The down side to the kit is that for some reason completely unknown to me is that the area under the tank body is completely open. Why Tamiya with all its loot and design work could not have included something to cover these gaping holes is beyond me. It is like building a Caddy and then selling it with rubber floor mats and plastic seat covers. I'm sure some aftermarket manufacturer is rubbing his hands in glee so that they can offer a cover up, but really, it is one area in basically all these kits where Tamiya has dropped the ball.
| CONSTRUCTION |
The instructions have you start by assembling the parts that fit onto the cast metal hull. These items have to be attached with super glue or epoxy; I used super glue. The actual fit of the parts is quite good, but not perfect. There is some slop in these bits and a super tight join is not always possible. Fortunately, tanks are not required to be aerodynamic so this isn't a problem. It is during this stage that you have to choose which tank of the three you are building. With so many options provided, one has to research the heck out of things if doing something not provided with the kit.
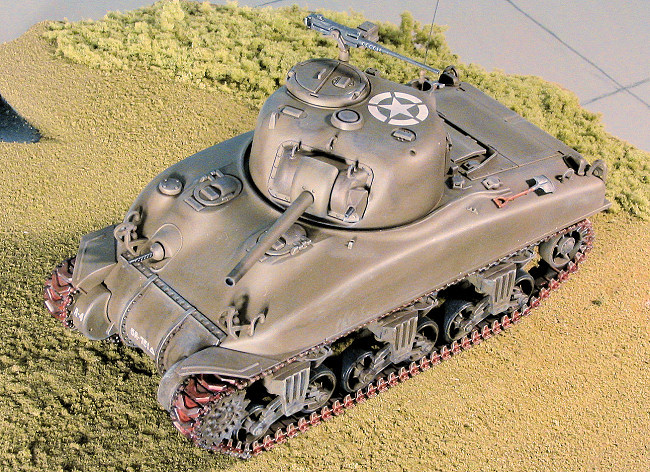
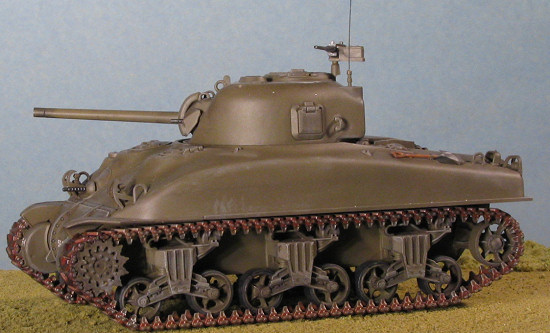
 I chose the earliest variation provided. This meant the three piece transmission cover and the more squared off exhaust/muffler combo. It also meant the spoked, cast wheels and idler. Once the front and rear sections are glued on, it is time to move to the suspension. Each suspension section has five distinct pieces. One has to be very careful to properly assemble these parts. The two forward ones are different from the four aft pieces. When I built mine, I etched on the mounting section which of the four different ones it was (A - D). You'd think this wouldn't be a problem, but I was taking NO chances!
By far the most work intensive part of the build was removing the mold lines from the road wheels and idler. For some odd reason, the section across these parts was not flat but a shallow 'V'. This meant that one had to do more intensive sanding to remove the mold lines than normal. I also found it difficult to remove the sprue attachment points on the upper suspension spring part. One had to be very careful not to screw up the area on the return roller where one found these points. I'd say that I spent at least two hours of construction time just on cleaning these up. Of course, you could just blow these off, but to me, removing seam lines is a major part of any build and I like to be as thorough as I can as it does make a difference.
While I was working on the seam removal, I took breaks every now and then to do some other bits. it was during these times I was letting my hands rest from all the sanding that I started on other parts of the kit. I glued on the various hatches to the main body as well as the lights. On the turret, I cemented on the gun ring and hoist attachments. These are quite small and I found it best to glue them on first and then clean them up later. Worked rather well.
 The gun had the end cap glued in place and the barrel cleaned up. The co-axial machine gun was attached to the moveable cannon mount and this placed through the mantlet. Then the shield was glued to the barrel and the barrel shoved in place. The turret has a lower section with a seam that runs near the bottom of the bustle in the rear. This was sanded down once the join was flooded with cement and then allowed to dry. So far, no filler on any of these Tamiya tanks, and this is #3.
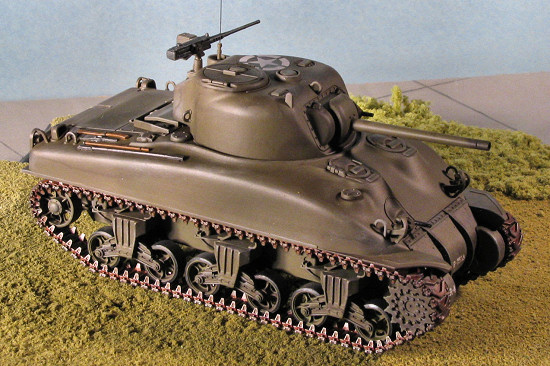
The lights have guards that fit over them and I found them to be a bit on the brittle side as I managed to break two of them. Various other hoist attachments were cemented in place. I left off all the shovels and pry bars as these would be best painted prior to gluing in place. The .50 cal was assembled and left to dry.
Back at the lower hull, I glued on all the suspension bits and the idler. The drive sprockets were pushed into place and this seemed like the best time to start painting.
| COLORS & MARKINGS |
The nice thing about US tanks is that they are basically a solid color. The bad thing is that they are a solid color and so don't have interesting camo. Sounds contradictory, but it is true. The solid color makes for a much quicker painting session and overall build, but doesn't really leave you with anything that attracts your attention.
 I looked around for some OD and I have a lot of different paints I can use. What I did was to take two acrylics that I'd had premixed for quite some time and mixed them together. These were Aeromaster Finnish AF OD and Pollyscale #22 Olive Drab. The end result was about what I wanted and it sprayed on without any real trauma. During this time, I also painted the tracks with steel as this provides a good base coat for the application of other shades. I should mention at this point that Tamiya was nice enough to put the sprue attachment points on the center of the links rather than out on the ends. Makes it MUCH easier to clean up and one can sand off the attachment points without fear of screwing up something that may be quite visible.
At this time, I returned to the workbench so that I could paint the road wheels and return roller. I also took the time to do the first painting of the various implements and other add on stuff while they were still on the sprue. These were then cut off and any remaining mold lines were removed. The parts then had the final painting done and they were attached to the hull. The tracks were given several applications of Rustall . I know that many like using a red oxide paint on these, but to be honest, they all look overdone to me. From what little I've seen of tanks, it seems as if the weathering on the tracks is not as great as what one often sees. Perhaps I'm wrong. However, one nice thing about scale modeling, when it comes to weathering, just about anything goes as a vehicle will look different in this sense during different times of its life. Thanks to the use of Alclad II for the tracks, the rust didn't stick to the high areas and settled into the low points as it would on the real thing.
Deciding to boldly go, I applied the decals without first applying a gloss clear coat. The markings were minimal on this tank and so I applied them into puddles of Solvaset. Yes, begin doubly daring, I was rewarded with no problems at all. The next day, the tank was given a matte coat of clear.
| FINAL CONSTRUCTION |
Back at the bench, I assembled the tracks onto the suspension. The upper track run is keyed with the forward return roller and the rest of the sections were put on without any real trauma. It seems to me that these sections ended up being just a tad bit short to fully meet up so some fudging up and down the line was necessary. Once on and dry, the upper hull was screwed in place and the cover plates glued over them.
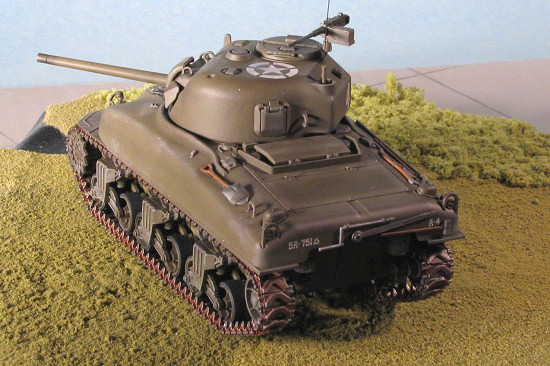
 I then attached all the remaining 'stuff' onto the back of the tank and did whatever touch-up painting was required. The machine gun was glued on as were the commander's hatch sides. I was going to put a figure in there, but didn't want to hassle with filling the ejector pin marks so closed it using clear paint (in case I change my mind later.
The next step was to do an overall black wash using Rustall's wash. This is thinner than the stuff one generally makes up and doesn't overdo things with one application, no matter how heavy one puts it on. Once that had dried, I gave the entire tank a good dry brushing using a medium grey. It provided a very nice contrast to the darkened Olive Drab. The last bit included adding a radio antenna and then some pastels for the gun barrel and the exhaust. That was sealed in place with more matte clear and the model was complete. Of course, as I look at the photos now, a few moments before publishing, I realize I forgot to paint the lights......
| CONCLUSIONS |
This is truly a great model. There is little that one can do to mess up in construction aside from using too much cement to attach bits. It was a tad fiddly regarding the tracks, but the sheer number of options provided make this a kit you can do over again and not have the same tank as the time before. I can highly recommend it and am surprised that this is the first Sherman tank I've ever built!
February 2006
You can find this kit and many others at Wings nTreads. A big thank you for providing the review kit.
If you would like your product reviewed fairly and fairly quickly, please contact the editor or see other details in the Note to Contributors.