
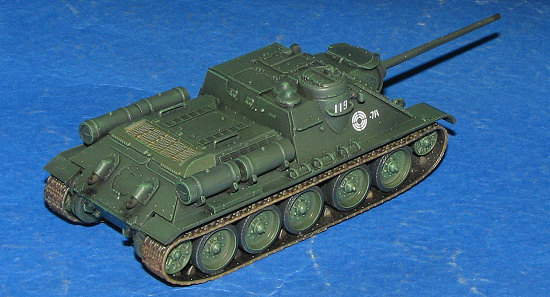
Dragon 1/72 Su-85M
| KIT #: | 7211 |
| PRICE: | $14.95 SRP |
| DECALS: | Three options |
| REVIEWER: | Scott Van Aken |
| NOTES: | Includes photo etch fret |
| HISTORY |
During early World War II, Soviet tanks such as the T-34 and KV-1 had sufficient firepower to destroy any German tank they encountered. However, in the fall of 1942, Soviet forces first encountered the German Tiger tank. By spring 1943, they knew of the existence of the German Panther tank, although the Panther was not seen in combat until July 1943 at the battle of Kursk.
 The fielding of these new-generation German vehicles meant that the Red Army required a more powerful anti-tank gun. The SU-85 was a modification of the earlier SU-122 assault gun, essentially replacing the SU-122's 122 mm howitzer with a D-5T high-velocity 85 mm antitank gun. The 85 mm gun could penetrate the side armor of a Panther or Tiger at long range, and do so from a small, highly mobile vehicle with all-around armor protection.
The SU-85 entered combat for the first time in August 1943. It was employed by Soviet, Polish and Czechoslovak forces right up tothe end of the war. There were two versions: the basic SU-85 had a fixed commander's cupola with rotating periscope and three vision blocks; the improved SU-85M had the same commander's all-around vision cupola used on the T-34-85. When the up-gunned T-34-85 tank was in full production in the summer of 1944, there was no point in continuing to produce a tank destroyer without superior firepower, so SU-85 production was stopped in late 1944, and replaced with the SU-100, armed with the D-10S 100mm gun.
| THE KIT |
This kit is based pretty much on Dragon's superb T-34 kit, which was one of the first really nice 1/72 small armor kits I ever bought. Never built it, but always wanted to! As so much of the running gear is the same as the T-34, it is probably no surprise that you get 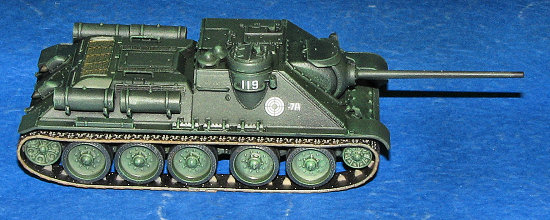 an upper hull for that particular kit. However, you also get a large sprue that is nothing but tank destroyer. In fact, it appears that there are bits for the SU-122 or perhaps the SU-100 on this one as well.
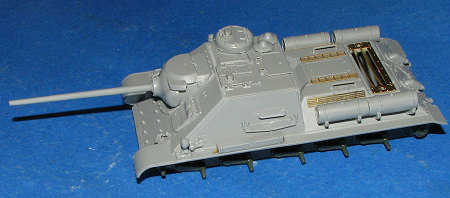
A small photo etch fret is included for the engine cooling screens and some other small bits. You also get updated wheels, sprocket and idler. The superlative DS one piece tracks are also part of the package. One needs to be careful about over-applying cement to these tracks. They also take paint just like the plastic bits and it will not flake off in handling.
Instructions are very well done providing both Gunze and Model Master references. Markings are for three SU-85Ms, all late war (1945). All are listed as 'unidentified unit' and there are two in overall Soviet armor green and one in overall winter white. Decals are well done and my past experience shows that they will provide no difficulties in use.
| CONSTRUCTION |
 I like to build tank kits so that the road wheels and tracks are about the last things to put on. This facilitates painting the road wheels if they have rubber facings (which this one does). Fortunately, the T-34 chassis does not use side skirts so attaching the running gear at the end is not a problem.
What I did find as a bit of a problem is locating parts on the trees. You see, the two main trees, which are from a T-34 and an SU-100, are both labeled 'A'. The instructions say nothing about which sprue 'A' the part is located on. Apparently the only SU-85M bits are four pieces with a new mantlet, barrel, and rear fighting compartment wall.
One uses the fuel drums from the SU-100 side of things and these are not the best moldings. They do not close up fully, leaving gaps on the ends. I also found that when one installs the photo etched shutters over the rear engine bay, the screened cover will not fit well. As you can see rather clearly through the screen, one has only the choice to use the screened cover or remove the 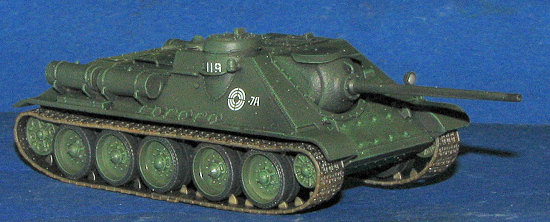 shutters and install the plastic one.
I also found some discrepancy as to where exactly to place the running lights on the left forward side of the hull. The instructions show them in one place, and yet after all had been glued down, I noticed on the box art image that they did not go where the instructions had shown. Now this would not be a problem for those familiar with armor in general, but I'm not and was caught by this glitch. I also cannot honestly tell you that I got the tracks on the correct way or not as it wasn't readily apparent. The tracks also fit rather loosely on the wheels.
Fortunately, they are easily glued in place and with the somewhat thick overlap on the bottom, things don't look too bad when done.
| COLORS & MARKINGS |
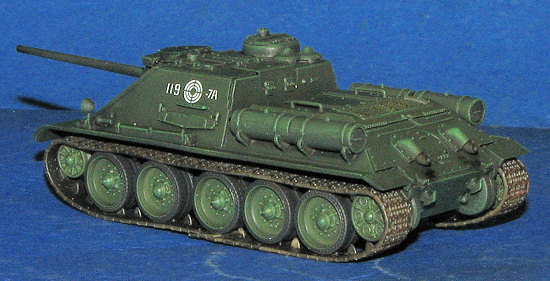
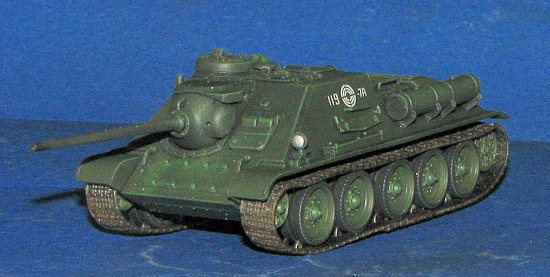 Let me back up a bit on this one to the painting stage. Painting this kit was really quite simple. Everything was overall Testors Soviet Armor Green. I first painted the tank with matte black and then sprayed on the Green. This was supposed to make the shadow areas darker than the rest, but to my untrained eye, it just made the Green a bit darker than usual. Once all the bits were in place, I drybrushed the entire model with Vallejo Light Green to bring out the details.
I also used Alclad II Steel to paint the tracks and the tow rope ends. The engine shutters were also painted this color. The next step was application of decals. I used the markings for the box art subject as they had more decals than the others. The white markings were quite opaque and went on well.
| FINAL CONSTRUCTION |
Well really, there was none. I press fit the rear engine cover in place, gave the model an overall semi-matte and added some pastel exhaust and rust stains. I then looked for a way to attach the tow cables, but could no longer get them over the shackles that had been glued down early in the construction. Naturally, there is zero indication on how to fit these in the instructions so I just left them off.
| CONCLUSIONS |
 The more of these kits I build, the more I like them. They have a lot of detail and while some can be fussy to build, this isn't one of them. Looks great when done and takes up very little room on the display shelf. Get one. Build one. I know you'll like it.
My thanks to www.dragonmodelsusa.com for the review kit. Get yours at your local hobby store or ask them to order one.
November 2007
#1492 in a series
Copyright ModelingMadness.com. All rights reserved.
If you would like your product reviewed fairly and fairly quickly, please contact the editor or see other details in the