| KIT #: | 32542 |
| PRICE: | 1000 yen SRP$7.00 from a vendor |
| DECALS: | Two options |
| REVIEWER: | Scott Van Aken |
| NOTES: |
| HISTORY |
 The GAZ-67 and the subsequent GAZ-67B were general purpose four wheel
drive Soviet military vehicles built by GAZ starting in 1943. These and the
previous GAZ-64 were inspired by the Kubelwagen and the Jeep as the Soviets did
not have anything similar when the war started. The only thing close was a 4
wheel drive staff car based on a standard sedan.
The GAZ-67 and the subsequent GAZ-67B were general purpose four wheel
drive Soviet military vehicles built by GAZ starting in 1943. These and the
previous GAZ-64 were inspired by the Kubelwagen and the Jeep as the Soviets did
not have anything similar when the war started. The only thing close was a 4
wheel drive staff car based on a standard sedan.
The GAZ-67 was a further development of the earlier GAZ-64 using lessons learned from experience with the -64 variant. A main improvement was a wider track of 1446 mm. It also had a strengthened chassis frame, enlarged fuel tank and other improvements.
It was powered by a slightly more powerful 54 hp (40 kW) version of GAZ M1 4-cylinder 3280 cc gasoline motor, and had a top speed of 90 km/h (56 mph). Production started on 23 September 1943 (the first serial vehicle produced). From January 1944 it was replaced by the GAZ-67B, which had some mechanical improvements.
| THE KIT |
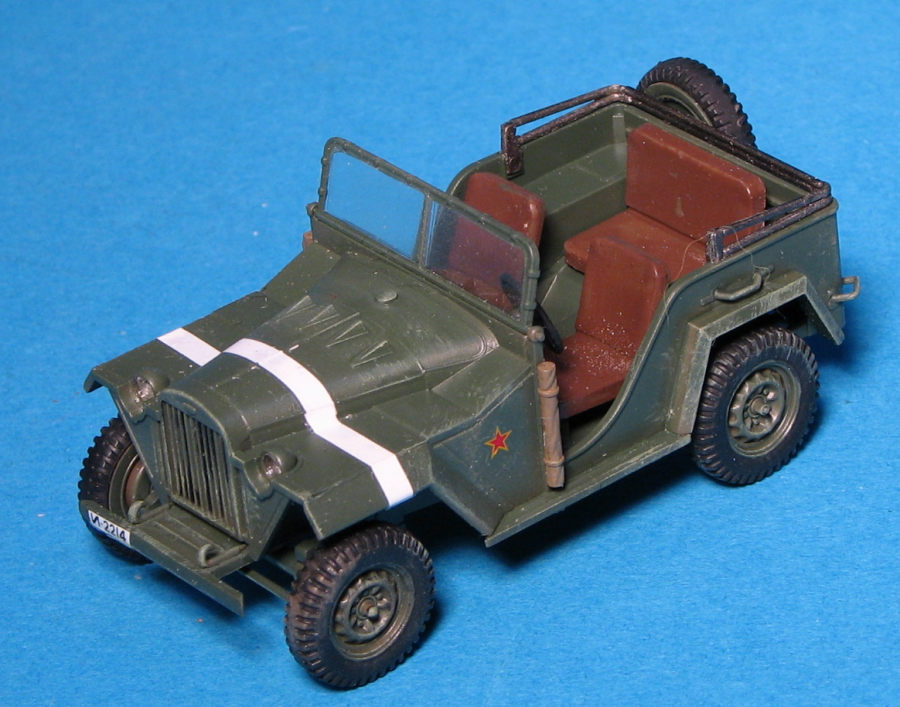
This is one of Tamiya's very nice 1/48 military vehicles and is in the lowest end of the price range. You are provided a single sprue of OD colored plastic and a clear sprue for the windscreen and light lenses. A small decal sheet is included with license and registration data for three vehicles.
 For those so inclined, this kit could easily be
constructed in a weekend. One first builds up the chassis by adding the
suspension pieces and then the wheels before moving on to the interior. This
fits into a floor piece to which the various body parts are installed. The
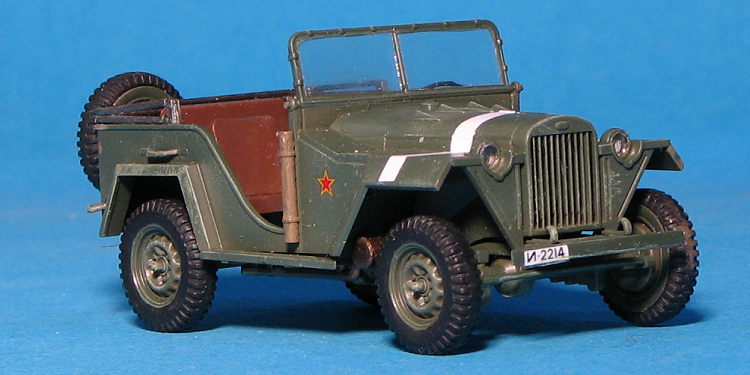
hood section contains the instrument panel and the front grille. Front
fenders are separate and attach to this piece.
For those so inclined, this kit could easily be
constructed in a weekend. One first builds up the chassis by adding the
suspension pieces and then the wheels before moving on to the interior. This
fits into a floor piece to which the various body parts are installed. The
hood section contains the instrument panel and the front grille. Front
fenders are separate and attach to this piece.
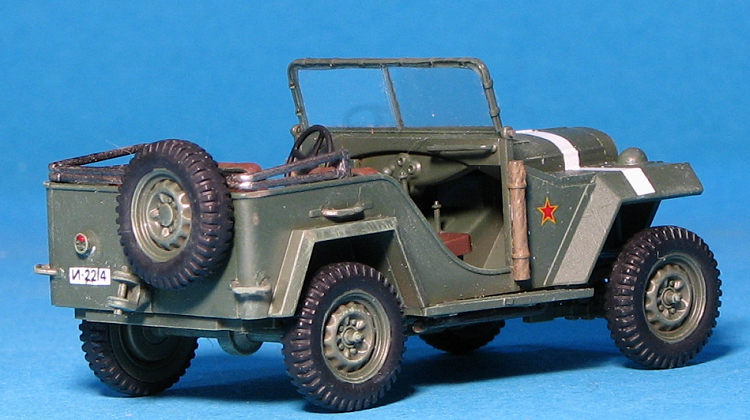
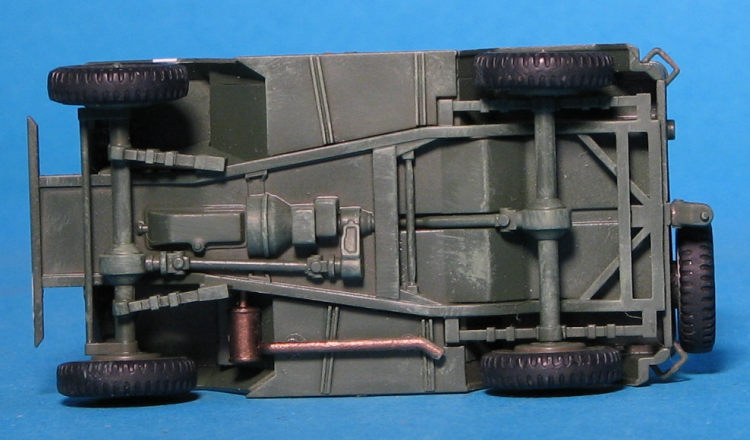
Flipping things over, the exhaust and engine compartment walls are attached. There is a partial lower engine molded into the frame piece. One then attaches the body to the chassis along with the frame for the canvas roof, spare and some other bits. The windscreen is shown in the upright position, but I'll bet you can model it folded against the hood. A driver figure is included and you need to build it up holding the steering wheel before attaching that the the rest of the vehicle.
Instructions are the vertical road map style that Tamiya uses for these kits and all the options are painted in a dark green. Tamiya calls for XF-61, but any similar shade will be sufficient.
| CONSTRUCTION |
 Since most of the kit was to be painted in
XF-61 dark green, I headed for the paint rack. Not finding any, I used
Testors Russian Armor Green and painted pretty much all the parts while
still on the sprue. I brush painted the seats with XF-64 Red Brown as I did
have that shade. I then attached the suspension components to the frame.
Since most of the kit was to be painted in
XF-61 dark green, I headed for the paint rack. Not finding any, I used
Testors Russian Armor Green and painted pretty much all the parts while
still on the sprue. I brush painted the seats with XF-64 Red Brown as I did
have that shade. I then attached the suspension components to the frame.
The next step for me was building up the body. I left off the seats so I could paint some of the small items once attached. Fit is quite good, though when putting on the back panel I had to remove the alignment dots as something was amiss elsewhere. I also had a touch of trouble getting the outer front fender pieces to mate well with the hood piece. In general, some of the attachment points are not really positive. There are also ejector marks on one side of all the body panels, some of which will be visible to the penlight crowd and some that will be very difficult to fill.
While working on the body, I finished painting and assembling the wheels, which were then glued onto the chassis.
| COLORS & MARKINGS |
 At this time, I added a few pieces to the body, such as the headlights,
instrument panel, steering column and a few grab handles. The steering
column is not straight as it angles into the firewall. The various grab
handles were a pain to clean up as they were so small, but did fit as they
should. I then masked the windscreen and painted everything that was there
with the aforementioned Russian armor green.
At this time, I added a few pieces to the body, such as the headlights,
instrument panel, steering column and a few grab handles. The steering
column is not straight as it angles into the firewall. The various grab
handles were a pain to clean up as they were so small, but did fit as they
should. I then masked the windscreen and painted everything that was there
with the aforementioned Russian armor green. | CONCLUSIONS |
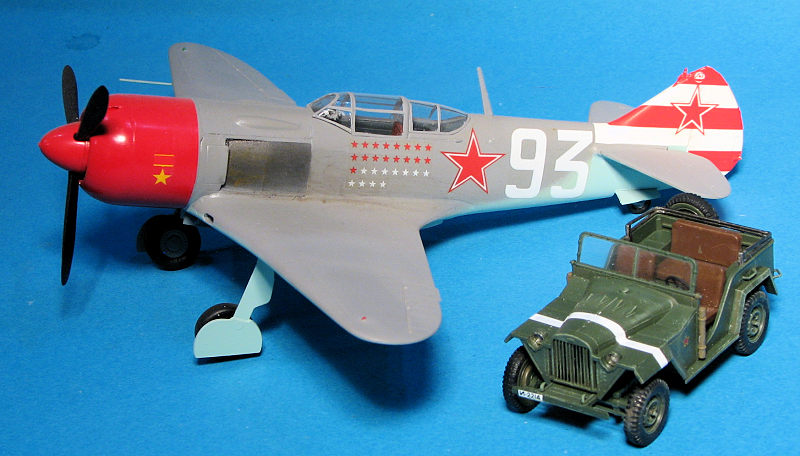
Overall, this one was fun to build. It took me a bit over a week, but then, I usually have other things to occupy my time. It makes an interesting comparison with a Jeep and is something that was used everywhere in the last year of the war so is perfect for a bit of a diorama.
| REFERENCES |
Tamiya instructions
March 2020
Copyright ModelingMadness.com. All rights reserved. If you would like your product reviewed fairly and fairly quickly, please
contact
the editor or see other details in the
Note to
Contributors. Back to the Main Page
Back to the Review
Index Page
Back to the Previews Index Page