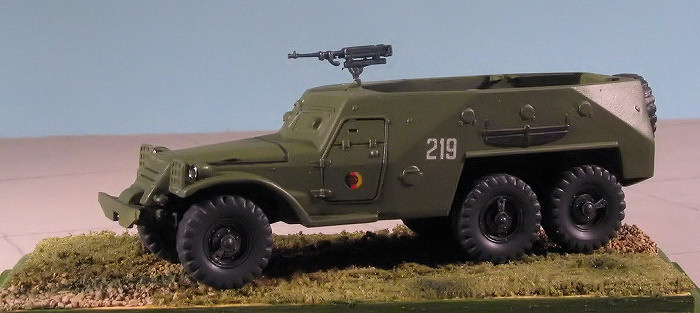
ICM 1/72 BTR-152 Armored Personnel Carrier
| KIT #: | 72531 |
| PRICE: | $12.00 MSRP |
| DECALS: | Several options |
| REVIEWER: | Scott Van Aken |
| NOTES: |

| HISTORY |
Paraphrasing from the instructions:
 "The first Soviet APC BTR-152V was designed between 1948 and 1950. Series production began in 1951 with the first public appearance being made during the 7 November parade in Red Square, Moscow. The BTR-157V was developed on the base of the ZIL-151 army truck which was a highly capable cross-country vehicle. The welded armor plates formed a slope side hull completely enclosing the occupants, except for an open top. A total of six firing ports were provided for the occupants in the rear. A single 7.62mm machine gun was available for the crew.
A wide range of other vehicles were created based on the BTR-152, including a command vehicle, self-propelled anti-aircraft gun, field ambulance and others. Because of its rugged construction and ease of maintainability, the BTR-152 was exported to Soviet client states world wide, including Egypt, Angola, Afghanistan and Vietnam.
| THE KIT |
Molded in white with the wheels in black plastic, there really is little to this kit as compared to some other military models in this scale. The molding is fairly good, though many of the parts have ejector pin stubs with flash and some rather large sink areas were noted on a few of the bits. The dashboard is particularly badly done and some filler will be needed to fix this. I also noted that 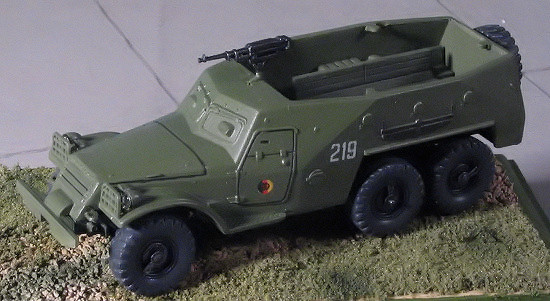 the back of each of the wheel/tire parts was deformed, though not enough to cause any mounting problems. Every kit I've seen with these wheels is the same. Most of the ejector pin marks won't be seen but some will so be prepared. A few oddities are that the shifter and steering wheel shafts are all half rounds. Place them so this won't be noticeable.
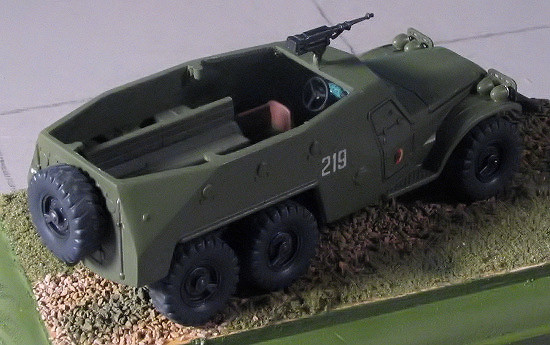
The kit has a driver's compartment that consists of a dash, steering gear and shifters, even though you can't see anything at all from the front as the windows are molded shut. A full crew bed is provided, which is basically wooden benches for the troops. A complete chassis is also provided to add underside detail.
Instructions are a single sheet with a short history, parts list and three construction steps. Options are three vehicles circa 1960. Two are Soviet and the other Czech, though there are no Czech markings on the decal sheet! The base color is Olive Drab with one of the Soviet vehicles carrying tan segmented camouflage. The small decal sheet is well printed and it looks like even the box art vehicle can be done as there are markings for it as well.
| CONSTRUCTION |
I'm not sure if this is an ICM original or not. SKIF did this in 1/35 but I don't know of any in this scale aside from the ICM version. The kit starts with assembly of the suspension. These parts have to be somewhat carefully removed from the sprues and all need clean-up of flash or large attachment points before assembly. I chose to assemble the suspension bits without gluing the transaxles. They can be held in place by the plastic axles. This was so that I could get proper alignment when it came time to 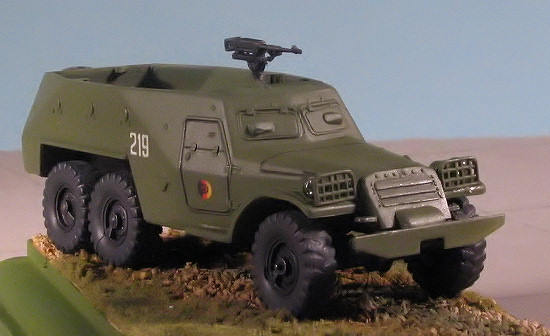 attach the drive shafts. You will have to glue the small mounting attachments that go inside the springs. One of mine went flying off into space during assembly and it was a miracle that I heard it hit several feet away as I was able to retrieve it after a few minutes searching. One thing I did notice is that the pins used to attach these to the springs will interfere with the wheels once they are installed. These may well need to be trimmed off at that stage. Gluing the suspension bits to the underside of the chassis was easy.
The transmission drive is a rather odd shaped piece that needs plenty of clean up. For this, I shoved the appropriate drive shaft into the rear transaxles first, then removed the axle for the forward suspension, which allowed me to attach the forward drive shaft into the forward transaxle. This was then gently grunted into place and the axle put back in place. It is imperative that the spring attachment points be completely dry or you'll knock something out of whack during this. I then sprayed all of the underside with matte black to be sure I got all the suspension bits covered.
At the body, there are some mold lines that need cleaned up, especially on the lower forward part. There is also a nasty mold seam on the hood that has to be treated to filler. The headlights seem to be on stalks to be placed atop the fenders. This is not the case. If you flip the body over you will see areas to drill out two holes. The headlight bezels are flush with the fender tops. The outer lights were drilled out in preparation for MV lenses. There is a third light for the left fender, but it looks too big when compared to the box art so I left it off. The last thing glued on at this stage was what looks like a DF loop antenna that was attached to the left rear. I'm probably completely wrong about this bit, but I could see no other way to attach it.
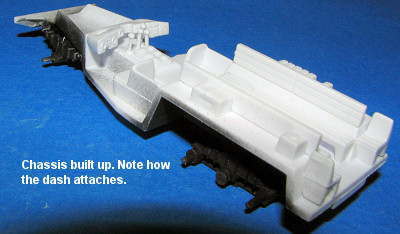 Back to the interior. There are four shift knobs (which look little like the real ones). These are moulded as half round. I simply placed them with the flat parts to the front. The seats and their backs were then glued in place as were the various little boxes that go behind the seats. The instrument panel has a couple of faceplates that get glued to it. The instructions are very vague about how this assembly fit. What I did was to glue it at the top rear surface, angled up a bit. Then I placed the body on to see how it fit. It is pretty low, but fits quite well. There is a circular looking thingie that seems to fit on the side of the body near one of the gun ports, so I dutifully attached it there. A bit later I realized that this was actually the tow connection so removed it, sanded the glue stain down and then put it where it belongs on the back of the body.
Back at the chassis, I glued on the front bumper. There are two side plate looking bits on the forward springs that have to be removed before the body fits properly. I'm sure they are supposed to stay there, but I couldn't figure out how to get the body to fit otherwise. Perhaps the suspension needed to be wider at this point, but things seemed to fit OK as it was. The steering wheel was glued to the steering shaft and then to the cut-out on the underside of the left of the instrument panel. Before adding the last few bits, it seemed like a good time to paint things.
| COLORS & MARKINGS |
The kit instructions would have you paint everything in olive drab except the chassis bits. These vehicles were a bit more colorful than that. Google offered a couple of images of the interior that showed more color than the instructions, so I chose to add some 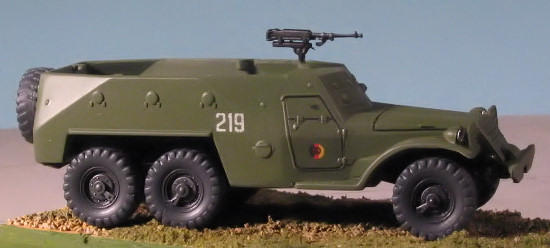 to my model. Basically a reddish brown back cushion to the seats and the planks were a worn wood, though I painted them in Russian Green. Other colors were added to provide some interest. The outside, however, was left in OD. Now Russian OD is not the brown OD that US vehicles have, but a very green shade. Russian Army Green is available in several paint lines or you can do as I did and mix your own.
Once all was painted the basic colors, I gave the body an overall coat of gloss clear acrylic as I knew I'd need it for the decals. ICM decals are not the world's best and tend to silver under even ideal conditions. One way to help prevent this is to trim all the clear film from the outside of the markings you are going to use. I also drowned them in Solvaset when applying them and also added more when they were dry. I decided to use the East German markings and some of the numbers from the sheet. It still amazes me that none of the markings on the sheet match those in the instructions. The vehicle was then given a matte clear to hold in the decals.
| FINAL CONSTRUCTION |
At this time, there really wasn't much to add on. Basically, I glued the chassis to the body and then attached the wheels. These are handed so check the photos to be sure you don't install them backwards. There are two spares, one of which will be attached to t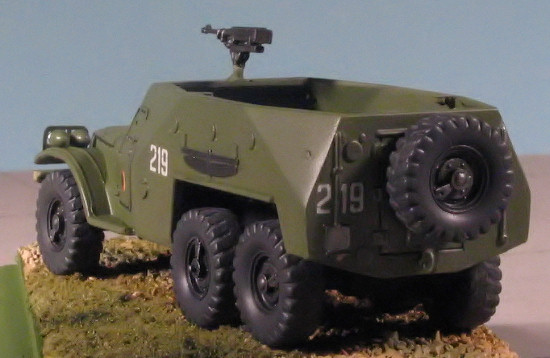 he kit. Naturally, I didn't get all six wheels to touch. Three were in the air so I sanded on them to get things as flat as I could. The forward tow hooks were glued in place and I glued in a pair of MV lenses (#29) before gluing the headlight screens in place. The machine gun was cleaned up as best I could (it suffers from major mold slip) and painted gunmetal before butt gluing it on the forward mount.
A bit of dry brushing just for giggles and then I went to work on a base. I like using bases for these kits for a variety of reasons. One is that they look nicer on them and the real biggie is that you can hide the fact that your wheels don't all touch!
For this one, another cheapie from Hobby Lobby with help from Woodland Scenics. Basically gravel for the central part and some 'grass' for the rest of it. I painted a few shades just to add some interest to things, but nothing really fancy. I put the groundwork on by flooding the top of the base with Future and then dumping on the cover. I pat it down a bit and when dry, just tap the base over a box to collect the extra (which is then put back into the bag. I did the gravel first.
The last thing is to superglue the APC to the base and when it is dry, I grab it and lift to be sure the base will come with it.
| CONCLUSIONS |
While not as easy a build as some of the other 1/72 military vehicles I've done, with proper preparation and a little ingenuity, it makes into a really nice model to add to the collection. It seems that most of the recent ICM releases in this area are on the same chassis so once you get one of them figured out, the rest should be easy. I also like that they are not expensive so one can build up quite a collection.
August 2006
#1421 in a series
Copyright ModelingMadness.com. All rights reserved.If you would like your product reviewed fairly and fairly quickly, please contact the editor or see other details in the Note to Contributors.
Back to the Review Index Page 2018