Tamiya 1/48 BA-64B Armored Car
| KIT #: | 32576 |
| PRICE: | @$18.00 total |
| DECALS: | One option |
| REVIEWER: | Scott Van Aken |
| NOTES: | Includes commander figure |
| HISTORY |
In 1941 the Grachev's design team at GAZ designed the
BA-64 which was based on the GAZ-64 jeep. Limited production of the initial
version was undertaken from late 1941 to early 1942. It had a coffin-style hull
(resembling that of the German SdKfz. 222) and was armed with
single 7.62mm DT machine-gun fired from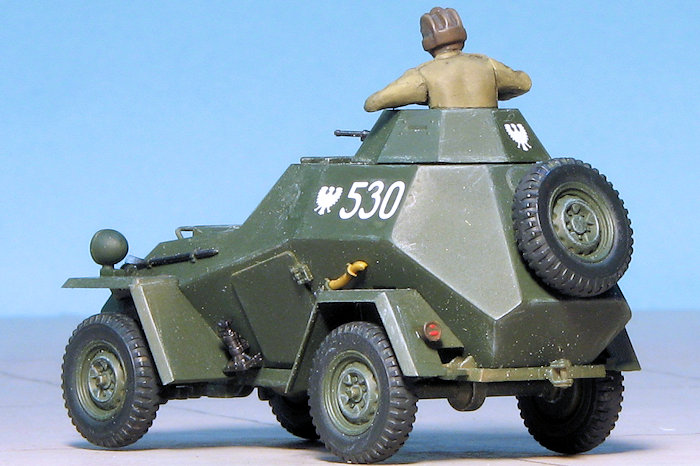 an open pulpit. A troop-carrying version
was developed, the BA-64D (desantiy:raider)
which could load 6 men, but no production was undertaken. In 1943, the improved
GAZ-67B jeep entered production. Its armored car derivative was the BA-64B which
became the standard production model. This now had a small turret where the
7.62mm DT were fitted. In 1944, small numbers of BA-64s were armed with single
12.7mm DShK and these were known as BA-64DShK. Some units
equipped with BA-64s rearmed some with 14.5mm PTRS AT-rifle or captured German
20mm cannon. The BASh-64 was a staff armored car version with several
modifications in the rear for radio storage, map reading and so on. It was not
produced in quantity.
an open pulpit. A troop-carrying version
was developed, the BA-64D (desantiy:raider)
which could load 6 men, but no production was undertaken. In 1943, the improved
GAZ-67B jeep entered production. Its armored car derivative was the BA-64B which
became the standard production model. This now had a small turret where the
7.62mm DT were fitted. In 1944, small numbers of BA-64s were armed with single
12.7mm DShK and these were known as BA-64DShK. Some units
equipped with BA-64s rearmed some with 14.5mm PTRS AT-rifle or captured German
20mm cannon. The BASh-64 was a staff armored car version with several
modifications in the rear for radio storage, map reading and so on. It was not
produced in quantity.
An experimental BA-64SKh were built with skis and a rear track assembly for traveling in deep snow. Two versions of the BA-64ZhD were also built by GAZ and the Vykunskiy factory. The BA-64 were often known as the "Bobik" by its crews, based on the diminutive form of its acronym. Total production of BA-64 (all variants) totaled almost 3.600 vehicles.
| THE KIT |
The
date on the box is 2013 so this is a fairly recent kit. There is a single sprue
of nicely molded olive drab plastic. No chassis weight with this one so that is
a bit of a break from the norm with Tamiya 1/48 kits. In t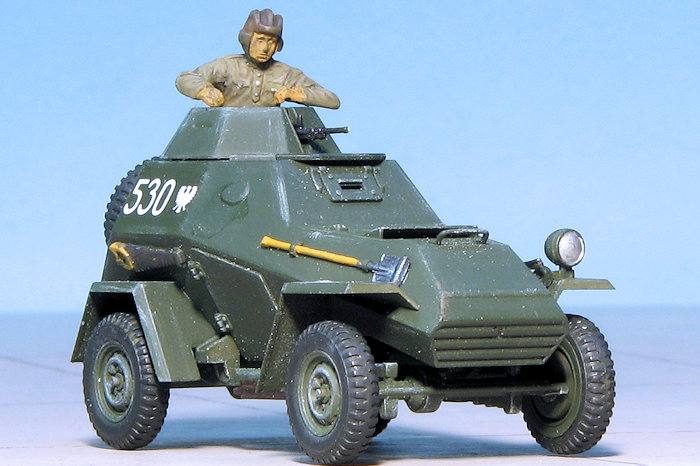 he first couple of
steps, one attaches the suspension bits, wheels and tow hooks. Then the body
gets a bit of attention. There is a separate door though nothing to see inside.
Various bits including pioneer tools and the drivers hatch are then added.
he first couple of
steps, one attaches the suspension bits, wheels and tow hooks. Then the body
gets a bit of attention. There is a separate door though nothing to see inside.
Various bits including pioneer tools and the drivers hatch are then added.
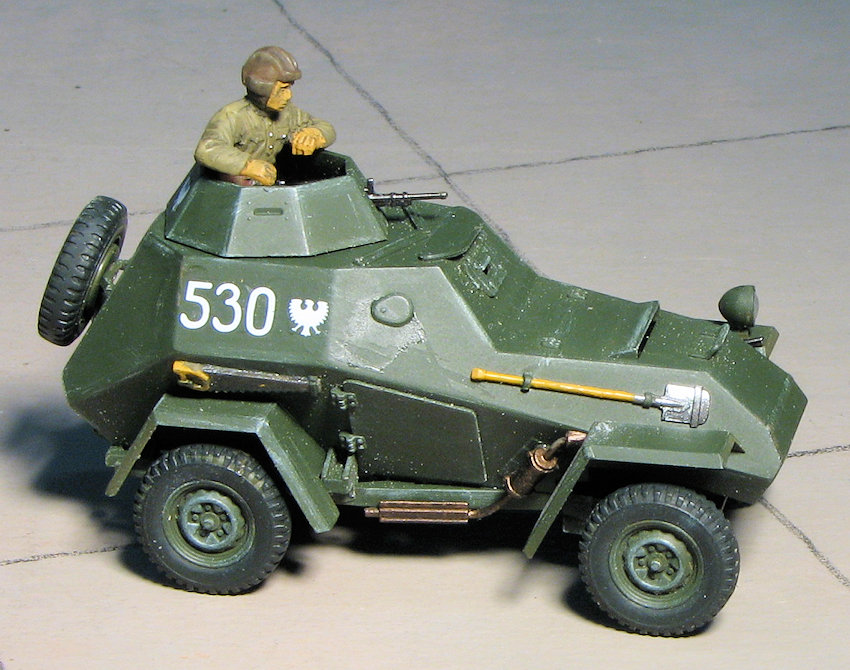
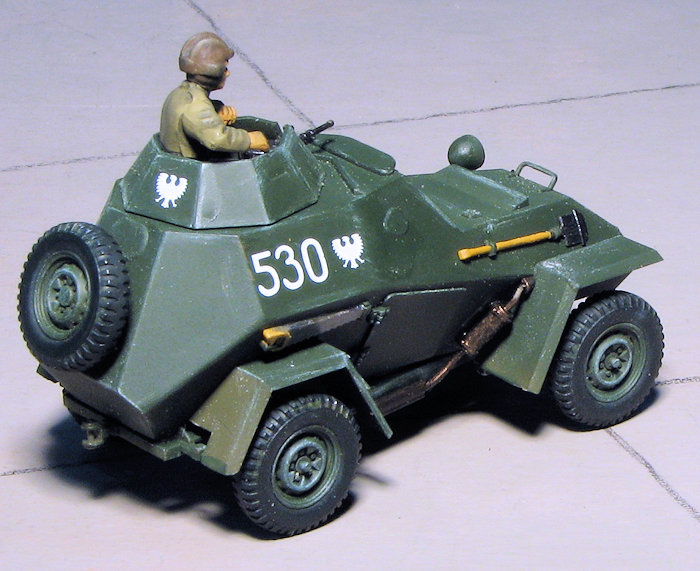
All the fenders are separate and since these are outlined in white if doing the single option, then this will help with painting. A spare tire fits onto a rcak at the rear. The small turret is open and contains the gingle machine gun. Other items are an exhaust system for the right side, head and tail lights as well as an upper torso commander's figure. This item really needs to be included to keep from looking into the turret top and seeing nothing.
Instructions are the long folded paper type with Tamiya paint references. There is a small decal sheet that includes simple vehicle numbers and that is pretty much it. The lone vehicle is shown on the box art and has white edged fenders and body. Looking at a lot of BA-64 images shows that not many had this feature so perhaps it is indicative of a unit commander's vehicle.
| CONSTRUCTION |
There are times when one simply wants a quick build that looks nice
when done. I had reached a point where everything on the bench was giving me
trouble so I turned to this kit to help. Tamiya's kits have a d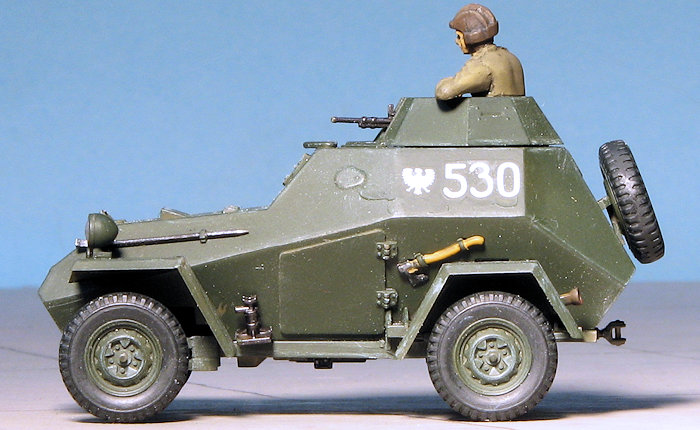 eserved
reputation for being well engineered, this resulting in relatively easy to build
kits. I figured this one could be completed during the periods of sanding,
fitting, and fussing with the other projects.
eserved
reputation for being well engineered, this resulting in relatively easy to build
kits. I figured this one could be completed during the periods of sanding,
fitting, and fussing with the other projects.
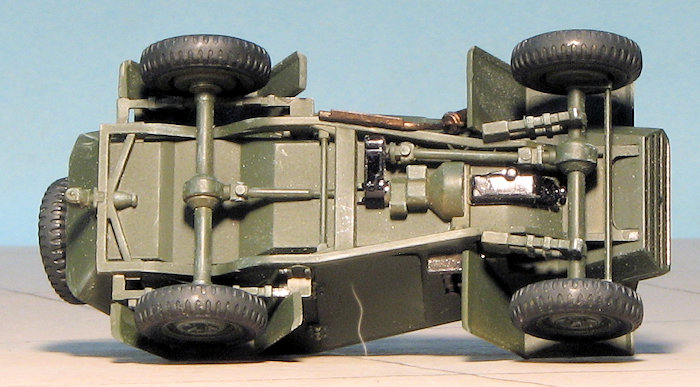
This one starts out easily enough by attaching the suspension bits to the chassis. Now it isn't all slam, bam, thank you ma'am, as you do have to clean up the molding seams, some of them rather difficult to get to. Eventually the chassis was constructed and I moved to the body.
With the lower section, I recommend installing the doors prior to attaching the upper half. It makes it easier to glue. Also attach the driver's visor before gluing halves together. This helps prevent glue smudges. The upper and lower halves fit quite well and I surprised myself by not oversanding the sprue attachment points that are on the glue surfaces. At the back of the body is the only place you'll need filler and I used some Mr. Surfacer to take care of the seam back there. The upper body splash panel, forward handle and the aft tire mount were then glued on.
| COLORS & MARKINGS |
 It was at this time that I painted the chassis, turret pieces,
fenders, and wheel pieces with the external color. This would ensure that there
would not be any areas unpainted. I then painted the tires using Tamiya's NATO
grey as my last bottle of Floquil weathered black had succumbed. I also painted
the underside of the body at this time. As I did with the recent JS-2, I used
Tamiya XF-13 JA green as it more closely matches the dark green of WWII Soviet
equipment. Many WWII Soviet armor models one sees are painted in the lighter
post-war shades.
It was at this time that I painted the chassis, turret pieces,
fenders, and wheel pieces with the external color. This would ensure that there
would not be any areas unpainted. I then painted the tires using Tamiya's NATO
grey as my last bottle of Floquil weathered black had succumbed. I also painted
the underside of the body at this time. As I did with the recent JS-2, I used
Tamiya XF-13 JA green as it more closely matches the dark green of WWII Soviet
equipment. Many WWII Soviet armor models one sees are painted in the lighter
post-war shades.
In addition to the overall vehicle, I used various Tamiya and Vallejo shades to paint the pioneer tools and the commander's figure. I used a khaki for the uniform and other shades for his face, cap and hands. I also suck at painting small figures.
| FINAL BITS |
 With all the pieces painted, it was a matter of
attaching them to the hull. I first glued on the pioneer tools and touched these
up, especially the clamps which would have been the same shade as the overall
vehicle. These really need to be attached before the fenders while there is room
to get them in place. Then the wheels were put in place aside from the spare, which I put on
last. The next items were the fenders. The horn on the left front should be
installed prior to attaching the fender.
With all the pieces painted, it was a matter of
attaching them to the hull. I first glued on the pioneer tools and touched these
up, especially the clamps which would have been the same shade as the overall
vehicle. These really need to be attached before the fenders while there is room
to get them in place. Then the wheels were put in place aside from the spare, which I put on
last. The next items were the fenders. The horn on the left front should be
installed prior to attaching the fender.
The figure was then assembled and painted using various Vallejo colors. It was given a black wash and then glued into the turret along with the machine gun. Last bits were the headlight and tail light, followed by the usual touchup painting. It was only at this juncture that I applied the decals. These are for the 27th SP Artillery Regiment, Ist Armored Corps of the Polish Army in Germany during the last months of the war. The decals are from Toro 48D05, which I used for the JS-2 built earlier this year.
| CONCLUSIONS |
I wanted a quick and satisfying build. This was it. Those who are faster builders than I could have this done in a couple of days, but I'm slow and had other projects that needed attention as well. I started it on a Friday evening and finished it on the following Monday. Cannot get much quicker than that. Add to all this that it looks very nice when done.
March 2016
Copyright ModelingMadness.com
Thanks to your editor for the review kit.
If you would like your product reviewed fairly and fairly quickly, please contact the editor or see other details in the Note to Contributors.