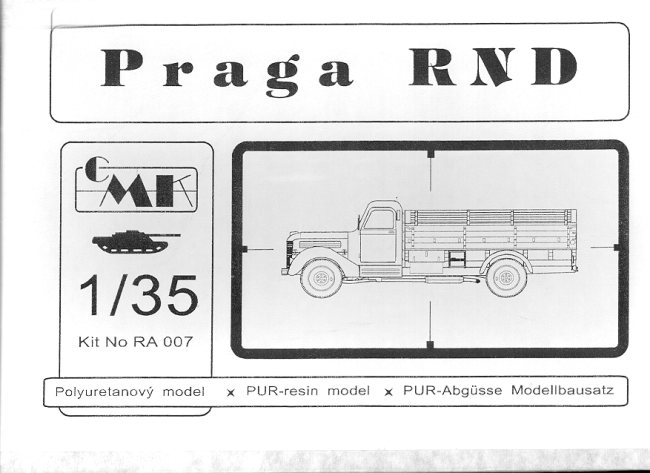
| KIT: | CMK 1/35 Praga RND |
| KIT # | RA 007 |
| PRICE: | $ |
| DECALS: | |
| REVIEW & | |
| NOTES: | Kit is resin with photo etch |

| HISTORY |
When this kit first found its way across the editorial desk, Ithough 'neat, a truck model'. I have always liked truck models like this,especially those that are unusual. Knowing absolutely nothing about this kit,I'll have to paraphrase from the kit instructions.
"In the mid-1930s, the Praga factory in Prague,Czechoslovakia was producing two three-ton lorries (trucks to us NordoAmericanos). One was a 72 HP 6-banger gasoline engine, and the other was a 60HP4-popper diesel. This kit is the diesel.
During WW2, these vehicles were supplied mostly to the SlovakianArmy. The Germans didn't like them as they were not designed to run off paved orhard surfaced roads. As a result, they weren't very successful for an army onthe move. However, they worked just fine for duties in the rear where theywouldn't be put to hard use.
After the war, there was a move afoot to replace all the prewarvehicles in the new Czechoslovakian army with new build ones. Though many typeswere replaced, the availability of new types was insufficient to replace themall so older types were modernized in an attempt to upgrade them. Despite theseattempts, the Praga RND was still basically a civil road truck and unable tomeet the needs of combat units."
Though the short history doesn't state as much, I can imaginethat the type stayed around well into the late 50s and even the early 60s.
| THE KIT |
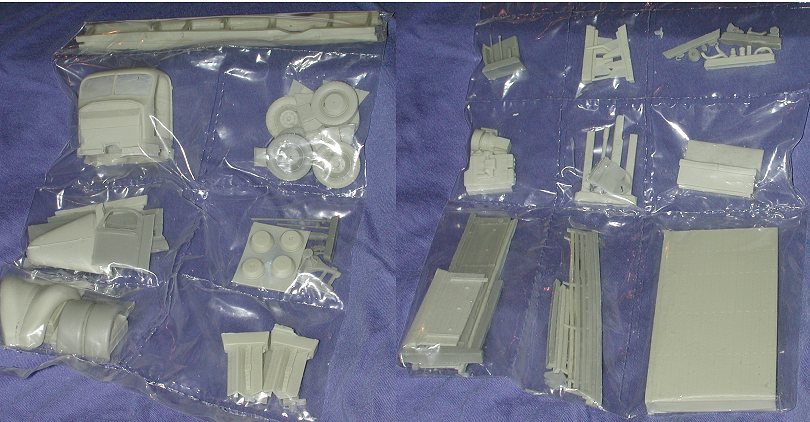
CMK has been doing quality resin parts for a number of years.This complete kit is no different. Molded in a greenish tan and tan resin, theparts are superbly detailed and totally devoid of any air bubbles. That initself is great news. It really is an incredibly well molded kit. Flash ispresent, but, like the resin blocks on which the parts are molded, it is to beexpected from any resin kit.
![]() Included is a sheetof clear acetate for the windows and a medium sized fret of etched metal. Theetched metal is for things like grille, bumper springs, grab handles, licenseplates and holders and other minor bits. This isn't a curbside but includes afull engine as well as a separate frame and chassis. The kit has decals for thelicense plates and registrations.
Included is a sheetof clear acetate for the windows and a medium sized fret of etched metal. Theetched metal is for things like grille, bumper springs, grab handles, licenseplates and holders and other minor bits. This isn't a curbside but includes afull engine as well as a separate frame and chassis. The kit has decals for thelicense plates and registrations.
Instructions are an eight step affair and are quite complete.All the parts are numbered and some are named. The builder will have to do asmall amount of extra work in the engine for wire and fan belts as well ashaving to drill an additional hole or two, but nothing that the average modelercouldn't accomplish.
The colors of the finished product are either khaki or panzergrey. There is no other coloring information given other than the final paint,but I would think that a few parts had some alternate colors tossed around inthere somewhere. I know of no reference for this truck, but the really dedicatedmilitary modeler should be able to find something about it.
| CONSTRUCTION |
This is a resin kit, so the first thing is to remove theparts from the resin blocks. Now rather than take all the bits off at once, Idecided to only remove those parts that I was actually going to use. This would,hopefully, prevent me from losing any bits.
The first parts removed were the engine and transmission. Whiletest fitting the two, I wasn't really sure how high up to put the transmissionso figured that if I had the chassis, I wouldn't put it too high or low. Thechassis is probably the most difficult resin piece I have ever had to removefrom its block. It seriously took me a good 35-45 minutes to remove the blockand sand things down. Then I figured I may as well attach the front and rearsprings since I had the chassis cleaned up. These are much easier to remove fromthe block, but need care in clean up. The rear spring has a helper spring thatneeds attached. There are also mounting indentations on the chassis for the rearsprings. Two of these indentations didn't exist so had to be made with a drillbit. The springs were then attached to the chassis.
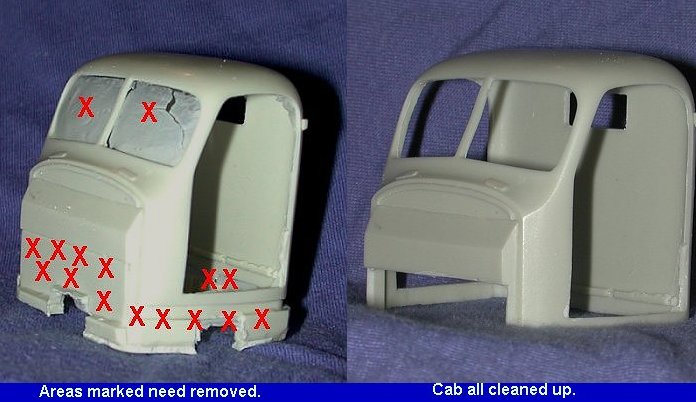 When I was done withthat little project, I just started removing parts from the bags and cleaningthem up. One of them was the cab and some other similar bits like the fendersand hood and side part. For those of you that want to know what truck cab looks like before and after it is cleaned up, I have taken somepictures for you.
As you can see, there is quite a bit of stuff that has to beremoved in order for the resin to be ready for final clean up. That final cleanup consists of sanding the edges and removing any left over bits of resin. Asyou can see on the cab at the bottom right of the door opening, there is a clumpof resin that will need to be sanded off. There are also mold seams to beremoved such as those in the right window frame. Just to give you a brief primeron removing bits from their blocks, I have done a six-step 'how-to' regardingremoving the rear fenders. I generally don't cut right against the part unless IKNOW that it is straight as it is too easy to slip and saw into something youwish you hadn't! By leaving a little bit, you can then file or sand itdown.

As you can see from the images above, you first have the part orparts attached to the resin blocks. I usually cut off the biggest one first.This part is cut at about a 45 degree angle to make sure that I don't hack intothe part itself by accident. Once it is removed, I then lightly scribe the nextpart several times. The resin here is thinner and easier to cut. Once the partis scribed, I then take the saw and cut it at a different angle and it quicklyremoves the part as you can see below. I do the same to the other part and amleft with two resin fenders and two sections of resin trash. It is then a simplematter to sand off the rough surface and smooth things down. Then go on to thenext piece.

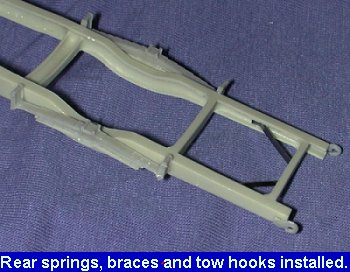 Anyway, once thesprings were attached to the chassis, the next part was to attach some small towhooks and a couple of etched metal braces in the rear. These went on with nofuss. I then removed the rear end housing from the resin block. This isbeautifully done on one side and rather poorly molded on the other. The problemis that there are resin globs that managed to find their way
 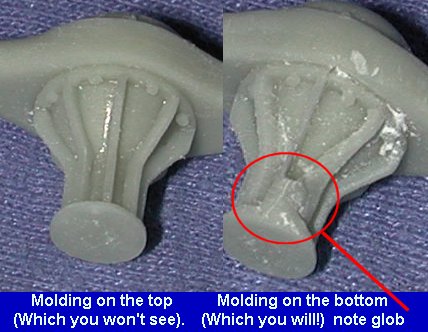 into the braces. This wouldn't be a problem if thatpart of the housing was unseen up against the bottom of the truck,unfortunately, it isn't. The only choice I had was to laboriously cut away asmuch of the glob as possible. Not a fun job. To make matters worse, when I wentto test fit the rear end with the rear springs, the mating plates didn't match.Now I had the springs glued right up against the outside of the chassis socouldn't
 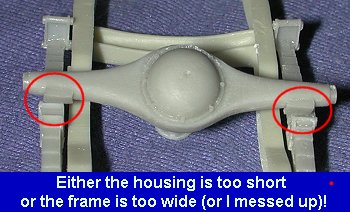 get it any closer. I canonly assume that either the chassis is too wide, the housing too short or Imissed something major when gluing on the
 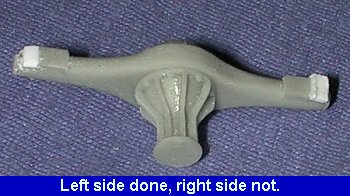 springs! The only fix I could think ofwas to glue some sheet sprue to the housing to widen the mounting blocks. Thiswas a rather painless undertaking only needing a small bit of sheet. Once theblock was attached with superglue, it was sanded down to shape and then all wasready. As you can see from the image, it isn't a difficult thing to do. Thesmall block was later cut down even further longitudinally so it wouldn't stickout. Another way to do this would be to use some Milliput or other epoxy puttyand then sand it to shape.
Then the axle was removed from the resin and attached to thehousing and chassis. This part fit well, thank goodness! The kit then spent nearly two years sitting in the box after I grew frustrated trying to figure out how the engine fit into the chassis!!
| PAINT & DECALS |
| CONSTRUCTION CONTINUES |
| CONCLUSIONS |
| REFERENCES |
If you would like yourproduct reviewed fairly and quickly by a site that has over 1,300 visits a day,please contact me or see other details inthe Note toContributors.