Cyber-Hobby 1/35 s.IG.33 Infantry Gun with simplified shield
| KIT #: | 6473 |
| PRICE: | $39.50 SRP |
| DECALS: | Yes |
| REVIEWER: | Scott Van Aken |
| NOTES: | Smart Kit |
| HISTORY |
The 15 cm
sIG 33 (schweres
Infanterie Geschütz
33) was the standard German
heavy infantry gun used in the Second World War. It was the largest weapon ever
classified as an infantry gun by any nation. Sources differ on the the
development history, but the gun itself was of conventional design. Early
 production models were horse-drawn, with wooden wheels. Later production models
had pressed steel wheels, with solid rubber tires and air brakes for motor
towing. The sIG 33 was rather heavy for its mission and it was redesigned in the
late 1930s to incorporate light alloys in an effort to save weight. This saved
about 150 kilograms (330 lb), but the outbreak of war forced the reversion back
to the original design as the Luftwaffe had a higher priority for light alloys
before more than a few hundred were made. A new carriage, made entirely of light
alloys, was tested around 1939, but was not accepted for service.
production models were horse-drawn, with wooden wheels. Later production models
had pressed steel wheels, with solid rubber tires and air brakes for motor
towing. The sIG 33 was rather heavy for its mission and it was redesigned in the
late 1930s to incorporate light alloys in an effort to save weight. This saved
about 150 kilograms (330 lb), but the outbreak of war forced the reversion back
to the original design as the Luftwaffe had a higher priority for light alloys
before more than a few hundred were made. A new carriage, made entirely of light
alloys, was tested around 1939, but was not accepted for service.
Most of the shells used by the sIG 33 were unexceptional in design, but the Stielgranate 42 was different in fundamental ways from ordinary shells. The driving rod was loaded into the muzzle so that the finned projectile remained in front of, and outside, the barrel entirely. A special charge was loaded and would propel the projectile about a 1,000 metres (1,100 yd) downrange. At about 150 metres (160 yd) distance the driving rod would separate from the projectile. Unlike other Stielgranaten, this version was not intended for anti-tank use, but rather for the demolition of strongpoints and clearing barbed-wire obstacles and minefields by blast effect.
| THE KIT |
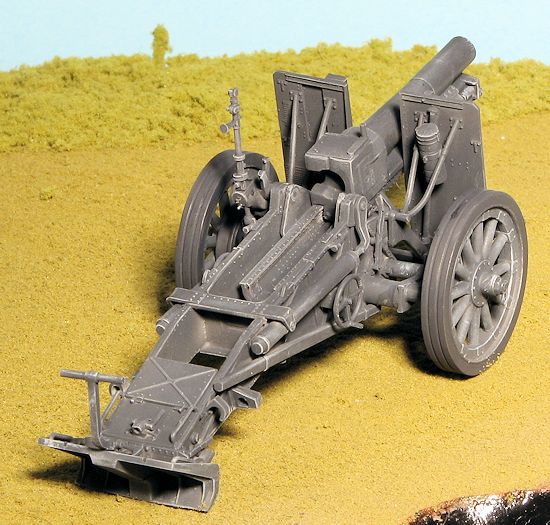
This is not the first release of this gun as a stand alone, but with Cyber-Hobby, one can count on a variant that is a bit different from the norm. In this case it is the simplified gun shield used on this venerable piece. The kit also includes some of those interesting Stielgranate 42 rounds that are mentioned in the history section. Also part of the kit is a five man crew and a bunch of extra shells. Other items of note are:
 - Gun recoils like the real one
- Two-directional slide-molded wooden road wheels
- Aluminum gun barrel designed for s.IG.33
- Rifling inside gun barrel realistically rendered
- Recoil system realistically rendered
- Newly designed gun shield made to scale thickness
- New shield with delicate detail on both sides
- Axle reproduced in great detail
- Gun carriage molded with authentic detail
- Realistic elevation mechanism allows gun to be elevated
- Spades are slide molded
- Detailed breech with two options
- Detailed hydraulic system for gun elevation
- Complex brake and axle assembly finely reproduced
- Protective wicker cases for rounds wicker ground mats included
- Periscope can be assembled in different ways
 - Periscope made from clear plastic
- Newly tooled taillights
- OVM specific to s.IG.33 included
- Bonus ammunition
Instructions are well done with nicely drawn construction illustrations. The aluminum barrel and vinyl 'wicker' bits are a nice touch as is the limited amount of photo etch included. You basically paint this either panzer grey or panzer yellow. There is a separate painting and assembly guide for the figures on the last page of the instructions. I've not a clue where the decals are to be attached as I seem to have missed that while looking over the instructions.
| CONSTRUCTION |
 slightly more complex one. However,
it takes me a while to realize that often, the initial construction of a sub-assembly seems to start in the smaller detail blocks. I found the recoil
bar section to be rather difficult to get properly aligned as it consists of
long thin pieces that are basically butt joined.
slightly more complex one. However,
it takes me a while to realize that often, the initial construction of a sub-assembly seems to start in the smaller detail blocks. I found the recoil
bar section to be rather difficult to get properly aligned as it consists of
long thin pieces that are basically butt joined. 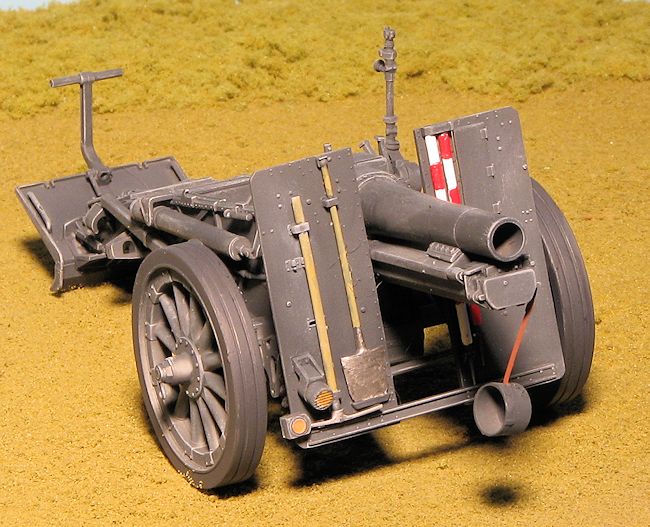 with the larger piece having a key to help align it. Part A 45
is not well shown in how it is mounted. It is half of a C clamp that will go
over the outer part of a pick that is mounted on the shield. Mount the pick
first and ten apply part A45.
with the larger piece having a key to help align it. Part A 45
is not well shown in how it is mounted. It is half of a C clamp that will go
over the outer part of a pick that is mounted on the shield. Mount the pick
first and ten apply part A45. | COLORS & MARKINGS |
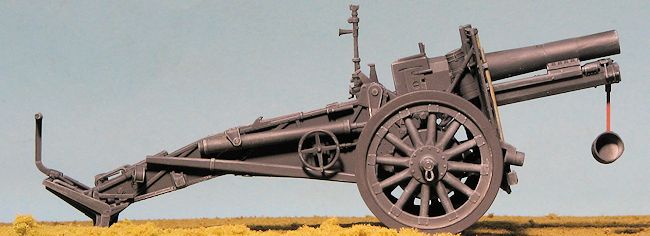
 I was initially undecided as to what color to paint this one. So what I
did was to give it an overall coat of panzer grey using Tamiya's German
grey thinned with lacquer thinner. I liked how it looked so decided to
keep it this shade. I then brush painted all the other bits such as the
tires, tools and the guide posts. The last step was to drybrush the
entire model. For this purposed, I used Vallejo sky grey. It took a
while, but was well worth the effort.
I was initially undecided as to what color to paint this one. So what I
did was to give it an overall coat of panzer grey using Tamiya's German
grey thinned with lacquer thinner. I liked how it looked so decided to
keep it this shade. I then brush painted all the other bits such as the
tires, tools and the guide posts. The last step was to drybrush the
entire model. For this purposed, I used Vallejo sky grey. It took a
while, but was well worth the effort.
| CONCLUSIONS |
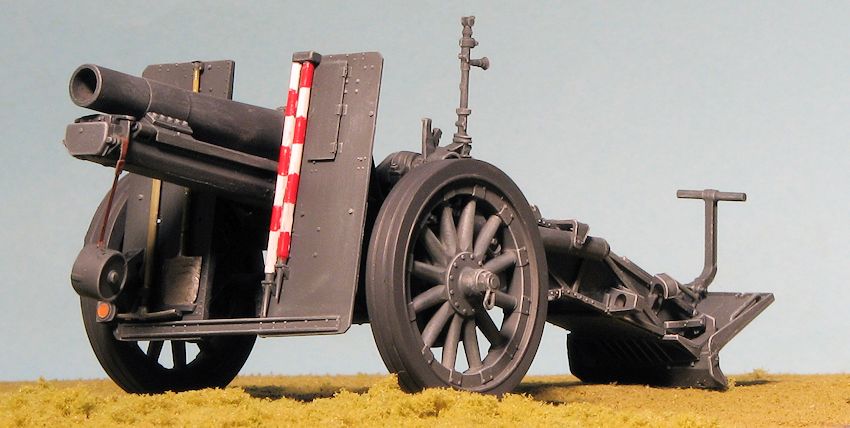
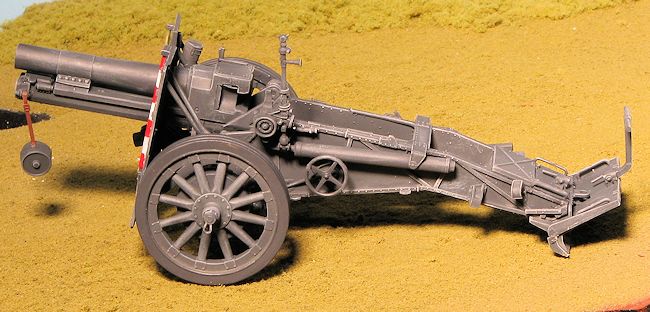
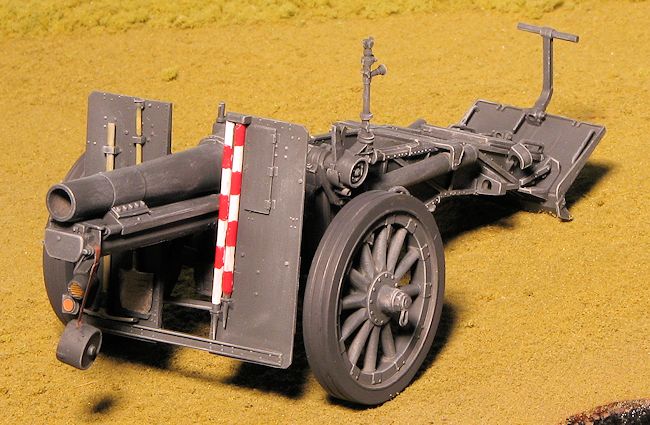
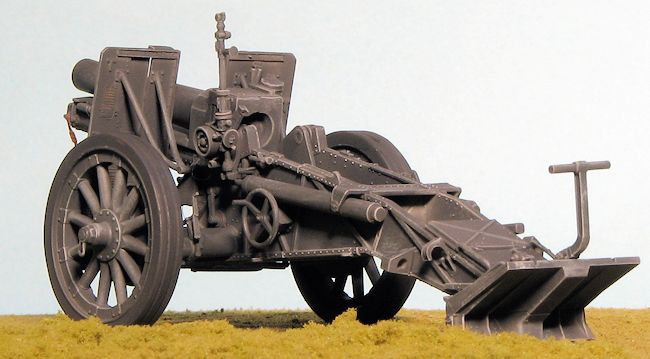
The end result is a very nice looking piece of artillery. I know that some of you will take me to task for not using any of the figures or accessories that came with the kit, but that just isn't how I like to do artillery. BTW, it isn't that the muzzle cap strap is bent, but it is windy out there on the steppes! It will look great on my very slowly growing shelf of 'queen of battle' subjects and encourages me to do another. Not only that, but it was a fairly quick build (for me), taking a bit under two weeks to finish.
| REFERENCES |
http://en.wikipedia.org/wiki/SIG_33
January 2014
Thanks to www.dragonmodelsusa.com for the preview kit. Get yours today at your local shop or on-line retailer.
If you would like your product reviewed fairly and quickly, please contact me or see other details in the Note to Contributors.