| KIT #: | 32511 |
| PRICE: | $22.50 MSRP |
| DECALS: | One option |
| REVIEWER: | Scott Van Aken |
| NOTES: | Cast metal hull |
| HISTORY |
Quoting from the instruction sheet: "German armored forces in WWII created a variety of vehicles by mounting anti-tank guns on obsolete tank chassis. These machines performed even better than expected, yet were still vulnerable due to high vehicle profiles 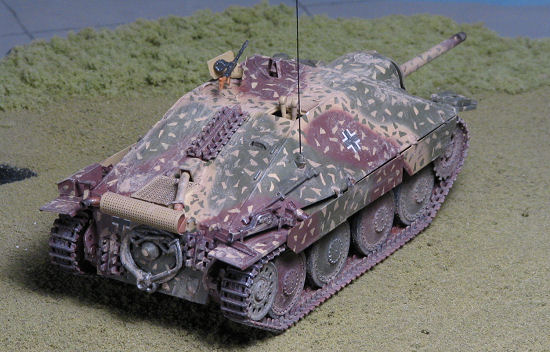 and open topped turrets. Allied bombings took a heavy toll on German production facilities, and further increased the need for an easily produced yet effective light tank destroyer to replace the StuG II and Marder. Prototypes of the Hetzer, which shared many of the components of the 38 (t) tank, were ready by 1944 and mass production began in April of that year.
The Hetzer was covered entirely with sloped armor and possessed a compact form and low silhouette, giving it much improved defensive abilities over other self-propelled guns. Armament consisted of a 75mm Pak 39 gun in a fixed mounting as well as a front mounted remote controlled MG 34. IT featured a wide body to accommodate the 4 man crew, as well as a strengthened lower hull with large wheels, guide rollers and tracks. Hetzers first entered service in July 1944 and would eventually be assigned to a number of units. BMM and Skoda continually refined the Hetzer during production and more than 2,800 vehicles were built. Owing to the ease of production and high operating rates, the Hetzer came to serve as Germany's main tank destroyer in the later years of the war."
| THE KIT |
As you have read here and in some other reviews, modern 1/48 armor kits are coming off Tamiya's molding machines like fleas off a dog's back. These cast metal hull kits are quite popular and are somewhat simplified with a lot of the usual stuff that is festooned on the sides of armor being mold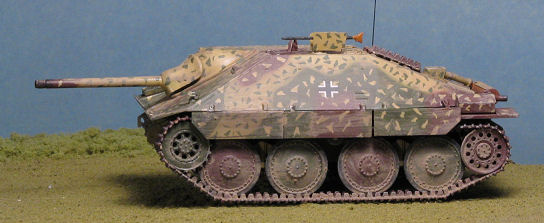 ed in place rather than being separate bits. In this regard they are more like 1/72 armor where things like this are the norm. This not only lowers the parts count, but also makes these pretty fast builds. Right from the box, an experienced modeler can have one done in a week or less. About the only really difficult part is painting the road wheels and return rollers as well as doing the tracks so they look like something real. This is an area that I have the greatest difficulty when it comes to tracked vehicles.
When I bought this kit I was coerced with much arm-twisting and veiled threats to also purchase an etched brass set for this kit by a company called Lion's Roar. It includes two etched frets and an aluminum turned barrel. This barrel has exposed threads on the end to simulate the removal of the end cap as was (apparently) done quite frequently by units operating this vehicle. It just looks incomplete to me, but I'm assured that this is prototypical.
| CONSTRUCTION |
With etched bits to be added, this changes the way the kit is built. Frankly, every tracked vehicle I've built has deviated from the 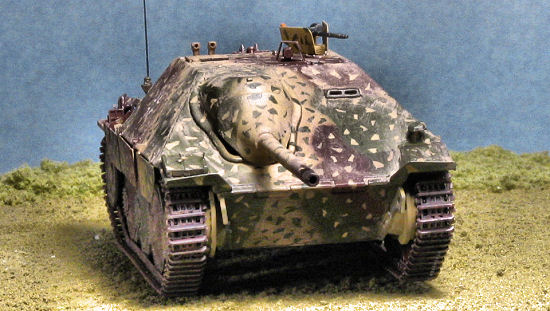 instructions. It seems that with most armor kits, you build the lower hull and suspension first. That seems OK, but then one realizes that to do this, you'd have to attach all the usual bits to the lower hull, paint it, paint the road wheels and any return rollers, paint the rubber bits on the road wheels, and then attach the tracks (which you have also pre-painted). Then you have to spend the rest of the build hoping not to get paint on these parts.
What I did with this one and all the tracked vehicles I've built (all three of them), is to first assemble the lower hull parts. On this kit, that means super glue and you'll be putting plastic bits onto a cast hull. This is not a problem for me and I've yet to have any trouble. Parts prep is mandatory to ensure a good fit and so that there are not any pesky sprue attachment points showing. Once the lower hull bits are into place, I start prepping the suspension bits. This means quite a bit of sanding and painting, but not as much as on say, a Panzer IV. I used a circle template to paint the central part of the road wheels in various colors, and this turned out well on a kit of this size. When using this template on smaller circular bits, the results were not as uniform. The idler and sprocket were also painted and these were set aside.
 I then looked over the etched brass set to see what bits were going to be replaced and what needed to be prepped (as in something removed) to accommodate the etched parts. Surprisingly, there isn't that much in this area. The worst being the one section of rear fender mount that requires some careful removal. Once the part had been cut back, the braces were added. I had to be sure that the inside portion of the aft braces touched the rear o
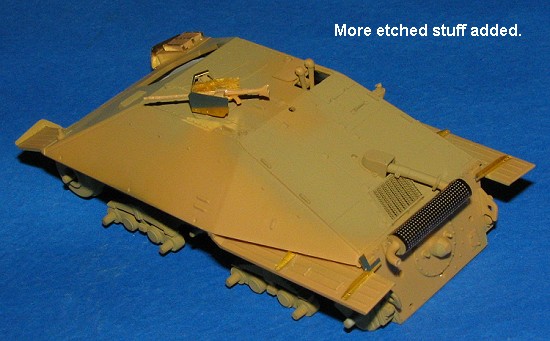 f the hull as they had to be glued there for additional support. I also attached various other small bits that were guards over vision ports and the shields to the upper machine gun. The muffler heat shield was itself heated (I guess you call that annealed) so that it would be more pliable. It was bent around a tool to provide the right curvature and then just 'snapped' in place.
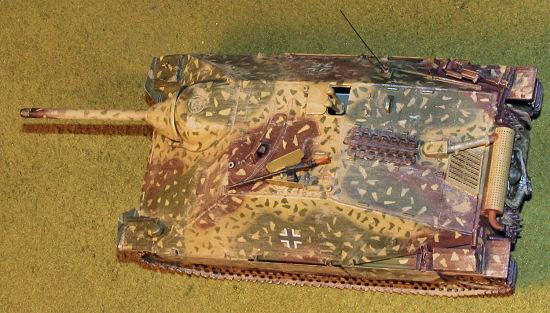
Often I ask myself "why bother with an etched set?". Well, as often as not, the answer is "because it is there". The plus of these things is that you can provide more scale size detail than what is done with injected plastic. A look at the difference in the forward fender bits in the image above will show this. Many sets now realize that replacing 3-D bits with 2-D etched metal is a waste, so they concentrate on flat stuff. The minus to these sets (aside from often costing as much as the kit they are to be used on), is that they are so easy to screw up. I am living proof of that. It is also often the case that one really cannot tell where the etched bits are used on the finished product. Once you cover it up with paint, it often just blends in with the rest of the model. Sure, the builder knows it is there, but the viewer may well not.
 I also added more etched bits to a box that fit upon a fender and attached more plastic bits until just about everything that goes on the hull was there. I was left with wheels and tracks. I was also left with the side shields. Here is where things got interesting.
Each shield has a notch in it for the separate etched attachment piece. These are positioned facing different directions, but the engraved fold lines are all the same. The instructions tell you to fold them all the same way. This is WRONG. You must fold half of them the other direction as they need to be attached with the little triangular piece on each shield section facing each other when they go on the hull. Sounds complex but it is simple when you see it.
During all this I did two major things wrong aside from bending the bits the wrong way. One is that I lost three of the ten small attachment braces. I also broke several of them at the bend join. You see, this brass is so thin that you can basically bend things once, maybe twice before they break off. This could be overcome by thicker brass sheet or at least having these pieces a bit thicker (though that won't happen). I also managed to attach several of them the wrong way. Instead of the little attachment grooves being on the inside, they are on the outside. Well, you get the idea. Assuming you use the Lion's Roar set, be very careful when getting to this part. I could have used the plastic shields, but they would have looked so out of place with the rest of the braces in the thinner brass.
| COLORS & MARKINGS |
About this time, I had most everything glued on that was going to be glued on at this juncture. Using Humbrol enamels, I painted everything but the road wheels, sprockets and idlers in a Sand color. This would be the base coat. Half of the wheels, sprockets a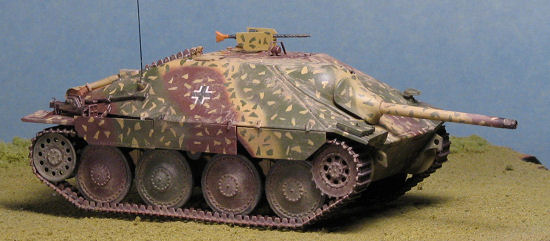 nd idlers were painted Green while the other half a darkish brown. I also painted the tow cable with Alclad II Steel.
The next job was to attach the running gear. I'd painted the tracks in a dark brown and then heavily dry brushed them with Model Master Steel. I also slathered on some Rustall and washed the whole thing with Rustall black wash. I'll tell you right now that painting tracks is probably my weakest point. Advice from those of you who are good at this would be welcome.
Then it was time to install the tracks. I vow to never ignore the 'install the tracks before putting on the body' advice provided by instruction sheets again (or until I forget). It was a royal pain in the butt to get the upper section properly done. Fortunately, Tamiya provides a guide for the upper track section and first three forward links. This is cleverly provided on the outside of the track sprue and is really quite helpful. After the usual struggle, I got all the tracks in place and despite starting to put one side's tracks on backwards from the other, I succeeded in having it all come together.
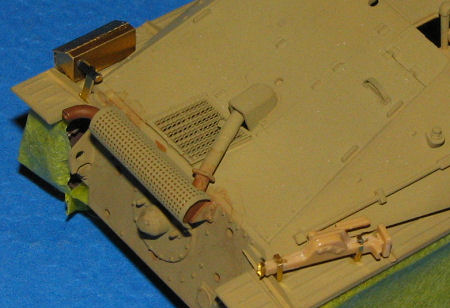 There were still some items not installed. One was a tool chest on the left rear fender. This was replaced with one from the etched set. On the right rear is a jack. The etched set has new hold-downs and foot for this. They are quite tiny, but thanks to enhanced vision (Optivisor), I was able to bend and attach these tiny parts after removing the molded on ones.
Now for some tricky masking. In order to not have paint spray all over my nice tracks, I used copious amounts of Tamiya tape to cover them up. I also remembered to do both sides so errant paint wouldn't sneak in the back way. Of course, this meant that I'd have to leave off the side skirts until the 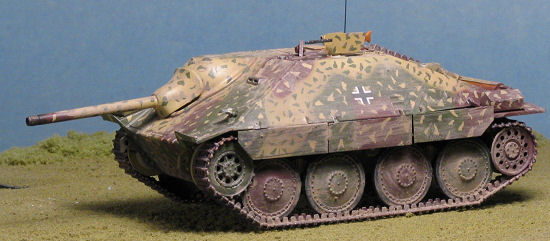 painting was done as I couldn't figure a way to easily remove the tape over the tracks with the skirts in place.
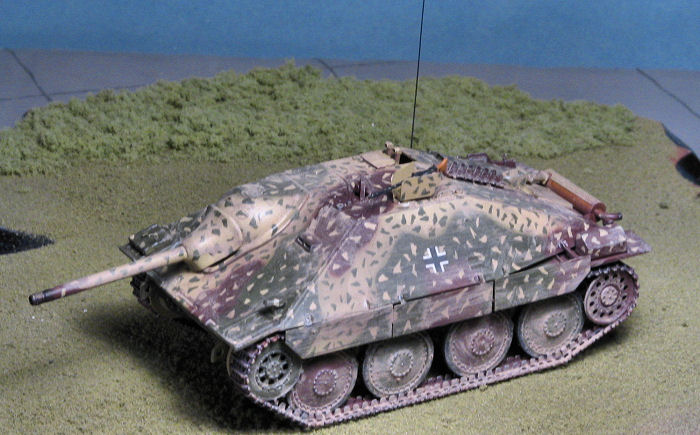
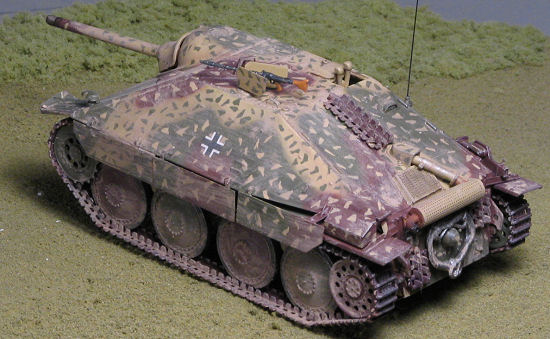
Once the basic paint job was done I installed the rest of the side skirts and then put more tape behind them and continued the base colors down. Now for the big decision. Should I continue with the ambush scheme or just leave it as it was. I decided to go ahead. Though I tried all sorts of ways to apply the little flecks, the only really useful way was to grab a fine tip brush, a tin of paint and have at it. This took quite a bit of time to do; not so much as it was difficult, but because there were so many little bits to paint on. When I found myself getting 'large', I stopped for a bit before continuing. Eventually all the brown and green areas had tan flecks and the tan areas had green flecks.
The kit was then given an overall coat of clear acrylic in preparation for decals. Markings on these vehicles is minimal at best with only one of the three options having anything more than three insignia. I brazenly used Champ setting solution on my insignia and was rewarded with no problems! I then gave it a few co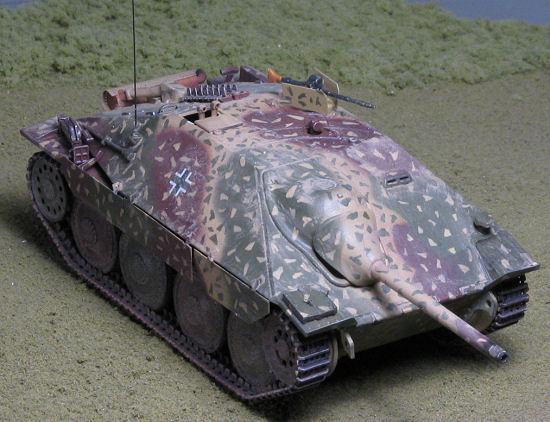 ats of black wash (during which a skirt or two came adrift). When dry, I glued back on the errant parts, drilled out the radio antenna hole, and glued on the separate track sections. The gun barrel tip and exhaust were treated to some black pastels. Then the kit was given an overall coating of matte clear to seal things in.
I still wasn't happy with the look of things. Just too darn clean.
I asked on the Forum what the Rustall 'dust' was for. I was told it was to use to build up flaked off rust when using the regular Rustall. This gave me an idea. I broke out the Rustall Flat and the Dust. Pouring some Dust onto a piece of cardboard, I dipped a wide brush into the Flat and then into the Dust. This was then wiped on the model. I kept this up until everything was coated. When it dried, it looked dusty, and while there are some streaks in it on the side (wiped up against some bushes), the effect really tones things down and looks a lot better (at least to my aging eyes). The radio mast was installed using stretched sprue and painted black. That was it.
| CONCLUSIONS |
First off, this is really a nice kit. Tamiya designed these to be built in the shortest time possible so has incorporated a lot of the parts into the molds instead of making them separate. For many kit builders, this is quite OK and is something that Tamiya did when they first started making 1/35 kits. However, this does not please a rather large number of other kit builders who want as much stand-out detail as possible. Hence you have folks like Skybow making the same subject in the same scale, except their kits have a much larger number of pieces. This is to provide a greater level of fidelity to the prototypes.
 Getting back to the kit, I found that the fit was excellent and I'm not used to not using filler on a kit, which seems to be the norm for armor kits in general. What I cannot recommend to most builders is the Lion's Roar update set. Sure, you get a nice aluminum barrel and very nicely done photo etch. However, in my experience with this set, the brass is way too thin and its inability to take any sort of additional bending or rough handling (as in the side skirt fiasco), makes it unacceptable to folks like myself who do not have a ton of experience with the stuff. Eduard makes a set, which came out after I'd bought mine, that has just as much detail, yet has the side skirts and mounts in one piece rather than separate. Makes it much more user friendly and frankly, the kit barrel is quite acceptable, though I'm sure someone will do a separate version.
The addition of the etched set turned a 10 day to two week build (like the StuG) into a 7 week project. This happens to me all the time when I use aftermarket stuff and the more stuff I use, the longer the build time. I also find that I'm getting somewhat addicted to small scale armor in general and have several kits underway along with the usual aircraft builds. Frankly, kits of all sorts are taking over the work bench like the chicken heart that ate Philadelpia!
I can't believe I paid retail for all of this!
February 2006
#1398 in a series
Copyright ModelingMadness.com. All rights reserved.
If you would like your product reviewed fairly and fairly quickly , please contact the editor or see other details in the
Back to the Review Index Page 2018