| KIT #: | 32583 |
| PRICE: | $29.00 SRP |
| DECALS: | Two options |
| REVIEWER: | Scott Van Aken |
| NOTES: | Includes metal weights |
| HISTORY |
 The Panzerkampfwagen 38(t) was originally a Czech tank of pre-World War II design. After Czechoslovakia was taken over by Germany, it was adopted by the German Army, seeing service in the invasions of Poland, France and Russia. Production ended in 1942, when its armament was deemed inadequate. In all, over 1400 were manufactured. The chassis continued to be produced for the Marder III (1942-1944) with some of its components used in the later Jagdpanzer 38 (1944-1945) tank destroyers, turretless assault guns, anti-tank guns and anti-aircraft guns.
The (t) stands for tschechisch, the German word for Czech; the Czechoslovak military designation was LT vz. 38 (Lehký tank vzor 38, Light Tank mark 38). Manufacturer's designations included TNH series,TNHPS,LTP and LTH. The special vehicle designation for the tank in Germany was Sd. Kfz. 140.
The PzKpfw 38(t) Ausf. E-F was a Pz 38(t) with frontal armour increased to 50 mm by bolting on an additional 25 mm armour
| THE KIT |
The kit is molded on four sprues. Two of them, which contain suspension bits, road wheels and the track links are identical. There are also two large oval weights and a bag with polycaps. The weights fit on special mounting posts that are installed on the flat hull bottom. To this are added the four sides, the right and left side pieces have the main suspension molded in place.
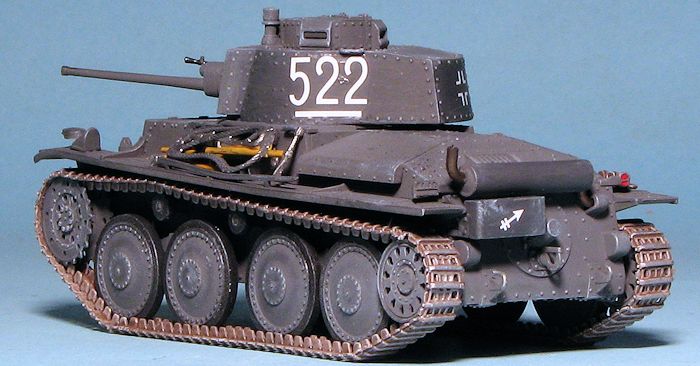 The tracks are link and length with the single pieces molded as to fit around the idler, sprocket and forward/aft road wheel. The road wheels all have rubber rims so the builder will probably need to alter the construction sequence or paint as the kit is built. The upper hull section has separate front and side pieces with a machine gun fitting into the front. Engine covers are separate but there is nothing to see inside the hull. A nice selection of pioneer tools is included along with various tool boxes. Spare track sections and a muffler is provided to add to the busyness of the hull.
The turret is comprised of five pieces with a six piece cupola. There is a separate hatch, but again, nothing to see on the inside. The poly cap is used to allow the main gun to elevate. There is no breech and a single piece barrel. For those who want something inside that open hatch, a tank commander figure is provided.
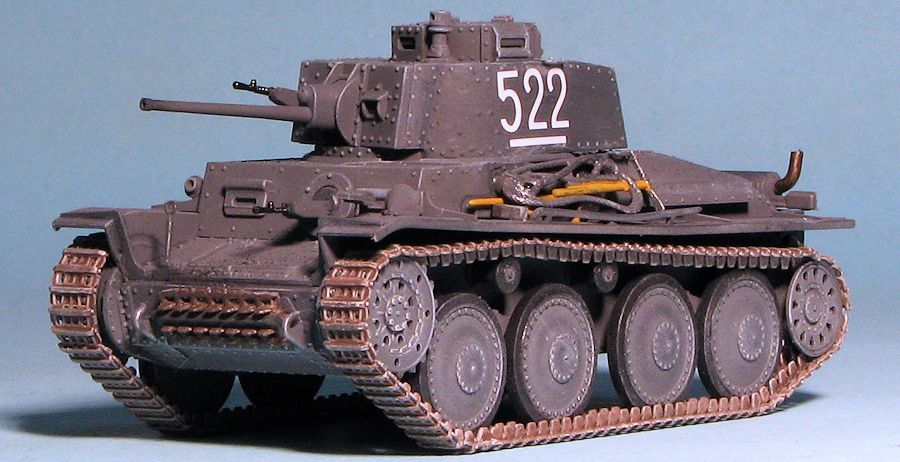
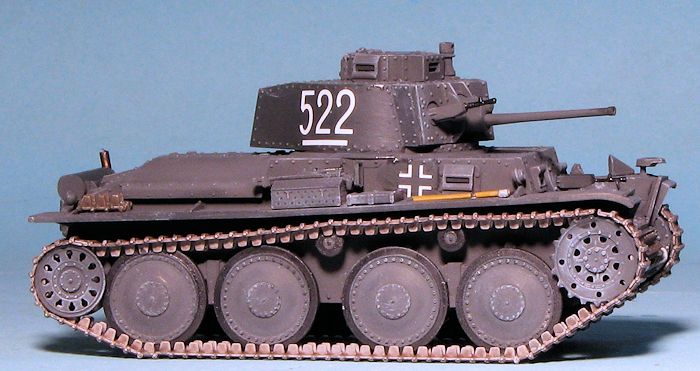
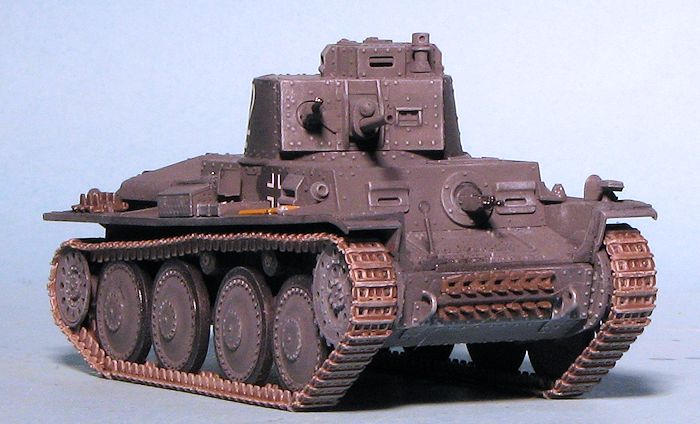
Instructions are well done with detail drawings as needed. There are only Tamiya paints provided as color references. Two markings options are given, both in overall panzer grey. One is the box art vehicle from the 22nd Panzer Division on the Eastern Front in 1942. The other is an unmarked vehicle from the same place and time period. The small decal sheet is nicely printed.
| CONSTRUCTION |
 Like their other 1/48 armor kits, this one went together with minimal fuss. I first assembled the lower hull section and removed the upper hull piece from its sprue. Once these were cleaned up, these areas were painted Tamiya panzer grey as were the road wheels, return rollers sprocket and idler pieces. I did this as the road wheels and return rollers were to be painted weathered black and I'd not have the chance to paint these hidden areas once the wheels were installed.
I then attached some of the external tow hooks and the pintle to the lower hull and repainted those areas. Next, after painting the rubber areas on the return rollers and road wheels, I assembled these pieces along with the sprocket and idler. As a note, you have assemble the two idler halves on the lower hull as you will find it difficult to install the aft road wheel if you do not add the outer bit after gluing on the road wheel. I then primered the track bits. The sprues with the road wheels and track pieces are the same as Tamiya provided on its Hetzer kit.
Meanwhile, I started assembling the turret and adding pieces to the upper hull. One has to be somewhat careful installing the hold-down that keeps the main gun in place to prevent glue from getting on the stub that holds the gun barrel or it will not elevate. The hull machine gun is held in place by a circular piece and one needs to take care with this as well or it will not move. Apparently the coaxial gun on the turret is not designed to move. The barrels on these two machine guns are quite fragile so care is needed during assembly.
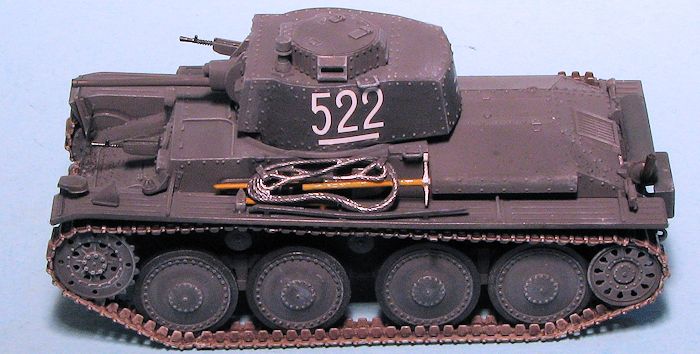 All of the sections of the turret and the cupola are so engineered that any seams are either covered or are at a natural edge, something that really helps. Those entering their models in contests will want to fill the seams on the underside of the aft turret as well as the myriad holes on the underside of the fenders once all the pioneer tools are glued in place. The turret has a flat section just under the cupola specifically designed to hold the figure supplied. However, this means having the cupola hatch open and this will reveal a number of ejector pin marks, some of which will be difficult to deal with. I closed the hatch, eliminating this issue.
If you have not guessed already, painting was an on-going process with most bits requiring panzer grey. I prepainted as many of the pioneer tools as I could before I attached them to the upper hull. Back at the lower hull, I primed the tracks and then painted them with an acrylic 'track color' I had received several years ago. This stuff had turned quite thick so I thinned it a bit. Apparently a bit was too much as it was quite thin and I ended up applying three coats. Then began a somewhat slow application of the track links and lengths. The Tamiya instructions show a sequence and I followed it; applying one piece at a time, then letting it dry before applying the next one.
| COLORS & MARKINGS |
 Painting this one is actually quite easy. It is overall panzer grey. For this I used Tamiya XF-63. As mentioned in the write-up, much of the overall painting was done prior to attaching the tracks. Of course, this did not include everything as I still had to paint the various pioneer tools for which I used Vallejo wood and steel. These colors were easy to apply as all the bits had been primered with panzer grey. Vallejo paints do not stick well to unprepared surfaces. For the areas to get decals, I first brushed on some Vallejo gloss clear and when dry applied the decals with a bit of Mr. Mark Softer, which seems to work very well with Tamiya decals. I naturally chose the box art tank over the very generic second option. When the decals had dried, I used Vallejo's clear matte, also brushed on to return the area to the same matteness as the rest of the tank. I drybrushed every square millimeter of the tanks with white so it wouldn't look quite so dark and to add some definition.
There was not all that much left after this. I attached the pioneer tools, painted the machine gun barrels with gunmetal and the tail light with a vermillion paint I had. A bit of pastel was added over the end of the gun barrel and the engine exhaust pipe. I should mention that the machine gun barrels are very weak and I had to reglue both of them at least twice after breaking them off during handling.
| CONCLUSIONS |
Overall it is a very nice model and typical of Tamiya, well engineered. I'm sure there are those of you would could build this kit in a couple of days, but it took be longer than that. While it is pricey, it is very well done and makes a nice addition to my small, but growing 1/48 military collection.
| REFERENCES |
http://en.wikipedia.org/wiki/Panzer_38%28t%29
June 2015 Thanks to me for the review kit. If you would like your product reviewed fairly and fairly quickly, please contactthe editor or see other details in the