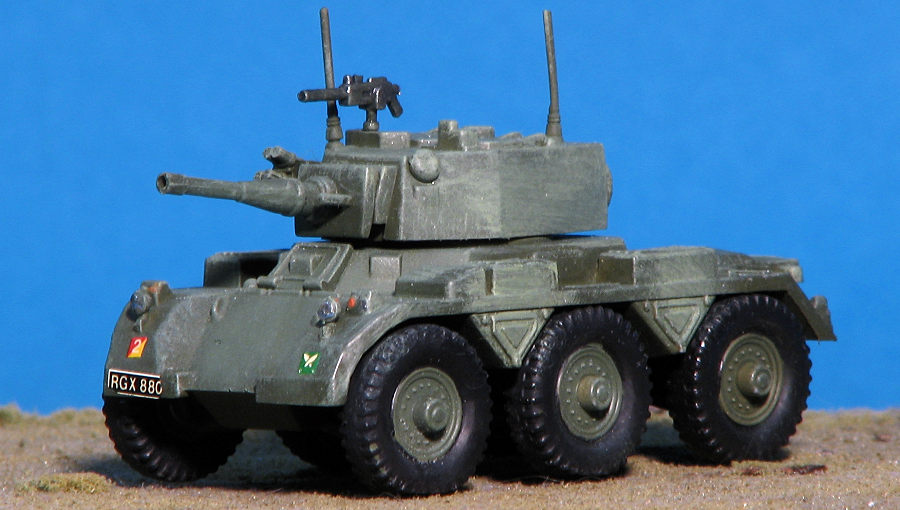
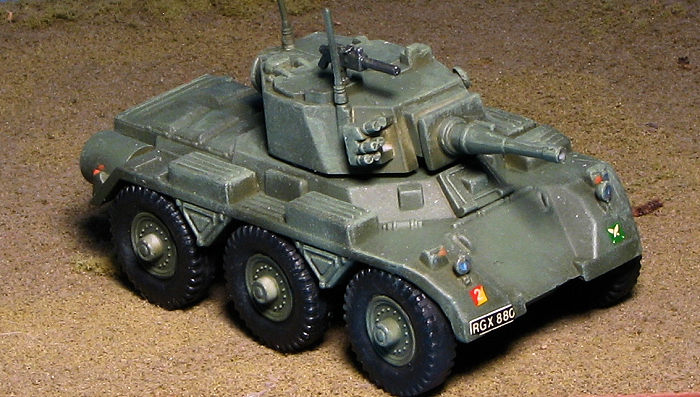
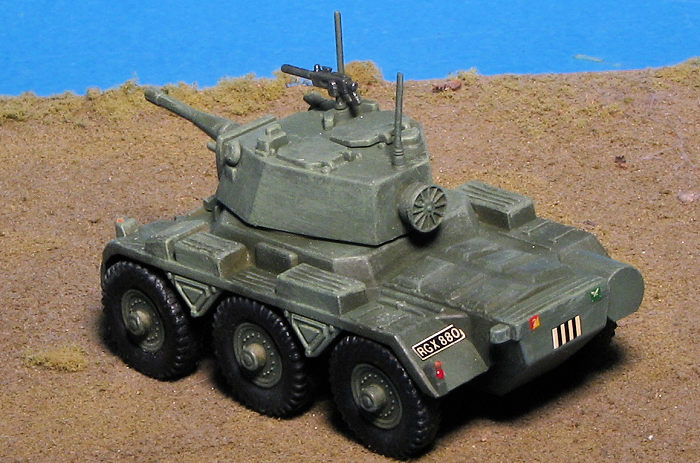
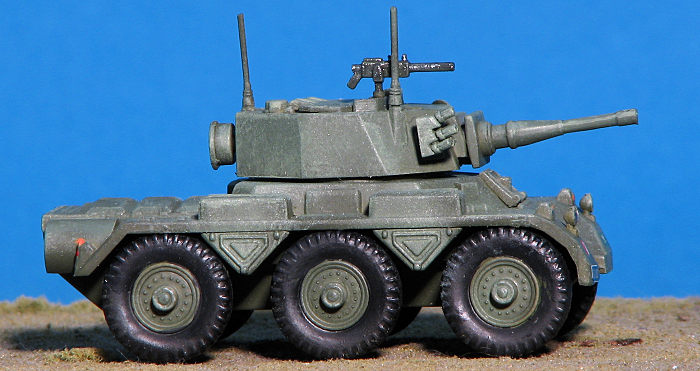
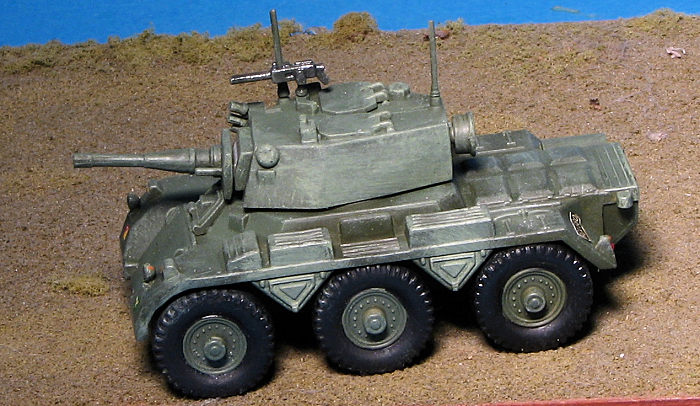
JB Models 1/76 Saladin Mk 2 armored car
| KIT #: | JB 1004 |
| PRICE: | $7.98 |
| DECALS: | Four options |
| REVIEWER: | Scott Van Aken |
| NOTES: | 1994 boxing |
| HISTORY |
 Development of the Saladin armored car began in 1947, but due to
specification changes, including the main armament, the first two prototypes
were not delivered until 1953. Further delays occurred with priority was given
to the production of the F.V. 603 Saracen APC, required for use in the Malayan
Emergency.
Development of the Saladin armored car began in 1947, but due to
specification changes, including the main armament, the first two prototypes
were not delivered until 1953. Further delays occurred with priority was given
to the production of the F.V. 603 Saracen APC, required for use in the Malayan
Emergency.
Production finally began at the Alvis Company in Coventry in 1958 and a total of 1,177 had been built by 1972 when production ceased. The Saladin was sold to some 20 countries and some are still in service today.
The Saladin had a crew of three; driver, gunner, and commander, who also doubles as the loader. The 76mm gun fires HESH, HE, smoke, and canister rounds with a normal complement of 42 rounds.
| THE KIT |
 I have been told that the same people who designed many Matchbox kits
also designed this one. As such, there is good detail, but not a lot of parts.
This makes for a relatively speedy build for most modelers. The parts themselves
are a bit on the thick side when compared to more modern military vehicle kits,
and there is, of course, no interior. All of the suspension bits are separate
and fit into slots on the main hull. The most fiddly construct are the smoke
grenade launchers which have the twin barrels attacked separately to the backing
block. The main gun looks to be fairly well done and along with the mantlet is a
single piece. A somewhat clunky looking machine gun and rather thick screening
is also part of the kit. General molding, while a bit soft, is well done with
few molding glitches.
I have been told that the same people who designed many Matchbox kits
also designed this one. As such, there is good detail, but not a lot of parts.
This makes for a relatively speedy build for most modelers. The parts themselves
are a bit on the thick side when compared to more modern military vehicle kits,
and there is, of course, no interior. All of the suspension bits are separate
and fit into slots on the main hull. The most fiddly construct are the smoke
grenade launchers which have the twin barrels attacked separately to the backing
block. The main gun looks to be fairly well done and along with the mantlet is a
single piece. A somewhat clunky looking machine gun and rather thick screening
is also part of the kit. General molding, while a bit soft, is well done with
few molding glitches.
Instructions are a folded sheet with five well illustrated construction steps. Humbrol paint references are provided as well as a standard painting guide. There are markings for four vehicles shown with most an overall Desert Yellow and one in Bronze Green. The small decal sheet is fairly well printed, but it is difficult to tell if there are registration problems due to its small size.
| CONSTRUCTION |
 I pretty well went with the flow of what was provided in the instructions. I
built up the turret and the smoke discharger assemblies. These latter have some
really small pieces. Then I built the lower hull sections. I installed the
suspension bits without the wheels and in hindsight, I should have left them on
as I ended up having to sand down a few to get the vehicle to sit flat.
I pretty well went with the flow of what was provided in the instructions. I
built up the turret and the smoke discharger assemblies. These latter have some
really small pieces. Then I built the lower hull sections. I installed the
suspension bits without the wheels and in hindsight, I should have left them on
as I ended up having to sand down a few to get the vehicle to sit flat.
The gun barrel was drilled out and I went to attach the discharger assemblies. Unfortunately, one of them went flying out of my tweezers and I've not been able to find it. The headlights and muffler were then attached. On the turret, the hatches were glued in place along with the radio masts.
| COLORS & MARKINGS |
 Then it was time for some paint. Fortunately, I have
several Vallejo colors that are for British armor. These are in several shades
so I first sprayed everything in the darker green. Then I went with a mid-green
in spots. With that done, the lighter green was used to drybrush the overall
vehicle. This also was true for the wheels. These items had the tires painted in
Tamiya XF-85 rubber black.
Then it was time for some paint. Fortunately, I have
several Vallejo colors that are for British armor. These are in several shades
so I first sprayed everything in the darker green. Then I went with a mid-green
in spots. With that done, the lighter green was used to drybrush the overall
vehicle. This also was true for the wheels. These items had the tires painted in
Tamiya XF-85 rubber black.
They were then attached to the axle stubs and the wobble was taken out by sanding on the bottom of some of the tires. This took a bit and the sanded areas were repainted. Then the machine gun was painted and attached. This was followed by painting the headlights and tail lights. Decals for several vehicles were supplied, but these proved to be fairly brittle. This is undoubtedly due to the age of the kit, but I got enough on to be believable.
| CONCLUSIONS |
For those who like to build military vehicles and don't want to spend weeks doing it, these kits are the perfect thing. JB models is no more, but I understand the company has been purchased so they should be reappearing once again. If you like inexpensive and don't want to spend a lot of money, these are just the ticket.
| REFERENCES |
Kit Instructions
11
February 2022 Copyright ModelingMadness.com. All rights reserved. No
reproduction in part or in whole without express permission of the editor.
Another in a series of cheep kits brought to you by your
equally cheep editor. (Yes, I do know how to spell cheap. Humor me.) If you would like your product reviewed fairly and
fairly quickly, please
contact
the editor
or see other details in the
Note to
Contributors.